Exago
Manual
Exago
Manual
5
www.imv-imaging.com
|
2.1 Connection and disconnection of
probes
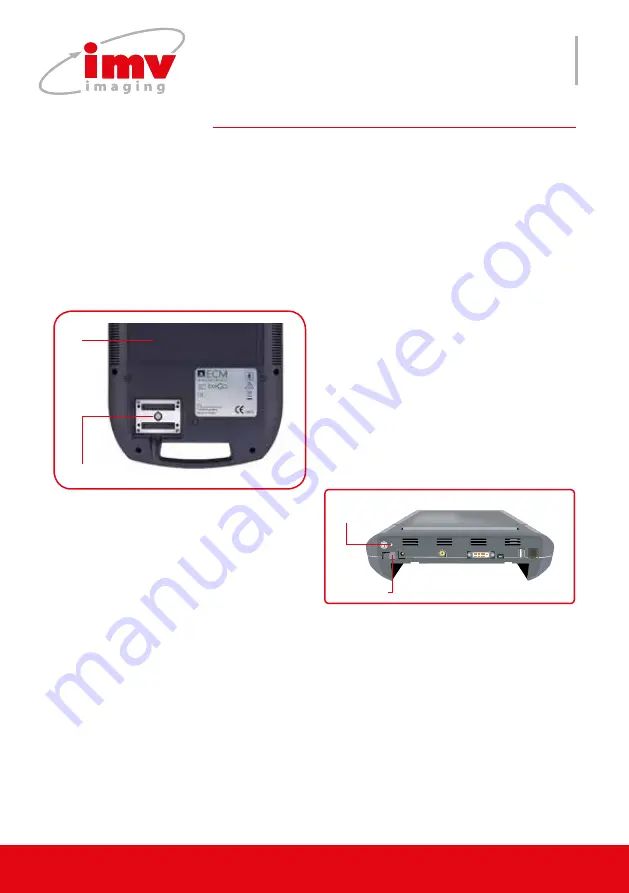
To connect a probe, put the probe con
-
nector in the opening provided for this
purpose (Pic. 1). Turn the locker situated in
the middle of the connector with a slight
pressure in order to engage the locking
mechanism. When the locking mechanism
is engaged, make quarter turn so that the
probe is connected.
After connecting a probe, always place
the probe in a safe place (in one of the
probe holders if the system is used with its
trolley) in order to avoid any damage of
the probe due to a shock or falling down.
Before disconnecting the active probe,
make sure to freeze the image.
To disconnect a probe, make a quarter
turn in order to unlock the connector. Take
the connector out of the device and store
the probe in an appropriate place protec
-
ted from shocks.
When starting the device, always make
sure to have a probe connected on the
connector.
2.2 Use of Exago trolley
If the equipment is used with the Exago
trolley, check that a probe is connected to
the right hand side connector.
2.3 Starting of the device
To start/stop the equipment, turn on the
power switch situated on back panel of
the device (Pic. 2)
Then wait until the system starts and dis
-
plays the user interface on the screen.
The Exago equipment starts in B mode
with the probe connected. If no probe is
connected, the system will display a label
“No probe”. In this case, connect a probe
to the connector and press “Freeze”, or
restart the equipment.
2.4 Battery operation
The Exago battery can be removed from
the equipment by pressing the two clips
located on the rear of the product. When
inserting the battery back in the device,
check that it is securely fastened. (Pic.1)
When the device is powered by the mains,
the battery is charging whether the device
is on or not. While the battery is charging,
a charging indicator is visible on the back
panel of the device.
2.Getting started
Probe connector
Charging
indicator
Power on/off
Pic.1
Pic.2
Battery
slot


