background image

21

ENGLIS

H

4. JOB PROGRAMMING

4.1

Job Menu

The job menu is protected with a PIN code, to prevent unauthorized editing or deleting 
jobs.
To enter the job menu:

1. From the Main Menu 1/2 press 

 and 

.

2. Enter PIN-code 

2546

 to enter the job menu.

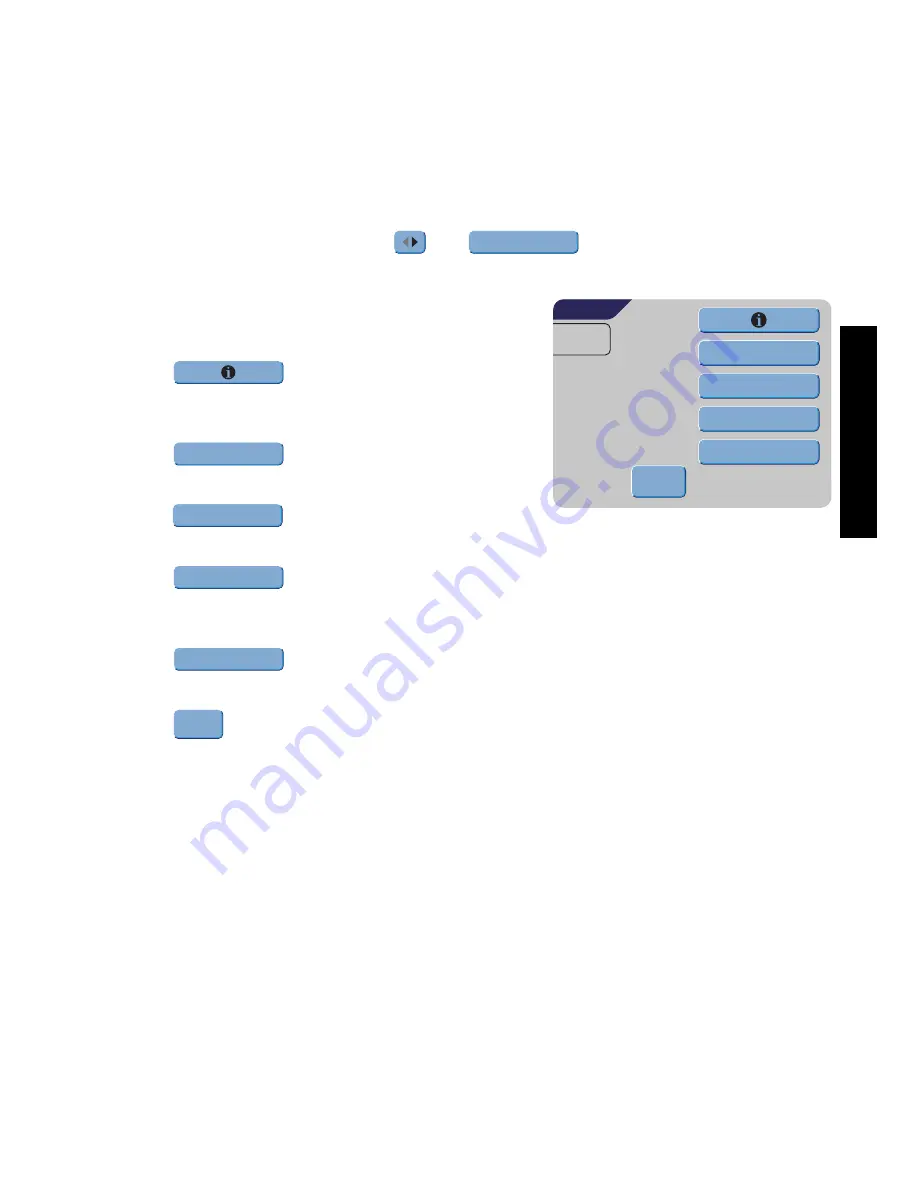
The job menu contains 5 buttons, which enable 
different functions. These functions are described in 
the following subchapters.

• Press 

 to see the details of a certain 

job.
Refer to “Job Information” on page 22.

• Press 

 to create a job from scratch.

Refer to “Create Job” on page 23.

• Press 

 to change a job. Refer to “Edit 

Job” on page 30.

• Press 

 to copy a job. This copied job can be edited. In this way it is 

possible to create a new job, which resembles a certain job.
Refer to “Copy Job” on page 30.

• Press 

 to delete a certain job, which is not longer necessary.

refer to “Delete Job” on page 31.

• Press 

 to return to the Main Menu.

Job menu

Edit job

Create job

JOB 1

Copy job

Delete job

ESCAPE

JOB MENU

Create job

Edit job

Copy job

Delete job

ESCAPE

Summary of Contents for FPi4000

Page 1: ...mation 22 4 3 Create Job 23 4 4 Edit Job 30 4 5 Copy Job 30 4 6 Delete Job 31 5 Supervisor Menu 32 5 1 System Info 32 5 2 Options 33 5 3 Online Services Option 33 6 Optical Mark Recognition OMR option 34 6 1 General 34 6 2 Adjustments 34 6 3 Document Orientation 35 6 4 OMR Codes 35 7 Options 39 7 1 MaxiFeederTM 39 7 2 Intermediate Transport 40 8 Maintenance 41 8 1 Operator Maintenance 41 9 Fault f...

Page 2: ...2 ...

Page 3: ... For safety reasons the machine will not function when the covers are open Keep long hair fingers jewelry etc away from rotating and moving parts The power connection must be easily accessible preferably close to the machine For safety reasons it is essential that the machine is connected to a socket outlet that has a protective earth connection The machine has an over current protection of 20 Amp...

Page 4: ...outlet Make sure the machine has a good functioning connection that has protective earthing the Plug and socket outlet must match Japan Establish an earth connection before connecting the mains plug to the power supply First disconnect the power supply before removing the earth connection Languages This manual is also available in other languages For more information please contact your local supp...

Page 5: ...ain materials and components of waste electrical and electronical equipment needs selective treatment as their injudicious handling or disposing of on or into land water or air would represent a major threat to the environment and human health In order to facilitate collection and treatment separated from normal domestic waste electrical and electronical equipment is marked with the following logo...

Page 6: ... unit N Water reservoir E Locking hand grip upper unit O Side cover opened F Document feeders P Ruler G Collator arm Q Thumb wheel for side guide adjustment H Collator area R Side guides envelope hopper I Power inlet power switch S Knob for separation adjustment J Knobs for clearing stoppages T Envelope support bracket Q O P R S T J K L N J M A B C F G H I D E ...

Page 7: ... area In the folding area the document s are folded according to the job specifications 4 Envelope feeder The envelopes are picked up and transported to the insert position inside the machine 5 Inserter After the folded package of documents is inserted into the envelope the glue of the envelope is moistened and the envelope is closed 6 Operating panel The machine is programmed and operated from th...

Page 8: ...erated by pressing a finger directly on the touch screen on the relevant function or button The interface recognizes the location of the pressure point and when this is located within the defined area of a button the user interface reacts with pressing this button In this way the user can simply operate the machine by pressing on the displayed buttons and or functions Caution The display is covere...

Page 9: ...r Trays Note The machine can be delivered with a tray to manually adjust the separation However this tray fits in all positions this adjustment is only possible when fitted on the lowest position position one Place the document feeder trays in position 1 Hold the document feeder slightly inclined as shown in the figure 2 Place the front end of the document feeder tray underneath the two black roll...

Page 10: ...onnect the machine to the mains power supply 2 Use the power switch to switch the machine ON The software will ask you to select the required language 3 Select the required language for the display 4 The software will ask you if you want the select language option to be displayed every time the machine is switched on Select either Yes or No 5 Press The Main Menu screen 1 2 will be displayed A Test...

Page 11: ...The document separation for the automatic feeders is set automatically The special feeder fitted in the lowest first position can be manually adjusted Adjust the manual document separation as follows feeder swap two documents document enclosure one document no fold single fold letter fold zig zag fold Address carrier in upper feeder Face up and leading Address carrier in upper linked pair feeders ...

Page 12: ...il it clicks into place The feed rollers will move down 7 Slide the document further into the machine until it stops 8 Turn knob B clockwise until a slight resistance is felt when moving the document in and out the machine If you feel too much resistance turn knob B counterclockwise 9 Remove the document 10 Pull back knob B 11 Place a stack of documents in the document feeding tray 12 Fit the remo...

Page 13: ...hine and turn knob A clockwise until a slight resistance is felt when moving the envelope in and out of the machine When the resistance is too high turn knob A counterclockwise until only a slight resistance is felt Feeding Envelopes 1 Place the bottom envelope between the rollers flap down and trailing bottom side of envelope pointing to machine 2 Loosen the stack of envelopes and place the stack...

Page 14: ...mately 5 minutes for the brushes to moisten 3 7 Fill Start The Fill Start feature automatically adjusts all machine settings When Fill Start is started the machine will pick one sheet from each filled feeder The picked documents will be folded if necessary and inserted into an envelope Using Fill Start 1 Load envelopes 2 Make sure there is sufficient sealing liquid in the sealing liquid reservoir ...

Page 15: ...adjust the Insert position as follows 1 Press on the left or right side of to adjust the insert position to the left or the right 2 Press to load a new envelope into the insert position 3 Recheck the insert position and adjust as required 4 If necessary adjust the envelope insert fingers Open the top cover Adjust the outer fingers D approximately 5 10 mm 0 2 till 0 4 from the edges of the envelope...

Page 16: ...the button to start the job Press the button to stop the job The machine will stop immediately Press the button to clear the document path to prepare the machine for a new job 3 8 Daily Mail To process documents or sets of documents which can not be processed automatically the top feeder is equipped with a daily mail switch Switch to Daily Mail function 1 Select or change to a job where the Daily ...

Page 17: ...Other Menu Options After starting up the Main Menu 1 2 screen will appear The screen shows the selected job number and the total number of envelopes that have been processed using this job Press the button to start the job Press the button to stop the job The machine will stop immediately Press the button to clear the document path to prepare the machine for a new job The Main menu 1 2 will be dis...

Page 18: ... Press to load a new envelope into the insert position and check the condition again 3 Press to confirm the insert position 4 When the envelope position and the position of the fingers is correct press to load a folded sheet in the envelope The envelope will be sealed when enabled refer to Sealing Envelopes on page 14 and ejected to the envelope tray 5 Press to leave this screen without changing s...

Page 19: ...of envelopes that must be processed with the numeric keys 6 Press to confirm possible changed settings and to return to the previous screen 7 Press to return to the previous screen without changing settings Main Menu 2 2 Press will bring you in the second main menu screen 2 2 Also this screen shows the selected job number and the counters indicating the programmed number of envelopes to do as well...

Page 20: ...ing the job owner this menu is protected by a PIN code This job menu will be described in Job Programming on page 21 Press to return to the previous screen without changing settings Supervisor Menu Pressing the gives access to system settings The supervisor menu therefore is restricted and protected by a PIN code The supervisor menu will be described in Supervisor Menu on page 20 Press to return t...

Page 21: ... details of a certain job Refer to Job Information on page 22 Press to create a job from scratch Refer to Create Job on page 23 Press to change a job Refer to Edit Job on page 30 Press to copy a job This copied job can be edited In this way it is possible to create a new job which resembles a certain job Refer to Copy Job on page 30 Press to delete a certain job which is not longer necessary refer...

Page 22: ...dication for daily mail Below this icon the format of the document in the relevant feeder is indicated ISO standard or height in mm This sign indicates that the relevant feeders are linked This means that when one feeder is empty the system automatically starts picking documents from the other feeder The sign below this icon tells whether the Optical Mark Recognition OMR for the selected feeder is...

Page 23: ...s Document settings Fold setting Optical Mark Recognition OMR settings if installed Double feed control settings Job name settings Mailing Franking settings if available Press each button to set the relevant job item All these settings will be described below Press to view all relevant information about the selected job Press to save the job with the entered settings under the specified job number...

Page 24: ...ope flap A numeric keypad will be displayed to enter the applicable dimensions It is also possible to select ISO standard envelopes or dimensions in inches depends on the installation settings Press to confirm changed settings or press to return to the previous screen without changing settings Document Settings This screen enables the setting of the document formats and the number of documents tha...

Page 25: ...ion enables to fill two adjacent feeders with the same documents When the first feeder is empty the system automatically swaps to the other feeder Press to select two adjacent feeders The selected feeders will be highlighted Press to link two highlighted feeders The will be displayed between the selected feeders Note When linking two feeders the program will automatically equal the number and form...

Page 26: ...d Double parallel fold Zig zag fold Except when no fold is required the display shows a simple diagram of the document with the fold positions Press next to a fold to display a numeric keypad Enter the required position of the relevant fold Press to clear the displayed dimension and enter a new dimension Press to confirm changed settings or press to return to the previous screen without changing s...

Page 27: ...ric keypad and to enter the position of the first reading mark on the sheet measured from the top Press or to enter the maximum number of sheets in the set of documents Fold type Minimum position Maximum position Single fold 75 mm 2 95 Longest document length minus 25 mm 0 98 Letter fold First fold 75 mm 2 95 Longest document length minus 50 mm 1 97 Second fold Position first fold plus 26 mm 1 02 ...

Page 28: ...r divert mark is encountered error VT 135 final set part will be displayed Press to view the programmed OMR codes Refer to OMR Codes on page 35 for a description of the OMR codes Press to return to the previous OMR settings screen Double Feed Control Settings This screen enables to set the Double Feed Controls DFC settings for the different feeders ON or OFF Press to select a feeder The selected f...

Page 29: ...mailing franking machine must print frank the envelopes or PASS THROUGH to let the envelopes pass through without printing franking When switched ON pressing on the second will select whether the mailing franking value is determined by the MAILING FRANKING MACHINE or based on the INSERTER DATA When the printed franking value is determined by the mailing franking machine a mailing franking job can ...

Page 30: ... this screen are described in chapter Create Job on page 23 4 5 Copy Job 1 After pressing the in the Jobs menu refer to Job Menu on page 21 the screen will show the Copy Job screen 2 Use or to select the job to copy from Press for more information on the selected job refer to Job Information on page 22 3 Use or to select a free job number to copy to A warning will be displayed when no more free jo...

Page 31: ...ill show the Delete Job screen 2 Use to select the job that must be deleted The screen shows the details of the selected job 3 Press to delete the selected job number or press to return to the previous screen JOB 5 1 2 3 C6 5 106 212 b Select job 2 2 1 A4 A4 100 1 ESCAPE OK DELETE JOB Delete job OK ESCAPE ...

Page 32: ...n displays information about the number of inserts since the last service visit The latest displayed error message Information concerning software versions Note When the supervisor is not able to solve possible problems write down the installed software versions and the last error before contacting the supplier Press to return to the previous screen Options System info Online services ESCAPE SUPER...

Page 33: ...characters 4 Press to confirm the license key and to return to the Options screen 5 Press to return to the Options screen without changing settings 5 3 Online Services Option This screen enables to display and change the settings for the Online services Refer to the appendix for a comprehensive description of the Online Services Press to return to the Supervisor menu without changing settings Ask ...

Page 34: ...her sheets carry the accumulate instruction If a parity check is used this is checked on each sheet If the set contains only one sheet it is the last sheet The code must appear in the same location on every page regardless of the actual code length This option can be enabled by a special license code refer to Options on page 33 6 2 Adjustments Reading head position The horizontal position of the r...

Page 35: ...d to obtain maximum blackness double strike Be aware of background noise Color changes on the form background design a logo or copy on the opposite side of the sheet that will bleed through can be read by the reading head causing disturbances of the OMR function The ribbon or toner quality must be checked before printing Fold type Type of documents Loading positions Address carrier face up and lea...

Page 36: ... the first mark and below the last mark a space of 8 5 mm 0 33 must be kept without printing This means that the minimum code area consists of 6 lines 2 lines to print the basic commands 4 lines free space Line distance may be 2 54 mm 0 1 to 6 35 mm 0 4 Code width character spacing and pitch The minimum width of the code area is 7 character spaces From left to right 2 characters space not printed ...

Page 37: ... and the mark definition is a service setting Other marks functions are possible via special codes Flex codes Divert mark The machine stops manually remove the set from the collator Reset and start again Stop mark The machine stops manually remove the set from the collator Reset and start again Selective feed mark The machine will selectively feed an enclosure when commanded so Sequence check Shee...

Page 38: ... first position is used for the start mark which must be printed on every sheet The second mark position is used for the insert accumulate command The mark is printed on the last sheet of the set inserting is required Position 3 and 4 are reserved for selective feeding from station 2 and 1 Print a mark on position 3 when a selective feed from station 2 is required Print a mark on position 4 when a...

Page 39: ...behind the frame axle 3 Connect the connector A to the socket B The MaxiFeederTM is auto detected by the system when it is switched ON This makes it easy to switch over from the standard document hopper to the MaxiFeederTM and vice versa Note To allow easier hooking on of the MaxiFeederTM it is advised to put the feeding plate in the rear position see section Separation To make use of a MaxiFeeder...

Page 40: ...nce starts becoming to big turn knob E counterclockwise 6 Pull knob E back when ready 7 Remount feeders 2 and 3 Feeding Documents 1 Squeeze the two blue handles C and D 2 Shift the feeding plate F to the rear position 3 Loosen the stack of documents and place them in the feeder BREs with flap down and leading Top side pointing to machine The feeding plate assembly will be shifted up automatically ...

Page 41: ...ine is delivered with an extra set of brushes To always have one clean set available it is recommended to soak one set in water and use the other set Remove the brushes one by one by pulling them down from the brush holder Replace the brushes and make sure that the studs on the brushes are fitted in the corresponding holes in the brush holder Check moistening cloth and replace if necessary When di...

Page 42: ...when Optical Mark Recognition is enabled The document stops in the collator area The operator must remove the document s from the collator area and must complete the set manually Technical errors The display shows a message The error cannot be solved by operating personnel and assistance of the service support is needed Warning screen When a cover is opened the display shows a warning screen with ...

Page 43: ...h the envelope track and inserter area Lower envelope track Remove the envelopes as follows 1 Open the side cover C 2 Lower and hold the handle D to the left and remove the envelope s from the lower envelope track 3 Release the handle D 4 If necessary the envelopes and documents can be transported manually by turning the blue knob E clockwise 5 Turn the blue knob F clockwise to manually transport ...

Page 44: ...pages from the collating area as follows 1 Move the collator plate B down 2 Remove the documents from the collator area 3 Move the collator plate B up in position 4 Press to reset the error and restart the job 9 3 Operator Troubleshooting 1 First write down the error 2 Try to solve the problem by consulting the table below 3 Switch the inserter OFF and ON again to verify system operation 4 When th...

Page 45: ...ding to specifications Envelope Settings on page 24 Technical specifications on page 48 Envelopes are double fed Envelope separation not correctly adjusted Check separation settings adjust if needed Loading Envelopes on page 13 Envelopes not placed properly in the hopper Check and replace if needed Loading Envelopes on page 13 Envelope stop skewed Side guides of the envelope hopper are set too wid...

Page 46: ...too deep into the envelope Check fingers position adjust if needed Insert Position on page 15 Envelope stops too early Check envelope stop position adjust if needed Insert Position on page 15 Machine stops while inserting stoppage at the inserting point Fingers not correctly adjusted Check fingers position adjust if needed Insert Position on page 15 Inserted document too long for used envelope Che...

Page 47: ...s inactive Activate the moistening brushes Sealing Envelopes on page 14 Envelope not filled properly or envelope flap not closed properly Inserted document too big Check fold settings adjust if needed Document Settings on page 24 Document not inserted deep enough Check adjustment of envelope stop position and fingers Insert Position on page 15 No document fed Feeder empty Refill feeder Loading Doc...

Page 48: ...ffice use Theoretical max speed 3000 inserts per hour depending on application Power consumption 100V AC 50 Hz 5 0 Amps 115V AC 60 Hz 5 0 Amps 230V AC 50 Hz 2 5 Amps Fuse 100 115 V AC T 5 0 A 125 V Time lag 5 0 Amps rated current 125 V 230 V AC T 2 5 A H 250 V Time lag 2 5 Amps rated current High breaking capacity 250V Approvals EMC Certificate conform EMC Directive FCC Certificate conform 47CFR p...

Page 49: ... 5 lb bond when folded max 170 gr m 42 5 lb bond Booklets up to approximately 1 mm 0 04 inch thickness depending on stiffness Paper size Minimum width 130 mm 5 1 Maximum width 236 mm 9 3 when folded max 230 mm 9 1 Minimum length 90 mm 3 5 the minimum document length used for the upper feeder is 115 mm 4 5 Maximum length 356 mm 14 Folding capacity Single fold 8 sheets max 80 gr m Double fold 6 shee...

Page 50: ...near the machine at least 24 hours before use Self copying paper may cause rubber parts to wear quicker The rubber used in this machine has the best resistance to Wiggins Teape material A B C D E F G Minimum size mm 160 90 32 10 130 84 60 g m2 inches 6 3 3 5 1 25 0 4 5 1 3 3 60 g m2 Maximum size mm 248 162 B 32 35 A 12 B 6 2 5 inches 9 7 6 38 B 1 25 1 4 A 0 47 B 0 2 0 1 Maximum insert specificatio...

Page 51: ...rposes C fold See Letter fold Clear The function of an inserting system in which all mail sets in progress are finished and the document path is left empty Daily Mail Capability of an inserting system to manually insert mail sets one by one into the system which are then inserted into an envelope Optionally depending on settings additional enclosures can be added and the mail set can be folded Thi...

Page 52: ...ng Situation in which the front of a sheet is facing downwards and the top of the sheet is closest to the separation unit in a document feeder Face down trailing Situation in which the front of a sheet is facing downwards and the bottom of the sheet is closest to the separation unit in a document feeder Face up Situation in which the front of a sheet is facing upwards when placed in a document fee...

Page 53: ...The system of all the Modules that cooperate to perform the inserting function accumulate document set fold and insert and have a single point of control Job A job is an actually produced collection of mail sets based on a certain Job Definition at a certain point in time for a specific purpose It consists of The Job definition used for the production Information about the batch size Job counter T...

Page 54: ...ible for preventive maintenance Single fold A single fold implies the document set is folded once The fold position is adjustable This fold is illustrated in the picture below Stacker Used as storage for filled envelopes Optional a horizontal unit can be delivered Stop counter Counter which sets the amount of envelopes to be filled After filling this amount of envelopes the system will stop even d...

Page 55: ...t is folded twice in such a way that each folded flaps is on a different size of the folded document resulting in a Z shape This fold is illustrated in the picture below The position of both folds is adjustable Synonyms zigzag fold Term Description ...

Page 56: ...006 J F M E van Stratum Managing Director This is a class A product In a domestic environment this product may cause radio interference in which case the user may be required to take adequate measures Note this equipment has been tested and found to comply with the limits for class A digital device pursuant to Part 15 of the FCC Rules These limits are designed to provide reasonable protection agai...

Page 57: ... van Stratum Managing Director This is a class A product In a domestic environment this product may cause radio interference in which case the user may be required to take adequate measures Note this equipment has been tested and found to comply with the limits for class A digital device pursuant to Part 15 of the FCC Rules These limits are designed to provide reasonable protection against harmful...

Page 58: ...58 ...

Reviews: