background image

32

Installing the Driver & Software

J

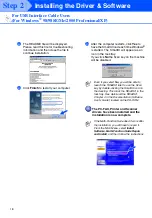
Click 

Finish 

to restart your computer.

K

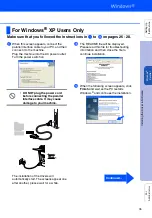
After the computer restarts, the installation 
of the drivers will automatically start. Follow 
the instructions on the screen.

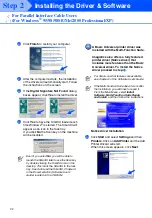
L

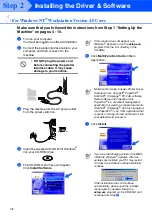
If the 

Digital Signature Not Found

 dialog 

boxes appear, click 

Yes

 to install the driver.

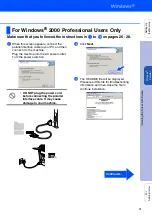
M

Click 

Yes

 to have the SmartUI loaded each 

time Windows

®

 is started. The SmartUI will 

appear as an icon in the task tray.
If you click 

No

 the Scan key on the machine 

will be disabled.

.

A Basic Universal printer driver was 
installed with the Multi-Function Suite.

Imagistics also offers a fully featured 
printer driver (Native driver) that 
includes more features than the Basic 
Universal driver. To install the Native 
driver proceed to step 

N

.

Native driver Installation

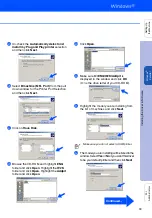
N

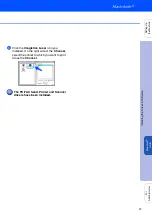
Click 

Start

 and select 

Settings

 and then 

Printers

. Click on 

Add Printer

 and the Add 

Printer Wizard will start.
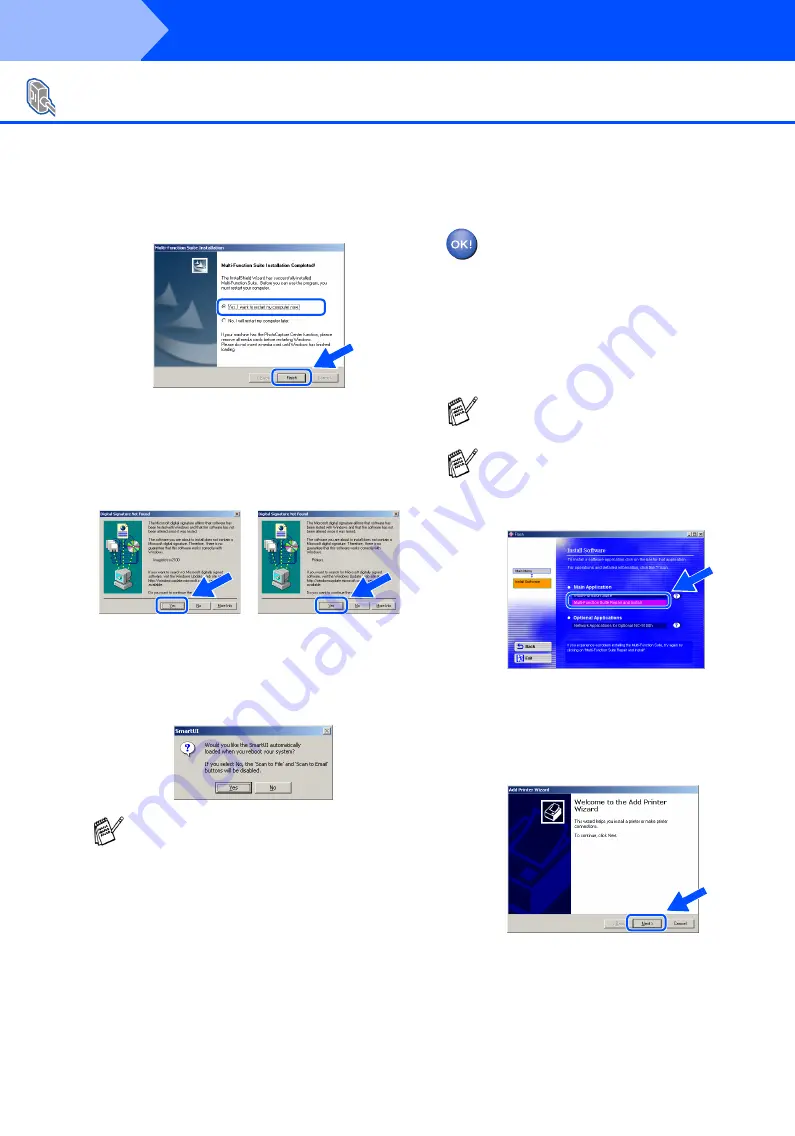
When this screen appears, click 

Next

.

For Parallel Interface Cable Users 
(For Windows

®

 95/98/98SE/Me/2000 Professional/XP)

Even if you select 

No

, you will be able to 

launch the SmartUI later to use the Scan key 
by double-clicking the SmartUI icon on the 
desktop. This loads the SmartUI to the task 
tray. See AutoLoad the SmartUI, Chapter 4 
in the Documentation (Software User’s 
Guide) located on the CD-ROM.

For details on what features are available, 
see chapter 2 of the Software User’s Guide.

If the Multi-Function Suite doesn’t work after 
the installation, you will have to repair it. 
From the Main Menu, select 

Install 

Software, Multi-Function Suite Repair 
and Install

, and then follow the instructions.

Step 2

Summary of Contents for sx2100

Page 1: ...ructions Keep this Quick Setup Guide User s Guide and supplied CD ROM in a convenient place for quick and easy reference at all times Step 1 Setting Up the Machine Step 2 Installing the Driver Softwar...

Page 2: ...observed to prevent possible personal injury Indicates cautions that must be observed to use the machine properly or to prevent damage to the machine Indicates notes and useful tips to remember when...

Page 3: ...it For Parallel use a bi directional shield interface cable that is IEEE 1284 compliant and not longer than 2 metres For USB use a Hi Speed USB 2 0 interface cable that is not longer than 2 metres Ple...

Page 4: ...l Pad 2 Liquid Crystal Display LCD 6 Start 10 Shift 3 Mode keys 7 Stop 11 One Touch keys 4 Navigation keys 8 Copy keys Temporary Settings For the details of the control panel see Control panel overvie...

Page 5: ...Windows 95 98 98SE Me 2000 Professional XP 26 For Windows 95 98 98SE Me Users Only 29 For Windows 2000 Professional Users Only 31 For Windows XP Users Only 35 For Windows NT Workstation Version 4 0 U...

Page 6: ...document support 2 Open the control panel cover by lifting it toward the back 3 Attach the ADF Support 4 Close the control panel cover 1 Connect the curled handset cord to the machine and the other en...

Page 7: ...ver release button 2 Unpack the drum unit assembly Remove the protective part 3 Rock it from side to side several times to distribute the toner evenly inside the assembly 4 Push the drum unit assembly...

Page 8: ...ay Check that the paper is flat in the tray and below the maximum paper mark 5 Put the paper tray firmly back in the machine and unfold the support flap before you use the machine 4 Load Paper in the...

Page 9: ...the machine is grounded through the power outlet you can protect yourself from potentially hazardous electrical conditions on the telephone network by keeping the power switched on when you connect it...

Page 10: ...d and then press Enter e g Enter 0 3 for March 6 Enter the two digits for the day on the dial pad and then press Enter e g Enter 0 1 7 Enter the time in 24 hour format on the dial pad and then press E...

Page 11: ...are the same enter the same number again 6 Use the dial pad to enter your name up to 20 characters and then press Enter 7 Press Stop Enter Menu Dial pad Stop 7 Setting Your Station ID Machine ID Fax _...

Page 12: ...of your external telephone answering machine Do you want to receive a fax automatically Manual You control the phone line and must answer every call yourself Do you use the machine for the fax use on...

Page 13: ...11 Setting Up the Machine Windows USB Windows Parallel Windows NT 4 0 Parallel Macintosh USB Macintosh Network Windows Network For Administrators...

Page 14: ...cs Support You can access the Imagistics Home Page Help Helpful hints Start Here OS 8 6 9 2 You can install the printer driver scanner driver PC FAX Send for Mac OS 8 6 9 2 Start Here OSX You can inst...

Page 15: ...onal XP Parallel Interface Cable Users Go to page 26 For Windows 95 98 98SE Me 2000 Professional XP Windows NT Workstation Version 4 0 Users Go to page 38 For Parallel Interface Cable Users Network In...

Page 16: ...XP If this window does not appear use Windows Explorer to run the setup exe program from the root directory of the CD ROM Multi Function Suite includes Printer Driver Scanner Driver ScanSoft PaperPor...

Page 17: ...screen is displayed make your selection and follow the on screen instructions B Click Finish to complete installation C When the Multi Function Suite Installation window appears click Next If you hav...

Page 18: ...our computer For USB Interface Cable Users For Windows 98 98SE Me 2000 Professional XP If you want to install the PS PostScript driver select Custom and then follow the on screen instructions When the...

Page 19: ...n H Select BRUSB USB Printer Port and then click Next I Accept the default Printer name by selecting Yes and then click Next J Select Yes recommended and then click Finish A test page will be printed...

Page 20: ...d Scanner drivers have been installed and the installation is now complete For USB Interface Cable Users For Windows 98 98SE Me 2000 Professional XP Even if you select No you will be able to launch th...

Page 21: ...ppear The installation of the drivers will automatically start Follow the instructions on the screen H If the Digital Signature Not Found dialog boxes appear click Yes to install the driver I The READ...

Page 22: ...ck Next M Un check the Automatically detect and install my Plug and Play printer selection and then click Next N Select USBXXX from the pull down window for the Printer Port Selection and then click N...

Page 23: ...e drive letter of your CD ROM S Highlight the model you are installing from the list of machines and click Next T The model you are installing will be listed in the window Select Yes or No if you want...

Page 24: ...ars click Yes Y If the test page printed click OK The Native Drivers have been installed and the installation is now complete For USB Interface Cable Users For Windows 98 98SE Me 2000 Professional XP...

Page 25: ...seconds for the installation screen to appear The installation of the drivers will automatically start The screens appear one after another please wait for a while H The README file will be displayed...

Page 26: ...USBXXX from the pull down window for the Printer Port Selection and then click Next M Click on Have Disk N Browse the CD ROM highlight ENG folder and click Open Highlight the WXP folder and click Open...

Page 27: ...If this screen appears select Do not share this printer and Next T Select Yes and Next to print a test page U When this screen appears click Finish V When this screen appears click Continue Anyway The...

Page 28: ...not appear use Windows Explorer to run the setup exe program from the root directory of the CD ROM Multi Function Suite includes Printer Driver Scanner Driver ScanSoft PaperPort ScanSoft Omnipage PC...

Page 29: ...n screen is displayed make your selection and follow the on screen instructions B Click Finish to complete installation C When the Multi Function Suite Installation window appears click Next If you ha...

Page 30: ...For Parallel Interface Cable Users For Windows 95 98 98SE Me 2000 Professional XP If you want to install the PS PostScript driver select Custom and then follow the on screen instructions When the Sele...

Page 31: ...Turn the power switch on DO NOT plug the power cord before connecting the parallel interface cable It may cause damage to your machine H Click Next I The README file will be displayed Please read thi...

Page 32: ...en installed and the installation is now complete For Parallel Interface Cable Users For Windows 95 98 98SE Me 2000 Professional XP Even if you select No you will be able to launch the SmartUI later t...

Page 33: ...urn the power switch on DO NOT plug the power cord before connecting the parallel interface cable It may cause damage to your machine H Click Next I The README file will be displayed Please read this...

Page 34: ...install the Native driver proceed to step N Native driver Installation N Click Start and select Settings and then Printers Click on Add Printer and the Add Printer Wizard will start When this screen a...

Page 35: ...en Highlight the Addprt folder and click Open S Click Open T Make sure X ENG W2K Addprt is displayed in the window and click OK X is the drive letter of your CD ROM U Highlight the model you are insta...

Page 36: ...ature Not Found dialog box appears click Yes If the test page printed click OK The Native Drivers have been installed and the installation is now complete For Parallel Interface Cable Users For Window...

Page 37: ...y cause damage to your machine The installation of the drivers will automatically start The screens appear one after another please wait for a while H The README file will be displayed Please read thi...

Page 38: ...MFL Port from the pull down window for the Printer Port Selection and then click Next M Click on Have Disk N Browse the CD ROM highlight ENG folder and click Open Highlight the WXP folder and click Op...

Page 39: ...s screen appears select Do not share this printer and Next T Select Yes and Next to print a test page U When this screen appears click Finish V When this screen appears click Continue Anyway The Nativ...

Page 40: ...ion Version 4 0 Users If this window does not appear use Windows Explorer to run the setup exe program from the root directory of the CD ROM Multi Function Suite includes Printer Driver Scanner Driver...

Page 41: ...n screen is displayed make your selection and follow the on screen instructions C Click Finish to complete installation D When the Multi Function Suite Installation window appears click Next If you ha...

Page 42: ...AX Printer and Scanner drivers have been installed and the installation is now complete For Windows NT Workstation Version 4 0 Users If you want to install the PS PostScript driver select Custom and t...

Page 43: ...main menu will appear Click Install Software 6 Click Multi Function Suite in Main Application For Network Interface Users For Windows 95 98 98SE Me NT 2000 Professional XP If this window does not app...

Page 44: ...is displayed make your selection and follow the on screen instructions C Click Finish to complete installation For Network Interface Users For Windows 95 98 98SE Me NT 2000 Professional XP If you see...

Page 45: ...essage appears at this point in the installation process you will first have to uninstall Multi Function Suite From the Start menu select All Programs Imagistics Multi Function Suite UnInstall and the...

Page 46: ...ss L Click Next Windows 98 98SE Me 2000 XP Users Go to M Windows 95 NT Users Go to P M Select yes and then click Next to configure Network Scanning N Click Next or enter the name you want displayed on...

Page 47: ...e Scan key on the machine will be disabled For Windows 98 98SE Me 2000 Users The PC FAX Printer and Scanner drivers have been installed and the installation is now complete For Windows 95 NT Users The...

Page 48: ...M drive 4 Double click the Start Here OS 8 6 9 2 icon to install the printer scanner and PC FAX Send drivers 5 Click Install next to the Multi Function Suite 6 Follow the on screen instructions and re...

Page 49: ...d On the right side of the Chooser select the printer to which you want to print Close the Chooser The PC FAX Send Printer and Scanner drivers have been installed Installing the Driver Software Settin...

Page 50: ...ll the printer driver Scanner driver PC FAX Send and Remote Setup program Scanning is not supported in Mac OS 10 1 5 Click Install next to the Multi Function Suite 6 Follow the on screen instructions...

Page 51: ...Select Quit Print Center from the Print Center menu The Printer driver Scanner driver PC FAX Send and Remote Setup Program have been installed and the installation is now complete Scanning is not supp...

Page 52: ...dy connected an interface cable 3 Turn on your Macintosh 4 Insert the supplied CD ROM for Macintosh into your CD ROM drive 5 Double click the Start Here OS 8 6 9 2 icon to install the printer scanner...

Page 53: ...BRN_xxxxxx_P1 Click Setup B Select your model and click OK Close the Chooser The setup is now complete xxxxxx are the last six digits of the Ethernet address Network User s Guide Chapter 7 on the CD...

Page 54: ...cable 3 Turn on your Macintosh 4 Insert the supplied CD ROM for Macintosh into your CD ROM drive 5 Double click the Start Here OSX icon to install the printer driver and Remote Setup program 6 Click I...

Page 55: ...om the Print Center menu The setup is now complete xxxxxx are the last six digits of the Ethernet address Network User s Guide Chapter 7 on the CD ROM For users of Mac OS 10 2 2 or greater Please see...

Page 56: ...Chapter 5 Configuring Internet Print for Windows Netware IPX SPX Chapter 6 Novell Netware Printing Windows 2000 XP Peer to Peer Windows 2000 only TCP IP Chapter 2 TCP IP Printing NetBIOS Chapter 4 Ne...

Page 57: ...D ROM drive The opening screen will appear automatically Follow the on screen instructions 2 Click the Install Software icon on the menu screen 3 Click Network Applications for Optional NC 9100h 4 Cli...

Page 58: ...the new device 4 Enter the IP Address Subnet Mask and Gateway and then click the OK button 5 The address information will be saved to the printer Setting your IP Address Subnet Mask and Gateway using...

Page 59: ...input capacity of 500 sheets For more details see Memory Board in Chapter 13 of the User s Guide The optional Network Print FAX Server transforms your machine into a Network Multi Function Center offe...

Page 60: ...stscript and Postscript Level 3 are registered trademarks or trademarks of Adobe Systems Incorporated PaperPort and OmniPage are registered trademarks of ScanSoft Inc Each company whose software title...

Page 61: ......

Reviews: