background image

Part No. 231555 R0905A

Printed in USA © 2005 ICON IP, Inc.

IMAGE is a registered trademark of ICON IP, Inc.

ORDERING REPLACEMENT PARTS

To order replacement parts, see the front cover of this manual. To help us assist you, please be prepared to give
the following information:

• the MODEL NUMBER of the product (IMTL41205.0)

• the NAME of the product (IMAGE FREESTRIDE 16.0 treadmill)

• the SERIAL NUMBER of the product (see the front cover of this manual)

• the KEY NUMBER and DESCRIPTION of the desired part(s) (see the PART LIST and the EXPLODED

DRAWING in the center of this manual)

LIMITED WARRANTY

ICON Health & Fitness, Inc. (ICON), warrants this product to be free from defects in workmanship and
material, under normal use and service conditions. Parts and labor are warranted for ninety (90) days
after the date of purchase. 

This warranty extends only to the original purchaser. ICON's obligation under this warranty is limited to
replacing or repairing, at ICON's option, the product through one of its authorized service centers. All re-
pairs for which warranty claims are made must be pre-authorized by ICON. If the product is shipped to a
service center, freight charges to and from the service center will be the customer’s responsibility. For in-
home service, the customer will be responsible for a minimal trip charge. This warranty does not extend
to any product or damage to a product caused by or attributable to freight damage, abuse, misuse, im-
proper or abnormal usage or repairs not provided by an ICON authorized service center; to products
used for commercial or rental purposes; or to products used as store display models. No other warranty
beyond that specifically set forth above is authorized by ICON.

ICON is not responsible or liable for indirect, special or consequential damages arising out of or in con-
nection with the use or performance of the product or damages with respect to any economic loss, loss
of property, loss of revenues or profits, loss of enjoyment or use, costs of removal or installation or other
consequential damages of whatsoever nature. Some states do not allow the exclusion or limitation of in-
cidental or consequential damages. Accordingly, the above limitation may not apply to you.

The warranty extended hereunder is in lieu of any and all other warranties and any implied warranties of
merchantability or fitness for a particular purpose is limited in its scope and duration to the terms set
forth herein. Some states do not allow limitations on how long an implied warranty lasts. Accordingly, the
above limitation may not apply to you.

This warranty gives you specific legal rights. You may also have other rights which vary from state to state.

ICON HEALTH & FITNESS, INC., 1500 S. 1000 W., LOGAN, UT 84321-9813

Summary of Contents for Freestride 16.0 Treadmill

Page 1: ...ference Visit our website at www imagefitness com new products prizes fitness tips and much more QUESTIONS As a manufacturer we are com mitted to providing complete customer satisfaction If you have q...

Page 2: ...a time 9 Wear appropriate exercise clothes when using the treadmill Do not wear loose clothes that could become caught in the treadmill Athletic support clothes are recommended for both men and women...

Page 3: ...operly assembled See ASSEMBLY on page 5 and HOW TO FOLD AND MOVE THE TREADMILL on page 12 You must be able to safely lift 45 pounds 20 kg to raise lower or move the treadmill 19 When folding or moving...

Page 4: ...st you note the product model number and serial number before contacting us The model number of the treadmill is IMTL41205 0 The se rial number can be found on a decal attached to the treadmill see th...

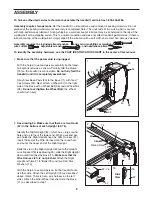
Page 5: ...l is more stable Do not fully fold the treadmill until it is completely assembled Attach four Base Pads 40 to the Base 11 with four 1 Tek Screws 94 Next attach a Wheel 37 to the right side of the Base...

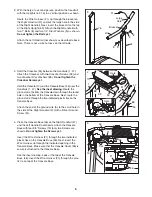
Page 6: ...nd wire A from the Console down through the round hole in the bottom of the Console Base Next route the ground wire through the two indicated plastic ties on the Console Base Attach the end of the gro...

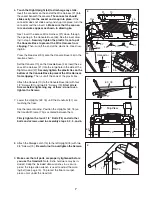
Page 7: ...Wire Harness from slipping Then cut off the end of the plastic tie See draw ing 6b Press the Bookrack 90 onto the Console Base 46 in the location shown Set the Console 10 on the Console Base 46 Inser...

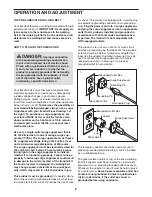
Page 8: ...lfunc tion or break down grounding provides a path of least resistance for electric current to reduce the risk of elec tric shock This product is equipped with a cord having an equipment grounding con...

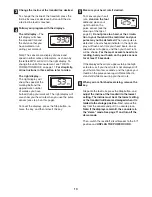
Page 9: ...tion Next stand on the foot rails of the treadmill Locate the clip attached to the key see the drawing above and slide the clip securely onto the waist band of your clothes Then insert the key into th...

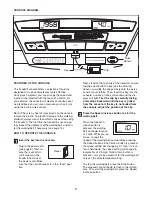
Page 10: ...ur right thumb on the pulse sensor see the drawing at the top of page 9 Do not press too hard or the circula tion in your thumb will be restricted and your pulse may not be detected When your pulse is...

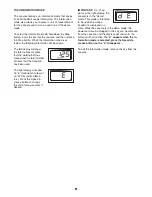
Page 11: ...ed and the total number of hours that the treadmill has been used The right display will show An E for English miles or an M for metric kilome ters Press the Speed in crease button to change the unit...

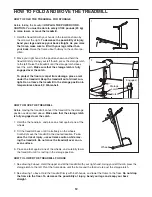
Page 12: ...peratures above 85 Fahrenheit HOW TO MOVE THE TREADMILL Before moving the treadmill convert the treadmill to the storage position as described above Make sure that the storage latch is fully engaged o...

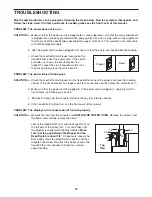
Page 13: ...ns off during use SOLUTION a Check the reset off circuit breaker on the treadmill frame near the power cord see the drawing above If the circuit breaker has tripped wait for five minutes and then pres...

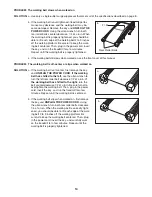
Page 14: ...er or slips when walked on SOLUTION a If the walking belt is off center first remove the key and UNPLUG THE POWER CORD If the walking belt has shifted to the left use the allen wrench to turn the left...

Page 15: ...vity that requires large amounts of oxygen for prolonged periods of time This increases the demand on the heart to pump blood to the muscles and on the lungs to oxygenate the blood For aerobic exercis...

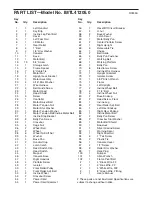
Page 16: ...13 8 Crossbar Screw 53 2 1 2 Screw 97 4 1 Tek Screw 94 4 1 Bolt 8 4 2 1 4 Bolt 78 4 Wheel Bolt 36 2 Crossbar Star Washer 88 2 Remove this chart and use it to identify small parts during assembly Save...

Page 17: ...Roller Adj Bolt 52 2 Incline Wheel 53 2 Crossbar Screw 54 1 Power Cord 55 1 Power Cord Grommet 56 1 Reset Off Circuit Breaker 57 4 U nut 58 2 Base Washer 59 1 Latch Decal 60 1 Motor Belly Pan 61 2 Ce...

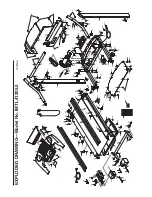
Page 18: ...48 86 69 66 66 3 87 1 49 49 90 97 36 37 38 40 94 37 38 36 40 94 70 26 13 72 12 17 27 19 31 30 29 28 70 89 47 58 102 8 9 9 8 35 13 53 13 34 8 9 8 35 53 70 64 92 10 73 73 85 11 62 76 21 70 13 95 96 9 10...

Page 19: ...esponsible for a minimal trip charge This warranty does not extend to any product or damage to a product caused by or attributable to freight damage abuse misuse im proper or abnormal usage or repairs...

Reviews: