background image

Ilumen 


Installation Manual Ilumen PIDbox Mini v2.0


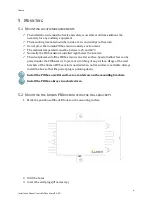
6.2


S

URGE PROTECTION


When having a lightning

and the solar panels, be aware 

If possible, place the surge protection between the PIDbox mini and the inverter for best results.

6.3


S

OLAR ARRAY AND INVER

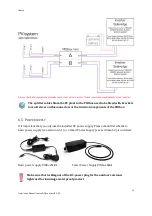
When installing the PIDbox mini
off the DC switch of the inverter

When doing any kind of work on the 
power plug from the device before unplugging any PV

Always connect the PV arrays to the 
plug should be connected to the positive side of 
plug should be connected to the negative side of 
MPPT should be connected in the sam
Connect the “A INV. out +” plug
1

st

 MPPT. Then connect the “A INV

inverter. If “B PV in” is used connect the 
the inverters 2

nd

 MPPT. 

All unused inputs and outputs have to be 

If you work with inverters wit
from multiple MPPT’s.

 
The maximum current
channel / MPPT. Make sure this is never exceeded.
 

Ilumen PIDbox Mini v2.0-EN 

When having a lightning/surge protection device installed between the PIDbox 

and the solar panels, be aware of an increased chance on reduced regeneration. 


If possible, place the surge protection between the PIDbox mini and the inverter for best results.

OLAR ARRAY AND INVERTER 

(MPPT)

 CONNECTIONS


PIDbox mini between the PV array and inverter

the DC switch of the inverter and/or in the DC combiner boxes

When doing any kind of work on the PIDbox mini, always disconnect the DC 
power plug from the device before unplugging any PV-cables.

rrays to the PIDbox mini. On the Ilumen PIDbox mini

the positive side of the strings of the 1

st

 MPPT and

the negative side of the strings of the 1

st

 MPPT. The

cted in the same manner to the “B PV in” plugs. Next connect

plug of the Ilumen PIDbox mini to the positive input of the inverter

INV. out –“ plug to the negative input of the 1

st


in” is used connect the “B INV. out” plugs in the same manner

All unused inputs and outputs have to be terminated with a corresponding sealing plug.

If you work with inverters with multiple MPPT’s you cannot mix 

MPPT’s. 

The maximum current that can pass through the Ilumen PIDbox mini

. Make sure this is never exceeded. 

8


protection device installed between the PIDbox 

uced regeneration.  

If possible, place the surge protection between the PIDbox mini and the inverter for best results. 

the PV array and inverter always switch 

es. 

, always disconnect the DC 

cables. 

PIDbox mini the “A PV in +” 

and the “A PV in –“ 

The strings of a 2

nd


connect the inverter. 

input of the inverters 

 MPPT of the 

plugs in the same manner to the inputs of 

sealing plug. 


 the PV arrays 

PIDbox mini is 

25A 

per 

Summary of Contents for PIDBOX MINI

Page 1: ...EN ILUMEN PID SOLUTION ILUMEN PIDBOX MINI INSTALLATION MANUAL Ilumen PIDbox mini Version 2 0 ILUMEN PID SOLUTION 2 0 EN 1 INDOOR OUTDOOR...

Page 2: ...unting the Ilumen PIDbox mini using the wall brackets 6 6 Electrical connections 7 6 1 Earth connection 7 6 2 Surge protection 8 6 3 Solar array and inverter MPPT connections 8 6 4 Using splitter cabl...

Page 3: ...mary 17 9 Decommissioning the Ilumen PID Solution 19 9 1 Disassembling the PIDbox mini 19 9 2 Packing the PIDbox mini 19 9 3 Disposing of the PIDbox mini 19 10 Troubleshooting 20 10 1 Faults 20 10 2 N...

Page 4: ...IDbox mini Ilumen PIDbox mini This manual is intended for skilled persons Only qualified persons with the appropriate skills are allowed to perform the tasks set forth in this manual DDITIONAL INFORMA...

Page 5: ...ining in how to deal with the dangers and risks involved in installing and operating electrical devices and plants Training in the installation and commissioning of electrical devices and plants Knowl...

Page 6: ...ble at all times without the necessity for any auxiliary equipment mounting location should be inside a rain and windproof location Do not place the Ilumen PIDbox mini in a dusty environment The ambie...

Page 7: ...ake sure the DC power plug is pointing to the ground ck if mounted securely ONNECTIONS PIDbox mini the AC side of the PV plant must be switched off the DC switch of the inverter must be switched off A...

Page 8: ...RTER MPPT CONNECTIONS PIDbox mini between the PV array and inverter the DC switch of the inverter and or in the DC combiner boxes When doing any kind of work on the PIDbox mini always disconnect the D...

Page 9: ...Mini v2 0 EN Make sure the PV arrays are connected to the A PV in and B PV in NEVER to the A INV out or B INV out side SING SPLITTER CABLES Each of the 2 channels of the PIDbox mini has a current limi...

Page 10: ...Ilumen Installation Manual Ilumen PIDbox Mini v2 0 6 4 2 INVERTER WITH 2 MPPT 6 4 3 INVERTER WITH 3 MPPT Ilumen PIDbox Mini v2 0 EN MPPT S AND STRING FUSES MPPT S AND STRING FUSES 10...

Page 11: ...ck the permissible current of each input of the inverter Please consult the manufacturer of the inverter MPPT S WITHOUT STRING FUSES Always check the permissible current of each input of the inverter...

Page 12: ...SE6000 Three Phase Inverters SE4K SE5K SE7K SE8K SE9K SE10K SE12 5K SE15K SE16K SE17K For following types of SolarEdge inverters one PIDbox per inverter should be connected Three Phase Inverters SE25...

Page 13: ...itter cables from the PV plant to the PIDbox need to be fixed with brackets the connectors or the internal components of the PID It is important that you only use the included DC power supply Please c...

Page 14: ...ress into the PIDbox A standard AC power source must be available on installation This power source should be on at all times The ideal solution is to have a separate circuit breaker of 16A for the PI...

Page 15: ...free AC channel of part 1 of the Smart Power Supply of the PIDbox Mini In case you don t connect any linking cables the second AC channel of part 1 should be closed with a cover Part 1 of Smart Power...

Page 16: ...type plate of the everything is properly mounted and connected see V frames are all connected to the same earth as the earth pin of the Ilumen DC cables are correctly connected Unused DC inputs and o...

Page 17: ...30 minutes power supply connected but no active solar system PIDbox mini active at night time Regeneration takes place only for FW version V 7 4 3 or higher readable on rating plate on rear of PIDbox...

Page 18: ...multiple strings can be combined to form a bigger input per side To do this a DC combiner cable can be Two versions can be ordered One with 2 and one with 3 connectors But always mind the maximum inpu...

Page 19: ...e PV plant 11 ECOMMISSIONING THE ILUMEN PID SOLUTION PIDBOX MINI mini Disconnect the Ilumen PIDbox mini from the AC grid Wait 0 minutes Make sure the AC cannot be plugged in again Disconnect the DC sw...

Page 20: ...th connection between PIDbox mini and the frame of the modules is interrupted PID is present but weather conditions do not allow a good regeneration Watch the lights during the day These should be blu...

Page 21: ...PIDBOX MINI Do not try to open up the PIDbox mini by yourself This will void the warranty Always contact iLumen technical service if your PIDbox mini is broken 11CONTACT Ilumen bvba Ambachtsstraat 19...

Page 22: ...ide is possible This product will function with p type solar cells If you want to apply this product to another technology please contact iLumen Various Warranty Certificates Registration before use I...

Reviews: