7
Dimmer Operation
During normal operation, press and release the
ZZZ (Snooze)/Display Dimmer Button
to control the brightness of the
LCD display.
Installing and Replacing Clock Backup Batteries
The unit comes with 2 AA back-up batteries installed to provide continuous alarm operation
and clock settings in the event of a power failure. The battery compartment is located on
the bottom of the unit.
Remove the battery pull tab before use.
While the display is
generally disabled in battery backup mode, pressing the
ZZZ (Snooze)/Display Dimmer
Button
will show a dimmed time display for 5 seconds if power is interrupted and clock
back up batteries are installed. When the Battery Low Icon located on the lower right of
the display is flashing, it is time to replace the back-up batteries.
1. Please make sure the AC adaptor is connected, otherwise all settings will be lost during
battery replacement.
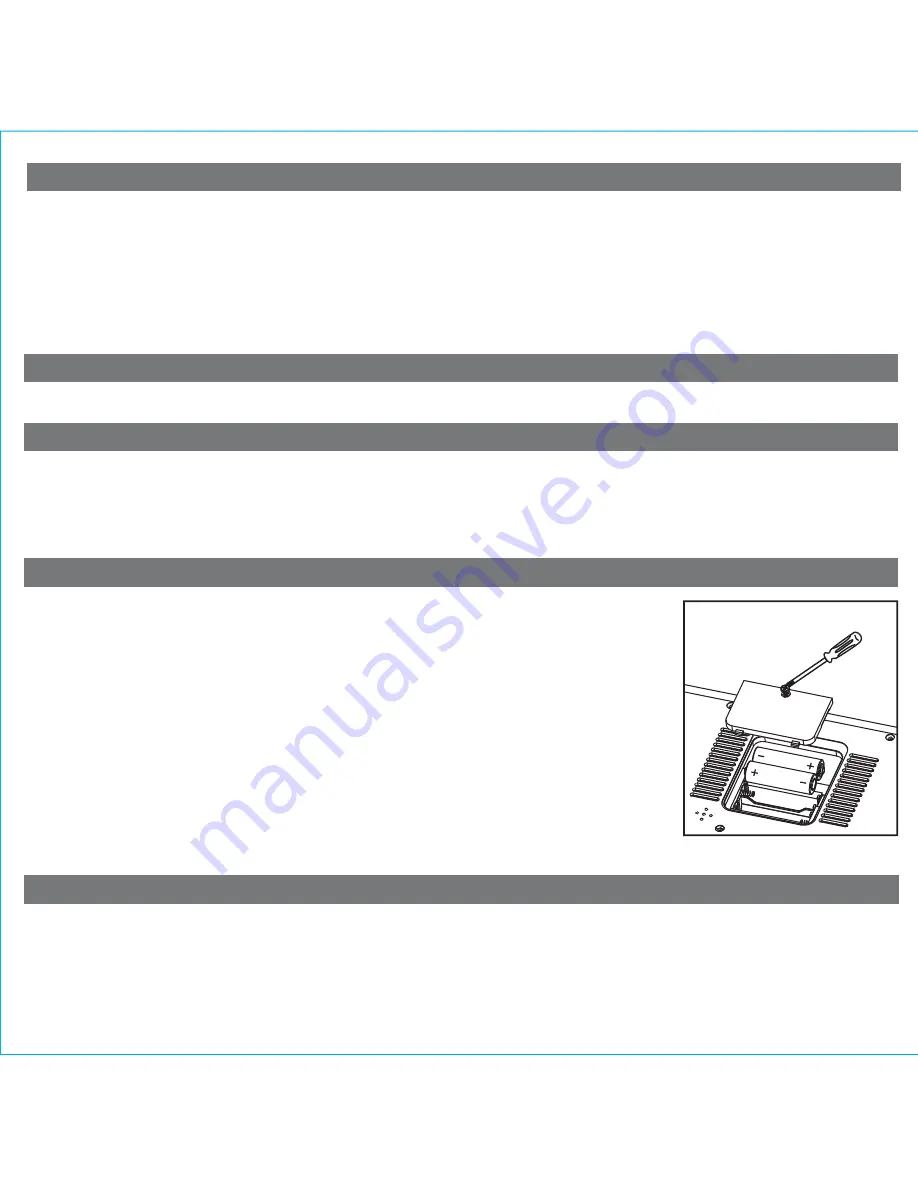
2. Use a Phillips screwdriver to remove the battery compartment cover located on the
bottom of the unit.
3. Remove the exhausted AA batteries. Insert fresh AA batteries, checking that the
polarity ( + and -) matches the diagram to the right. Replace the compartment door.
Note:
Make sure you dispose of batteries properly (see your local regulations).
P9
Nap Operation
Nap mode lets you set an alarm separate from the Alarm 1 and Alarm 2 settings. If the unit is ON,the nap wake to source
by default is the buzzer alarm. If the unit is OFF, the nap source will be the last played mode.
1. Press the
Nap Button
located on the top of the unit as needed to adjust the nap timer for 5, 10, 15, 20, 30, 45, 60, 90
or 120 minutes or OFF.
2. When the unit is OFF, pressing the
Nap Button
once will show the nap time remaining. Pressing it again will change
nap time to the next highest setting. When the unit is ON, pressing the
Nap Button
once will briefly show the nap time
remaining, then revert to standard display.
Charging a Device with the USB Port
A USB port is located on the back of the unit for charging devices while the unit is connected to AC power.
Connect one end of a compatible USB cable (not included) into the standard USB port on the unit and the other end into
the device you wish to charge. Some devices require proprietary USB charging ports or cables. Monitor the charging
status of your device. If the device does not charge, you will need to use the charger that came with your device.
Replacing Backup Batteries
Battery Warning
For models that require more than one battery
• Do not mix with used or other battery types/brands
• Replace all batteries at the same time
• Do not open batteries
• Do not dispose of in fire
• Do not heat above 75ºC (167ºF)
• Do not expose contents to water
• Do not charge or recharge
• Do not install backwards


