23
6.
Once the required hole depth is reached, allow the
auger bit to briefly turn at depth to clean the hole of
debris.
7.
Stop the rotation of the auger bit. Raise the auger out
of the hole and move away from the hole. Resume
the rotation of the auger bit to remove the loose soil
from the auger bit.
NOTE:
Do not reverse the auger bit rotation to
remove the auger bit from the hole as loose
soil will fall back into the hole.
In some soil conditions or when excessive down
pressure is applied to the attachment, the auger bit
may “screw” itself into the ground and become stuck
causing the auger drive to stall. If this occurs,
reverse the auger bit direction and slowly raise the
attachment. Use the same procedure if the auger bit
becomes lodged under rocks, roots, or other large
obstructions.
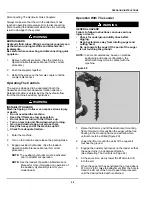
8.
Raise the lift arms often while the auger is turning to
remove the dirt from the hole. Stop the auger when
the point is above the ground.
Moving The Loader With The Auger Installed
WARNING
GENERAL HAZARD
Failure to follow instructions can cause serious
injury or death.
•
Check for underground utility lines before
digging.
•
Keep bystanders away from rotating auger and
cutting head.
•
Do not operate the auger if the point of the auger
is not touching the ground.
◂
W-2711
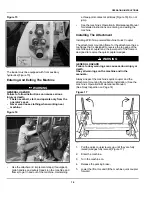
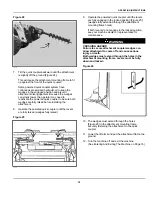
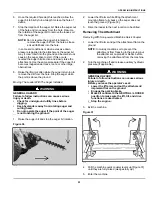
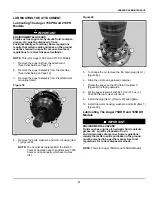
1.
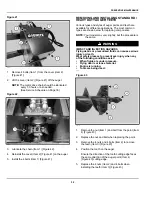
Raise the auger bit and stop the auger bit rotation.
Figure 30
C221412a
2.
Lower the lift arms while tilting the attachment
mounting frame fully back so the auger does not
touch the ground. [Figure 30].
3.
Drive the loader to the next location to be drilled.
Removing The Attachment
Removing With Non-powered Machine Quick Coupler
1.
Lower the lift arms and put the attachment flat on the
ground.
NOTE:
In muddy conditions or to prevent the
attachment from freezing to the ground, put
the attachment on planks or blocks before
removing the attachment from the machine.
2.
Turn the machine off and release auxiliary hydraulic
pressure (if applicable).
WARNING
GENERAL HAZARD
Failure to follow instructions can cause serious
injury or death.
Before you leave the operator’s seat:
•
Lower the lift arms and put the attachment /
implement flat on the ground.
•
Engage the parking brake.
•
Move all controls to the NEUTRAL / LOCKED
position to make sure the lift, tilt, and drive
functions are deactivated.
•
Stop the engine.
◂
W-3156
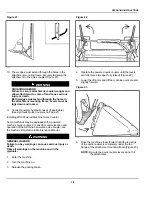
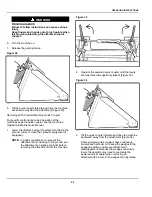
3.
Exit the machine.
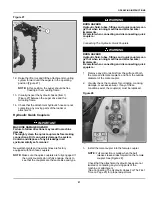
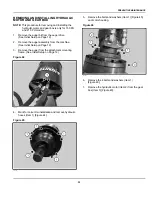
Figure 31
NA3445A
4.
Pull the machine quick coupler levers up [Figure 31]
until they are fully raised (wedges fully up).
5.
Enter the machine.
Summary of Contents for Auger 75 DDH
Page 2: ......
Page 12: ...10 Figure 4 C221899a SAFETY AND TRAINING RESOURCES ...
Page 29: ......
Page 52: ...50 troubleshooting 29 W warranty 48 welding safety 7 ALPHABETICAL INDEX ...
Page 53: ......


