iSignager 500A
Page 14
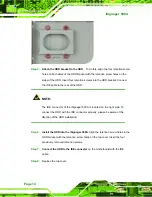
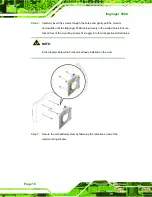
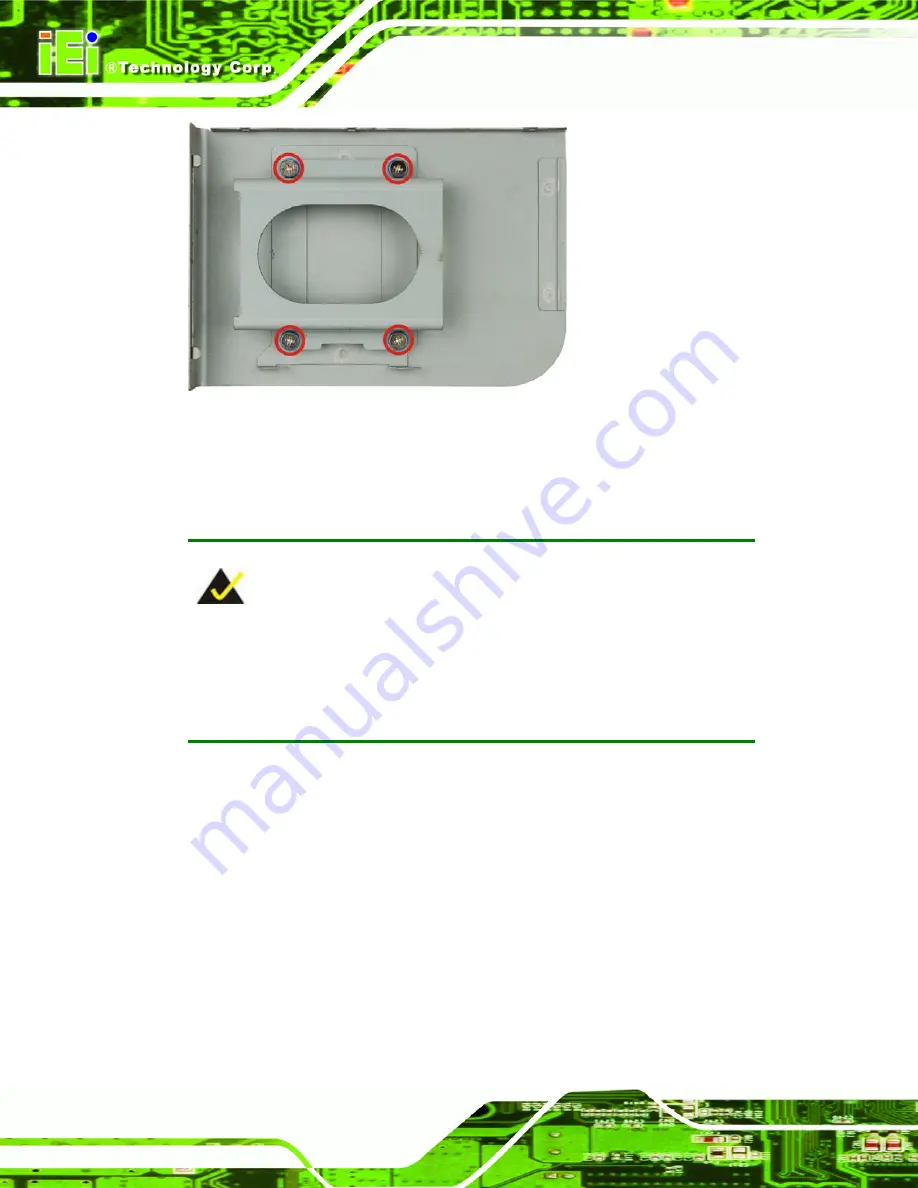
Step 5:
Attach the HDD bracket to the HDD.
To do this, align the four retention screw
holes on both sides of the HDD bracket with the retention screw holes on the
sides of the HDD. Insert four retention screws into the HDD bracket. Connect
the IDE cable to the rear of the HDD.
NOTE:
The IDE connector of the iSignager 500A is located on the right side. To
connect the HDD with the IDE connector properly, please be aware of the
direction of the HDD installation.
Step 6:
Install the HDD into the iSignager 500A
.
Align the retention screw holes in the
HDD bracket with the retention screw holes on the top cover. Insert the four
previously removed retention screws.
Step 7:
Connect the HDD to the IDE connector
on the motherboard with the IDE
cable.
Step 8:
Replace the top cover.
Step 0:
Summary of Contents for iSignager 500A
Page 1: ...iSignager 500A Page i iSignager 500A User Manual ...
Page 2: ...iSignager 500A Page ii Revision Date Version Changes 2008 04 1 0 Initial Release ...
Page 10: ......
Page 11: ...iSignager 500A Page 1 1 Introduction Chapter 1 ...
Page 20: ...iSignager 500A Page 10 THIS PAGE IS INTENTIONALLY LEFT BLANK ...
Page 21: ...iSignager 500A Page 11 2 Installation Chapter 2 ...
Page 34: ...iSignager 500A Page 24 ...
Page 36: ...iSignager 500A Page 26 THIS PAGE IS INTENTIONALLY LEFT BLANK ...
Page 37: ...iSignager 500A Page 27 A Video Audio and Graphic Formats Appendix A ...
Page 45: ...iSignager 500A Page 35 B Check and Modify the Player Status by Serial Port Appendix B ...
Page 58: ...iSignager 500A Page 48 THIS PAGE IS INTENTIONALLY LEFT BLANK ...
Page 59: ...iSignager 500A Page 49 C Hazardous Materials Disclosure Appendix C ...


