p.64
BASIC SETTING
iTDC
You can move to other SETUP MENU by pressing <F1> ~<F4> keys.
3.
There are several Sub MENU in the main SETUP MENU and in each SETUP MENU, you
can move between Sub MENUs by pressing <4> and <6> keys.
If you don’t press any key for 60 seconds or if you press <ESC> key then iTDC will
exit the SETUP MENU then return to normal operation. You can change the Master
ID in the [5. MASTER ID REG.] of [SETUP MENU F2] and once you change MASTER
ID, you can enter the SETUP MENU only using altered MASTER ID.
4
DOOR SETTING
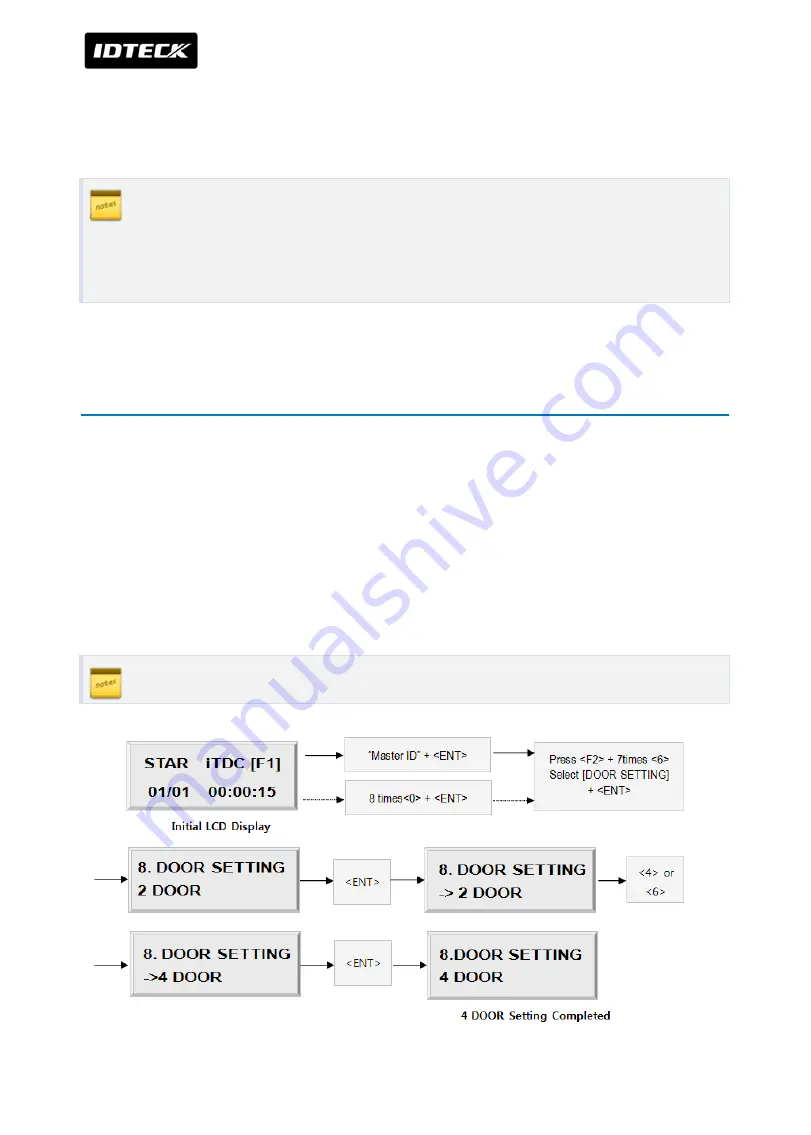
First, you have to configure “How many doors you want to control by iTDC”, as the iTDC will
automatically configure the Input sources and Output Relays upon to the number of doors to
be controlled by iTDC. Press <F2> key once then press <6> key or <4> key until the LCD shows
[8.DOOR SETTING] in the [SETUP MENU F2] then press <ENT> key to change the DOOR
SETTING. Please follow the steps below for DOOR SETTING and it shows the procedure for 4
DOOR SETTING.
The Master ID for iTDC-SR is 10 digits number (Default setting “0000000000”).
You have to install EIO88 to control 3, 4 doors before set the number of doors.
Summary of Contents for iTDC
Page 1: ...USER MANUAL iTDC 2 4 DOOR ACCESS CONTROL SYSTEM ...
Page 20: ...FEATURES iTDC p 13 3 DIMENSION Unit inch mm ...
Page 22: ...FEATURES iTDC p 15 Internal TCP IP Module IIM100 ...
Page 79: ...p 72 SETTING CHANGES iTDC ...
Page 87: ...p 80 SETTING CHANGES iTDC ...
Page 101: ...p 94 SETTING CHANGES iTDC 3 SETTING MENU F3 ...
Page 117: ...p 110 SETTING CHANGES iTDC ...
Page 135: ...p 128 APPENDIX iTDC But two functions 1 2 cannot be used at the same time ...


