8
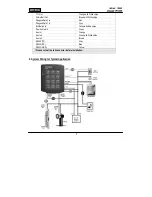
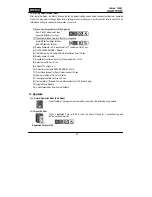
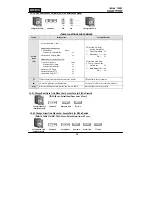
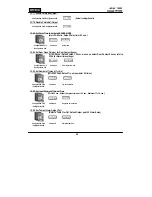
9-1. Power Connection
- Connect (+) wire of DC +12V power to Red wire and Red/White banded wire.
- Connect Power GND (-) wire of DC +12V to Black wire and Black/White banded wire.
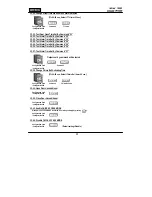
9-2. Door Lock Connection
9-2-1 Connection of
POWER FAIL SAFE: Door Lock
- Connect Door RELAY (NC), Blue/White banded wire to DC +12V (be sure that the existing power supply has
enough capacity to support this accessory or upgrade to a larger-capacity one.)
- Connect (+) wire of Door Lock to Door RELAY (COM), Grey/Red banded wire.
- Connect (-) wire of Door Lock to Power GND (-) wire.
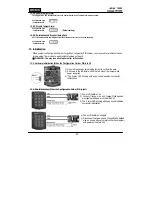
9-2-2 Connection of
POWER FAIL SECURE: Door Lock
- Connect Door RELAY (COM), Grey/Red banded wire to DC +12V (be sure that the existing power supply has
enough capacity to support this accessory or upgrade to a larger-capacity one.)
- Connect (+) wire of Door Lock to Door RELAY (NO), White/Red banded wire.
- Connect (-) wire of Door Lock to Power GND (-) wire.
9-3. Alarm Device Connection
- Connect Alarm RELAY (COM), White wire to DC +12V (be sure that the existing power supply has enough
capacity to support this accessory or upgrade to a larger-capacity one.)
- Connect (+) wire of Alarm Device to Alarm RELAY (NO), Purple wire.
- Connect (-) wire of Alarm Device to Power GND (-) wire.
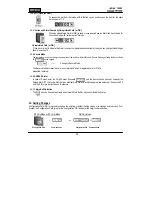
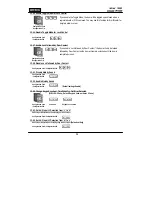
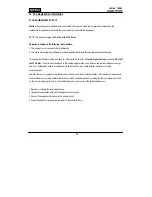
9-4. Exit Button Connection
- Connect one of the wires of Exit Button to Exit Button Input, Yellow/Red banded wire.
- Connect the other wire of Exit Button to Power GND (-) wire.
(If a normally closed Exit button is used, see section 12-67 to change the detection scheme from the default)
9-5. Door Contact Sensor Connection
- Connect Door Contact sensor (COM) wire to Door Contact Input, Green wire.
- Connect Door Contact sensor (NO) wire to Power GND (-) wire.
(If a normally closed Door Contact sensor is used, see section 12-69 to change the detection scheme from the
default.)
9-6. Auxiliary
Input Device Connection
(Applied to AUX Input #1, #2, #3)
- Connect one wire of the Auxiliary Input Device to the AUX Input wire
(Input #1 Orange, Input #2 Green/White banded, Input #3 Brown wire).
- Connect the other wire of Auxiliary Input Device to Power GND (-) wire.
(If a normally closed input device is used, see section 12-61,63 & 65 to change the detection schemes from the
default.)
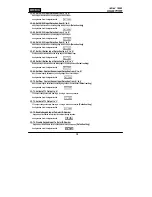
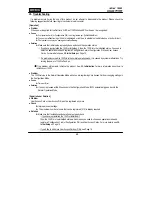
9-7. Auto-Dialer Connection
(Separate purchase required)
The Auto-dialer function of this unit has not been evaluated by UL.
- Connect the input wire of Auto-Dialer to TTL output, Orange/White banded wire.
- Connect (+) wire of Auto-Dialer to DC +12V (be sure that the existing power supply has enough capacity to
support this accessory or upgrade to a larger-capacity one.)
- Connect (-) wire of Auto-Dialer to Power GND (-) wire.
- Connect Telephone Line plug (RJ-14) to Auto-Dialer.
(
If an active High Auto-Dialer is used, see section 12-71 to change the TTL output level from the default.)
Summary of Contents for iPass IP100W
Page 1: ...User s Manual ...
Page 31: ...31 17 Template MEMO ...


