Part 1 - Remote Setup
36
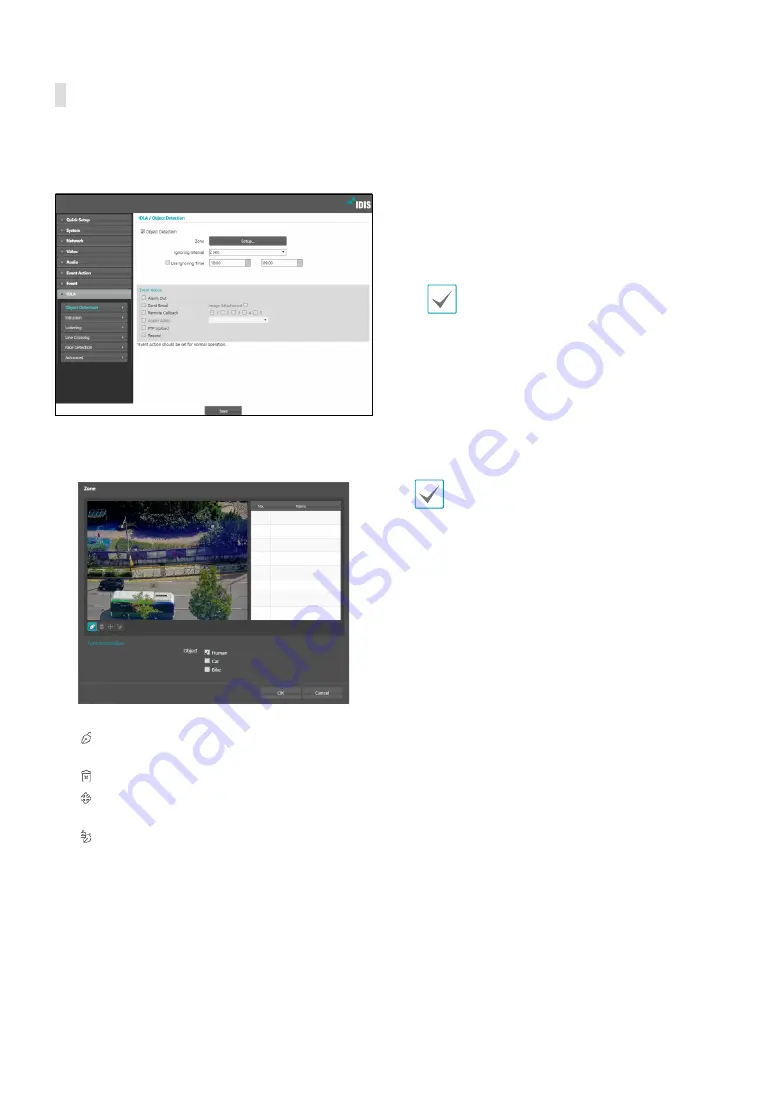
Object Detection
Select
Object Detection
and configure object detection
settings. With object detection event enabled, an event
is considered when an object is detected in a set zone.
•
Zone
: Click
Setup
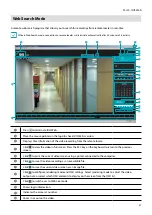
and define the object detection
area and the conditions for which an object detection
event will occur in each area up to 8 conditions.
-
Name:
Set the name of the area.
-
(Draw)
: Set the area on the screen in the form of
a polygon.
-
(Erase)
: Select the polygon to erase.
-
(Move)
: Move the position of the polygon on the
screen or the position of the polygon point.
-
(Edit)
: Add or delete polygon points.
-
Object
: Select the object (
Human, Car, Bike
) to
detect in the area.
•
Ignore Interval
: With Object Detection Ignoring
Interval configured, no event log or notification is
generated for object detected during a period of time
following a object detection event.
•
Use Ignoring Time
: Define the event ignoring time.
Object detections taking place during the defined
time range will not be assumed as events.
•
Event Action
: Select an object detection event alert
action.
-
Alarm Out
: Select if you wish to generate an alarm
out.
-
Send Email
: Select if you wish to send an email.
Select the
Image Attachment
option to attach a
.jpg image of the event detected to the email.
-
Remote Callback
: Select this option to send a
message to a remote system and then select which
system to send the message to.
• Not supported from the IDIS Web program.
• The camera must be registered to the remote
system in order to use the
Remote Callback
feature.
-
Audio Alarm
: Select this option to generate an
audio alert and then choose an audio file.
-
FTP Upload
: Select this option if you wish to
upload images to the FTP server.
-
Record
: Select this option to record video.
•
Event Action
settings must be configured
correctly in order to perform event actions.


