Zboard™ User Guide
14
5.
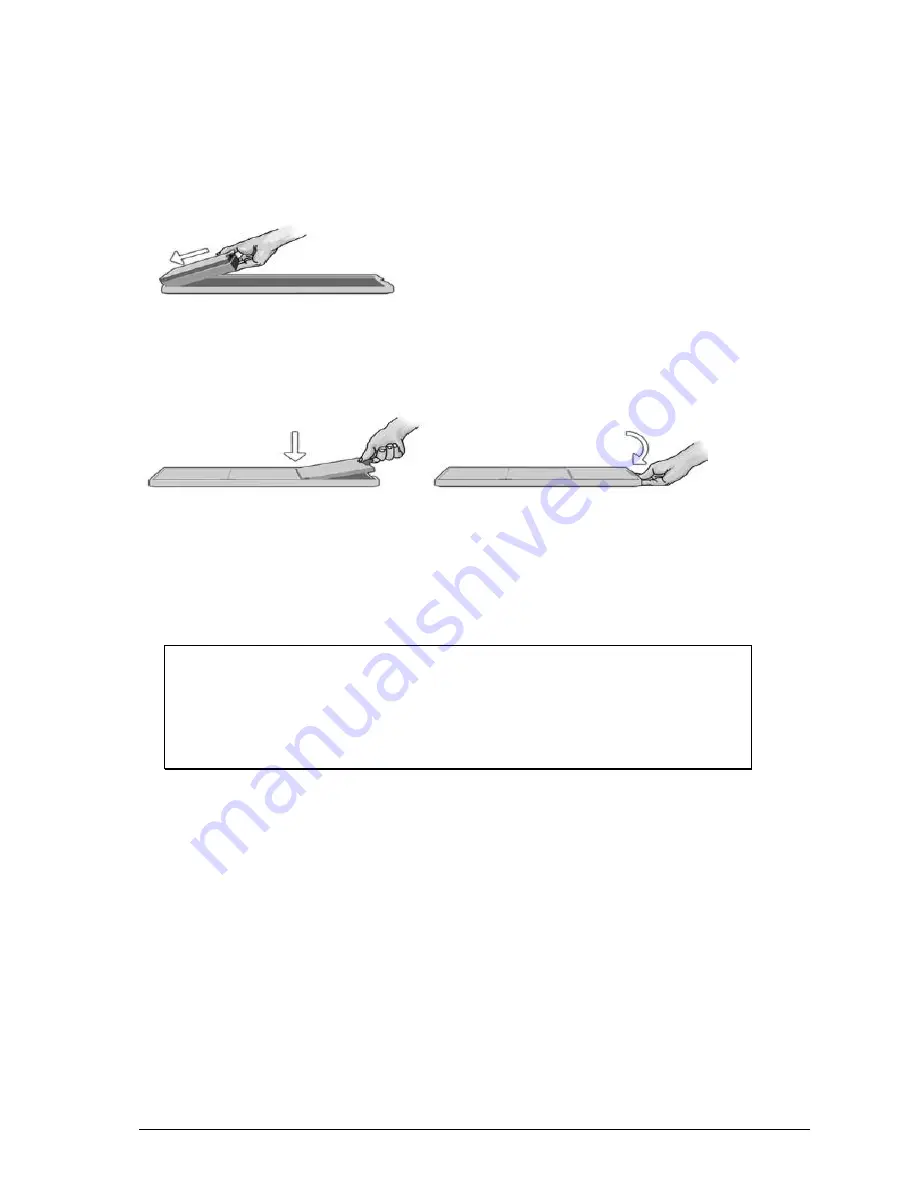
Take hold of the small latch on the right-side of the top Keyset panel, and use it as a
handle. Pulling gently while holding the left-most panel in the Keyset Cavity with your
left hand, and press the middle panel down into place.
6.
Finally, insert the right-most panel into the last empty section of the Keyset Cavity,
and secure the latch into place.
When the latch is locked, look over the Zboard™ Keyset you have just installed to make sure
all keys are standing up (i.e. none are depressed). If you see some depressed keys, remove
the Zboard™ Keyset (reversing the insertion procedure). Make sure that all rubber domes on
the base are in their upright position, and carry out steps 1-6 again.
NOTE: If the third Keyset plate doesn’t fit squarely in the Zboard™ Base
Keyset Cavity, open the Keyset and repeat steps 1-6.
NOTE: The latch must be closed properly in order to achieve uninterrupted
communication between the Base and the Keyset.
Step Two: Plug the Zboard™ Base into Your Computer
1.
Insert the Standard Keyset into the Zboard™ Base. Plug the Zboard™ Base
connector into the USB port on your computer.
It is not necessary to install the Zboard™ software for basic keyboard functionality.
The Windows® Operating System will automatically identify the Zboard™ and allow
standard keyboard functionality.
Using the Zboard™ in DOS mode
If your Zboard™ is not working in DOS mode or in any selection windows you may encounter
when booting up your computer, you may need to enable USB support in your computer’s


