background image

Pg.4/8 

Instruction Code: CI121RLER0 


SV: MONTERINGSANVISNING / EN: INSTALLATION INSTRUCTION / FR: INSTRUCTIONS 

D’INSTALLATION / ES: INSTRUCCIONES DE INSTALACIÓN


SV: INSTALLATION 
STEG 1: 

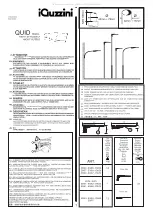
Mata kabeln som kommer från armaturen genom stolpfästet. Se figur 1. 


Steg 2: 

Rotera stolpfästet till antingen en vertikal eller horisontell position och rikta in de 

samverkande tänderna på stolpfästet med de på armaturen. 

STEG 3: 

Fäst stolpfästet i armaturen med hjälp av de medföljande 3/8" bultarna  

och brickorna och dra åt till 230in-lbs (19 ft-lbs) (26 Nm). Se figur 1. 

STEG 4: 

Skjut stolpfästet  på stolptoppen eller armen och dra de två medföljande 

insexskruvarna löst med en 5mm insexnyckel. 

STEG 5: 

Justera in armaturen på stolptoppen eller armen till önskad position. 

STEG 6: 

Dra åt de två insexskruvarna till 230 in-lbs (19 ft-lbs) (26 Nm).  

Lås skruvarna med medföljande mutter & låsmutter. 


EN: INSTALLATION 

STEP 1: 

Feed the cord coming from the luminaire through the tenon fitter. See Figure 1. 

STEP 2: 

Rotate fitter orientation to either a vertical or horizontal position and align the 

interlocking teeth on the fitter with those of the luminaire. 

STEP 3: 

Attach the fitter to the luminaire using the 3/8” bolts and washers and tighten


to 230in·lbs (19 ft·lbs) (26 N·m). See Figure 1. 

STEP 4: 

Slide tenon fitter oce the tenon and loosely tighten two Allen head screws with 

a 5mm Allen wrench. 

STEP 5: 

Rotate fixture on tenon to properly level the fixture’s position.


STEP 6: 

Securely tighten two Allen head set screws to 230 in·lbs (19 ft·lbs) (26 N·m). 


Summary of Contents for CREE LIGHTING XSP Series

Page 1: ...nsion et fr quence 220 240 V 50 60 Hz 150 240 V pour puissance d entr e B Courant d entr e min 0 07 A 230 V max 0 26 A 230 V Facteur de puissance 0 9 Indice de protection IP 66 Classe d isolation Clas...

Page 2: ...re la fissuration le d collement la d coloration et la corrosion excessives l exception des probl mes r sultants d une installation incorrecte La Soci t s engage r parer ou remplacer sa discr tion tou...

Page 3: ...an enhet EN Technical data on ZHAGA sockets Nominal voltage 30 Vdc Nominal current max 1 5 Adc The fittings equipped with ZHAGA sockets are designed for operating with a plug in device conforming to t...

Page 4: ...insexnyckel STEG 5 Justera in armaturen p stolptoppen eller armen till nskad position STEG 6 Dra t de tv insexskruvarna till 230 in lbs 19 ft lbs 26 Nm L s skruvarna med medf ljande mutter l smutter E...

Page 5: ...gra elektriska anslutningar EN NOTE For luminaires without cable with and without NEMA connector Remove cable outside insulation for 4cm remove 2nd insulation of cable leads for max 8mm For the lumina...

Page 6: ...ent des heures de fonctionnement du lampa daire et en calcule le point central Par rapport ce point central le client peut d cider pendant quelles plages horaires un courant de commande plus faible es...

Page 7: ...valide si sa longueur est comprise entre 4 et 23 5 heures TAPE 3 Si un cycle de fonctionnement d passe les cycles pr c dents d une heure ou plus le circuit ne fonctionnera pas pendant le pr ochain cy...

Page 8: ...heureavant deuxheuresapr sleminuit virtuel ES PASO 1 Entre en el modo de programaci n siguiendo la secuencia On Off Entrar en el modo de programaci n como se muestra en la Figura 4 Si el acceso se rea...

Page 9: ...the shop where you bought this appliance DIRECTIVE 2012 19 UE D CHETS D QUIPEMENTS LECTRIQUES ET LECTRONIQUES DEEE Informations pour les utilisateurs Ce produit est conforme la directive europ enne 20...

Reviews: