background image

29

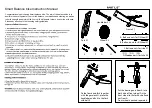
5. Reassembling the tyre and inner tube

Please avoid allowing foreign bodies 

inside the tyre. Ensure that the inner 

tube does note have any folds and is 

not squashed.

Ensure that the rim tape covers all spoke 

nipples and does not have any damage.

•  Place one edge of the rim into the tyre.

•  Push one side of the tyre completely into the 

rim.

•  Insert the valve through the valve hole in the rim 

and put the inner tube into the tyre.

•  Pull the second side of the tyre into the rim with 

the balls of your hands.

•  Ensure that the inner tube is correctly posi-

tioned.

•  In the case of Dunlop or Woods valves: Push 

the valve stem into the right position and tighten 

the cap nut.

•  Pump the inner tube up somewhat.

•  Check that the tyre is properly in place and 

runs true using the control ring on the side of 

the tyre. Adjust the positioning of the tyre with 

your hand if it does not quite run true.

•  Pump the inner tube up to recommended tyre 

pressure.

Please take note of the running direc-

tion of the tyre when installing it.

6. Fitting the wheels

Reattach the wheel securely back in the frame or 

fork with the corresponding quick release, bolted 

connection or full floating axle mechanism.

If your bicycle has disc brakes, 

please ensure that the brake discs are 

correctly secured between the brake 

pads!

Read the gear manufacturer’s instruction to cor-

rectly and safely assemble and set up derailleur 

gear systems, gear hubs and combined hub and 

derailleur gear systems.

Tighten all screws to the recommend-

ed torque. Otherwise the screws 

could break and parts could fall off 

(see page 37).

•  Connect the brake line, attach it or close the 

brake quick release.

•  Check if the brake pads are aligned with the 

brake surfaces.

• Securely attach the brake arm.

•  Test the brakes.

Brakes

Modern bicycles can be equipped with a variety 

of different braking systems.

There are various options:

Rim brakes in the front of V-brakes

If a brake pad is grazing 

against the rim:

The spring setting 

allows you to set the re-

turn force in such a way 

that both brake pads 

lift evenly from the rim 

when you release the 

brake lever. Subsequently check that the brakes 

are working correctly.

Setting up the distance between the brakes and the rim

Source: Shimano

®

 techdocs

Cantilever brakes

Spring adjust-

ment screw

Spring adjust-

ment screw

Both break pads

move to the right

Both break pads

move to the left

IDEAL MANUAL 2016_eng.indd   29

6/27/16   11:39

Summary of Contents for ATB Series

Page 1: ......

Page 2: ......

Page 3: ......

Page 4: ......

Page 5: ......

Page 6: ......

Page 7: ...s tyres 27 Tubular tyres 27 Dealing with a flat tyre 28 Brakes 29 Gear system 32 Inspection plan 34 Lubrication 36 Bolted connections 37 Specials at TT and Triathlon Bikes 38 Triathlon TT bike 38 Disc wheels special wheels 38 Electrical electronic gear shifting system 38 When you have purchased a BMX bicycle 39 How to use carbon components 40 Transporting the bicycle 41 Liability for material defe...

Page 8: ...hould inform yourself about the applicable na tional regulations in your specific country Firstly here are a few important pointers as to the rider s person which are also very important Always wear a suitable bi cycle helmet adjusted to fit your head and wear it for every ride Read the instructions sup plied by your helmet manufacturer relating to fitting the helmet properly Always wear bright cl...

Page 9: ...ll off or break This can result in seri ous accidents Check that all quick releases are safe and se cure every time you ride after your bicycle was unused even for a short period of time Regularly check that all bolts and components are secure Note that components made of composite materials i e carbon fibre often require a lower tightening torque See page 37 Common parts made of carbon fibre incl...

Page 10: ...ourself with its behaviour under braking before your first ride Single speed wheels with just one brake are not per mitted on public roads Fixie bicycles cannot freewheel which means that the pedals AL WAYS turn with bicycle s wheels Get familiar with the grip of your bicy cle pedals when they have a rubber or plastic cage Rubber and plastic pedals become very slippery under wet con ditions Ensure...

Page 11: ...ts relevant to your safety such as brakes and wheels are subjects to heavy wear which can impact the operating safety of these parts If you use parts for longer than their intend ed lifetime these can fail without warning which can in turn lead to falls and serious injury Please make these checks before continuing after a fall or if your bicy cle falls over Aluminium parts cannot be safely bent ba...

Page 12: ...and which brakes the bicycle has to be equipped with There is also an explanation of which age re strictions apply and what age riders have to be to ride where The partic ipation of children in public road traf fic is also addressed here If there is an obligation to wear a helmet it is started here Bicycles are intended for transporting one person at a time Taking another person as a passenger on ...

Page 13: ...Use on terrain Excess load Improperly repairing defects These bikes are not designed for extreme im pact This includes riding over steps bike jump ing extreme use in unauthorised biking competi tions doing tricks and performing stunts Type 4 Triathlon Time trial bikes are used on public roads smooth surfaces and paved streets Par ticipating in a competi tion is only permissible if the manufacturer...

Page 14: ...epairs to defects Bicycles are generally not designed to withstand extreme stress such as steep descents or high jumps nor heavy duty use such unauthorised competitive events tricks or stunts Type 8 Enduro spring travel up to approx 150 180 mm and appropriately equipped pedelecs can be used on public roads and off road They may be used to ride over obstacles such as roots rocks or steps Jumps are ...

Page 15: ...liable for damage resulting from use outside of intended use This applies particularly to damage resulting from non adherence to the safety instructions e g in terms of Using the bicycle on rough terrain for very high jumps steep descents or hard riding in bike parks Carrying excess weigh or making improper repairs to defects These bikes are not designed for extreme stress This includes extreme us...

Page 16: ... how to operate and service these parts Using quick releases Quick releases are systems installed on the bicy cle in place of bolted connections They consist of two parts The clamping lever which provides the necessary clamping force and the locking nut which allows you to regulate the clamping force You can change the setup of your quick release when the clamping lever is open The quick release c...

Page 17: ...el Never use the bicycle unless you are sure that the wheel has been properly secured and cannot come loose Mounting Place your wheel into the dropout below the fork leg The hub must be firmly attached in the drop out Disc brakes Ensure that the brake disk is properly inserted into the brake caliper Ensure that neither the brake disk nor the hub or the brake disk fastening screws knock against the...

Page 18: ...s of other manufacturers Through axles of other manufacturers can be tightened differently One possible way is to loos en the locknut in the dropout and to fix it after having turned it clockwise Check that all quick release fasteners and quick releases axles are firmly at tached even when your bicycle only remained unsupervised for a short time You may only start driving when all quick release fa...

Page 19: ...e of the front pedal Determining the correct seat height Set the seat to the height you estimate as correct Sit on the bicycle Allow somebody to aid you in doing this or lean against a wall or railing Place one pedal to its lowest position and put your heel onto it Your leg should now be straight If you put your foot into the correct riding posi tion your leg should be slightly bent Your foot is i...

Page 20: ...is equipped with a telescop ic seat post please ensure you read the instructions provided by the manufactur er before use Please ensure that you read the part manufacturer s operating manual when setting up and operating sus pension seat posts telescopic seat posts When adjusting the height of the seat never pull the seat post further out than the maximum extension length marked If your tube does ...

Page 21: ...it and brake without getting tired Familiarize your self with the allocation of the brake levers to the rear and the front wheel brake Some brakes are equipped with brake force limiters modulators These components are intended to prevent over braking and dangerous blocking of the wheels The braking force can suddenly in crease when the brake lever is pulled strongly or at the end of the lever move...

Page 22: ...of back pedal brakes can deteriorate substantially on long inclines This type of braking system can become very hot from continuous braking You should also us the front brake to slow down on long inclines Try to give back pedal brakes the chance to cool down and do not touch them Children s bicycle training wheels As a parent or legal guardian you have a major responsibility when your child rides ...

Page 23: ...d of equipment Carbon fibre frames and components are not permitted to carry children s seats Never attach a children s seat to the seat post Wrap and protect all suspension and moving parts on the seat and seat post Please en sure that your child cannot trap its fingers anywhere This would result in a substantial chance of injury Find out about the legal regulations which relate to the age of the...

Page 24: ...correct order Otherwise it is impossible to make a unique identification In the documentation you received from the retailer when you purchased your bicycle there is also a section where the frame num ber is entered The frame number can also be engraved on various parts of the frame It is frequently located in the seat tube the dropouts or the bottom bracket shell On no account should you ride wit...

Page 25: ...correct torque otherwise this can cause falls Before fitting the bar ends please in form yourself whether the add on has been approved by the handlebar manufacturer as only then may the bar ends be fitted You can not combine every frame and part made of carbon fiber Read the manuals of the manufacturers and ask your specialized dealer Accessories maintenance spare parts Light system Side dynamos a...

Page 26: ...ally switches on or off when the lighting system of your bicycle has a light sensor In order to remove the front wheel you first have to remove the connec tion on the light cable To refit the light cable the connecting terminal of the hub dynamo has to be fitted on the right fac ing forwards Re attach the connections correct ly and check that the lighting is working properly To do this turn the fr...

Page 27: ...th a loose mudguard brace as this could become wedged in the wheel and jam it Damaged mudguards have to be replaced by a specialist retailer before riding again In addi tion you should also regularly check whether the braces are fixed securely in the safety releases Re locking a safety release The diagram features a brace attached with a plastic clip This clip is locked into the stay on the fork T...

Page 28: ... specialist knowledge and experi ence and should only be performed in cooper ation with your specialist dealer Carefully read the attached instructions concerning the spring elements of your bicycle A typical suspension fork may look as follows The suspension fork must be adjusted accord ing to the fork manufacturer s operating instruc tions In general the fork should show noticeable movement when...

Page 29: ... Full suspension bicycles are not suit able for use with trailers and child bike trailers The bearings and attachments are not de signed to withstand this sort of force This could result in strong wear and breaks with serious consequences If you have a full suspension frame with a short seat tube which is open a the bottom the seat post can only be lowered to the point that it does not touch the s...

Page 30: ... screws of the axle housing should be loosened and tightened and not the axle nuts If the bottom bracket shell contains an eccentric bush please tighten the chain according to the instructions provided by the corresponding manufacturer Please ensure that axle nuts and boosters are correctly attached Dirt and permanent strain wear the chain The chain should be replaced as soon as it can be signific...

Page 31: ...tions Checking the hubs You can check the hub bearings as follows Lift the wheels up from the ground by first lifting the bicycle at the front then at the rear Push each wheel to start then turning The wheel should continue to turn and then slow evenly If the wheel suddenly stops the bearing is defective One exception is front wheels with a hub dynamo They have a slightly higher resistance to roll...

Page 32: ...imum per mitted tyre pressure If you replace the tyres only exchange them for the same model with the same dimensions and profile The bicycle s handling could oth erwise be negatively affected This can in turn result in accidents Tyres are available in various dimen sions The tyre dimensions are stated with normed information Example 1 46 622 states that the tyres have a width of 46 mm and the rim...

Page 33: ...ed by your manufac turer covering the tyres and rims Only use tubeless tyres on rims in tended for this purpose This will be marked on the rims with abbreviation UST for instance Only use tubeless tyres in the pre scribed way with the correct air pres sure and the recommended sealant if required Tubeless tyres can only be mounted and re moved from the rims without tools otherwise this could lead t...

Page 34: ...ur backwards somewhat Lift the bicycle slightly Lightly strike the wheel from above with the palm of the hand Take the wheel out of the frame If your bicycle has a gear hub please consult the instructions supplied by your manufacturer for removing the wheel Types of valve on bicycle tubes 3 Removing the tyre and inner tube For tubular tyres see page 27 Unscrew the valve cap the fastening nut and p...

Page 35: ...sponding quick release bolted connection or full floating axle mechanism If your bicycle has disc brakes please ensure that the brake discs are correctly secured between the brake pads Read the gear manufacturer s instruction to cor rectly and safely assemble and set up derailleur gear systems gear hubs and combined hub and derailleur gear systems Tighten all screws to the recommend ed torque Othe...

Page 36: ...ydraulic disc brakes Disc brakes The wheel can be removed without any further preparation Please note when fitting the wheel the disk must be slotted between the brake linings of the brake caliper and ultimately be centred without contact Vapour bubbles in the disc brakes Avoid permanently braking for long periods as can be the case during long steep descents The forma tion of steam bubbles and to...

Page 37: ... the case of back pedal brakes the screws on the brake arm of the chain stay have to be opened Nearly all modern brakes have much more braking power than was avail able for bicycles in former times Be careful while getting used to it Practise the use of the brakes and emergency braking ac tions in traffic free safe terrain first before partici pating in road traffic Do not brake continuous ly or o...

Page 38: ...ase or decrease the force or speed of the bike as needed In lower eas ier gears you can easily ride uphill and lower physical strain In higher gears which are harder to peddle in you can reach higher speeds and pedal at a lower cadence You should generally aim at riding the bike at a higher cadence and in lower gears Modern bicycles can be equipped with a variety of different gear systems There ar...

Page 39: ...ons so that your preferred pedalling frequency is always maintained Select Manual mode and directly regulate the continuous transmission on the rotary handle when you want to choose your gear ra tio The desired gear changing mode can be selected with a button on the ro tary handle The display on the rotary handle show whether the automatic or the manual mode has been se lected When the manual mode...

Page 40: ...ear this noise will no longer appear The use of spoke guards is required For City bikes Trekking bikes and Youth bikes they are mandatory Oth erwise only minor setup errors could lead to the chain or the entire rear derailleur falling between the sprockets and the spokes Inspection plan Only exchange or replace compo nents of your bicycle with components of the same brand and type The guar antee a...

Page 41: ...n Chain with suitable lubricant Check Firm attachment of all screw connections Every 1000 km Activity to be performed Check the hub brake lubricate with brake shell grease or replace as required special ist dealer Every 3000 km Activity to be performed To be checked cleaned and replaced as re quired by a specialist dealer Hubs Headset Brakes Pedals Gear system After riding in the rain Activity to ...

Page 42: ... remove dirt after riding in the rain as pre scribed by the manufacturer Special spraying oil Thread in case of installation During installation Installation grease Contact surfaces of carbon fibre parts During installation Carbon fibre installation paste Sliding surfaces of quick releases Once a year Grease spray oil Metal seat posts in the metal frame During installation Grease Joints of gear sy...

Page 43: ...s 6 Nm Dynamo attachment 10 Nm Seat clamp on carbon frames 5 Nm Drinks bottle holder on carbon frames 2 Nm Differences for carbon components Bolted connection Torque Front derailleur bracket attach ment screw 3 Nm Shift lever attachment screw 3 Nm Brake lever attachment screw 3 Nm Handlebars stem clamping 5 Nm Stem fork tube clamping 4 Nm Screw connection Thread Fastening torque max Seat clamp loo...

Page 44: ...le and care for them Special wheels can behave different ly than you are used to when riding braking and steering Trispokes and disk wheels in particular are more sensitive to wind than conventional wheels Rims made of something other than alumini um can provide different and perhaps con siderably less effective braking than you are used to Familiarise yourself with your new bicycle and its behavi...

Page 45: ... compo nents are securely fastened and regularly checked by a specialist The shape of the handlebars and the specialised application cause great forces to impact on the handlebars and stem Have these parts securely attached by a specialist and checked on a regular basis The safe fit of the brake cables in the rotor is important Wear and tear may cause them to loosen Ensure that the components are ...

Page 46: ... can break or wrap to such an extent that you could fall Therefore please always adhere to the in structions supplied by the manufacturer or ask for advice from a specialist Use a torque spanner to ensure that you get the required torque Carbon parts may not be applied with grease or oil Special assembly paste is avail able for assembling and safely securing car bon components with a low mounting ...

Page 47: ...ays transport bicycles on their running sur faces when not otherwise prescribed by the car rier manufacturer You may not attach the bicycle to the roof rack or rear carrier by its crank set It may come loose and cause a severe accident Bikes with a Carbon frames must not be trans porter with roof carriers Most roof carries Most roof carriers fix the frame bike with a clamp that fixes a frame tube ...

Page 48: ...e are subject to wear due to use Pedelecs and e bikes are also subject to battery wear Additional guarantees that might be provided by the manufacturer of your bicycle or Pedelec e bike are listed on page C7 on the cover Details of the conditions extent and possible use of such a guarantee are specified in the respective guar antee conditions In the case of a defect possible lia bility claim pleas...

Page 49: ...e technology of Pedelecs has advanced considerably during recent years Before the first ride with your Pedelec read this Original Instructions careful ly You must read part concerning the bicycle technology too You have to retain these operating instructions so that you can look up things and get information in future Hand these instructions to any person who uses maintains or repairs this Pedelec...

Page 50: ...the left grip a central display and a push ing aid at the right grip Your pedelec might be equipped and looking differently Different types of Pedelec are produced of differ ent interest and target groups They usually differ in the position of the motor or battery Your Pedelec may look different from the im ages shown here but the general functions described are the same Read the operating in stru...

Page 51: ...e same EU laws as a normal bicycle In the EU the use of cycle tracks is subject to the same laws as bi cycles Outside of the EU as well as in some re gions within the EU as special regulations could apply Please inform yourself about the applica ble national requirements Your Pedelec may have a pushing aid or our specialist dealer may install one for you It allows movement of your Pedelec at up to...

Page 52: ...7 Possible positions of quick releases through axles Notes on electrical and electronic compo nents Your pedelec is supplied with the corresponding operating manual for the integrated motor from the component manufacturer Information concerning operation mainte nance and servicing as well as technical data can be found in these instructions and on the websites of the respective component manufac T...

Page 53: ...dels allow you to charge the battery while it is mounted in the Pedelec Read the at tached component manufacturer s operating in structions for this purpose You can also remove the battery from its holder and charge it at an other location This is particularly recommended under cold conditions so that the battery can be charged in a warmer environment This facilitates shorter charging times Note t...

Page 54: ...o a socket with a 230 to 240 V current For safety reasons the charger has to stand and to be used on a dry and nonflammable surface Never place or store several accus on each other Especialy not while charging 2 The charging process starts as soon as the plug of the charger is connected to the bat tery When the charger has an LED it will light up Progress in charging the battery is indicat ed by t...

Page 55: ... a display at the handlebars The system is activated by pressing the battery button and shows the charging state and capacity of the battery either by a percent age value or by the way LEDs light up and the number of them More details can be found in the attached origi nal battery manufacturer s operating instructions Check the charging state and the capacity of the battery before every ride Only ...

Page 56: ... motor will not provide any support The motor power switches off at a speed of approx 25 km h This is a legal regulation If the Pedelec motor helped to generate a speed hight er than 25 km h the Pedelec would no longer be classified as a bicycle that does not require reg istration The motor of the S Pedelec has more pow er 350 to 500 Watt and only switches off at a speed of 45 km h You can also ri...

Page 57: ...ome Pedelecs can generate energy with their motor and charge the battery for example while riding downhil The motor acts like a generator brakes the bicycle and produces electricity that is used to load the battery This method can sign ficantly increase the potential range of a trip The recuperation system can also be used as a con veninet engine brake on steep or long inclines Your system operati...

Page 58: ...hen ex changes are required Maintenance and cleaning of live parts may only be performed by specialist dealer Only have the components of your Pedelec replaced with original parts that have been approved by the manufacturer Warranty and guarantee claims may otherwise become inval id Remove the battery before cleaning your Pedelec Take care not to touch and thus connect con tacts when you clean or ...

Page 59: ...hange the battery for a new one as required Replacement batteries are available from your specialist dealer Batteries for Pedelelecs and electrical bicy cles Batteries for Pedelecs and electrical bicycles must be treated as dangerous goods and are therefore subject to special marking retirements They must always be disposed of through a spe cialist dealer or the manufacturer Accus are no waste For...

Page 60: ...anged Problems encountered 1st inspection After approx 200 kilometres Work done Materials used Date signature Retailer stamp 2nd inspection After approx 1000 kilometres Work done Materials used Date signature Retailer stamp Inspections IDEAL MANUAL 2016_eng indd 54 6 27 16 11 39 ...

Page 61: ...tres Work done Materials used Date signature Retailer stamp 4th inspection Work done Materials used Date signature Retailer stamp 5th inspection Work done Materials used Date signature Retailer stamp IDEAL MANUAL 2016_eng indd 55 6 27 16 11 39 ...

Page 62: ...56 Notes IDEAL MANUAL 2016_eng indd 56 6 27 16 11 39 ...

Page 63: ......

Page 64: ......

Reviews: