25
APOLLO A1
QUADCOPTER OPERATOR’S MANUAL
UPDATiNg fiRMwARE
Firmware updates may periodically be released that provide enhancements and fixes that improve flight performance
and user functions. Updating the flight controller’s firmware is fast and easy.
PRIOR TO UPDATING THE FIRMWARE, YOU MUST REMOVE THE PROPELLERS FROM THE QUADCOPTER!
This must be done for safety reasons. Once you have installed the updated firmware, verified the correct default
programming values and tested and verified the quadcopter’s flight controls, only then should you reinstall the
propellers.
CONNECTiNg yOUR QUADCOPTER
Performing a firmware update requires the use of the Autopilot Configuration program. Please make sure you’ve
installed the Autopilot Configuration program onto your PC or laptop as described in the Installing the Autopilot
Configuration Program section on page XX. In addition, be aware that the connection sequence for updating the
firmware is the opposite of the connection sequence for changing programming values.
1) Connect the quadcopter to your PC or laptop a using a mini USB cable (not included).
2) Pull throttle control stick all the way back, verify that the Flight Mode Switch is in the Manual Mode (1) position,
then turn the transmitter ON.
3) Place the quadcopter right-side up on a flat, level surface, then plug the LiPo battery into the matching power
connector. The LEDs on the quadcopter should illuminate.
DOwNLOADiNg THE CURRENT fiRMwARE
Download the current firmware version to your desktop from the Files section of the Apollo A1 quadcopter product
page here:
http://www.hobbypeople.net/index.php/quads-helis/quadcopter/idea-fly-apollo-a1-gen-2-rtf-quad-copter-
w-carbon-props-drone.html
1) With the quadcopter connected to your PC or laptop, open the Autopilot Configuration program.
2) Press the Open USB button. The Update Firmware dialog box will appear.
If the Update Firmware dialog box does not appear, you may not have connected the quadcopter in the
incorrect order. Unplug the LiPo battery, turn the transmitter OFF, then unplug the USB cable. Reconnect the
quadcopter, making sure to do it in the correct order - connect the USB cable, turn the transmitter ON, then plug
the LiPo battery in.
UPDATiNg THE fiRMwARE
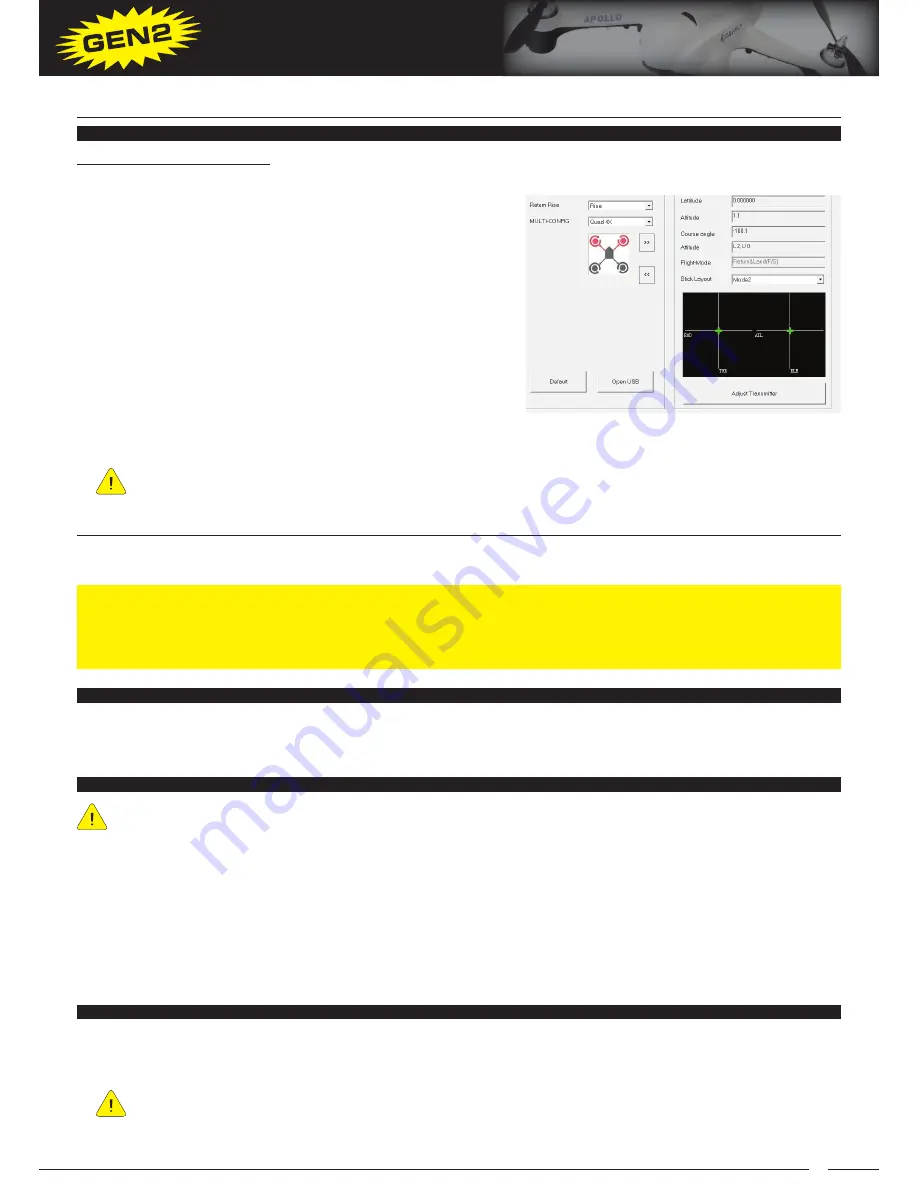
Adjust Transmitter Settings:
COURSE ANGLE
- This value displays the quadcopter’s current course angle deviation in degrees, relative to the
position the nose of the quadcopter was in when the compass
was last calibrated. This value does not show the actual course.
FLIGHT-MODE
- This value displays the Flight Mode that is as-
signed to the current Flight Mode Switch position. You are able
to verify which Flight Modes are programmed to the Flight Mode
Switch positions by moving the Flight Mode Switch and seeing
which Flight Mode is displayed.
STICK LAYOUT
- This option allows you to select the control
stick mode, so you can view the current status of the control
stick positions. When the control sticks are centered, the values
should all be green. If any values are red when the control sticks
are centered, you should first verify that the trim switches are all
centered. If after centering the trim switches, there are still red values, the control sticks should be calibrated. For
more information, see the Control Stick Calibration section on pages XX and XX.
The included transmitter operates in Mode 2, so you should select Mode 2 prior to checking the calibration
settings.
AUTOPiLOT CONfigURATiON PROgRAMMiNg
PROgRAMMiNg vALUE DEfiNiTiONS, CONTiNUED....


