I-7242D user manual
I-7242D DeviceNet/Modbus RTU Gateway User’s Manual, July 2006, Version 1.1 117/124
9.1 Application 1
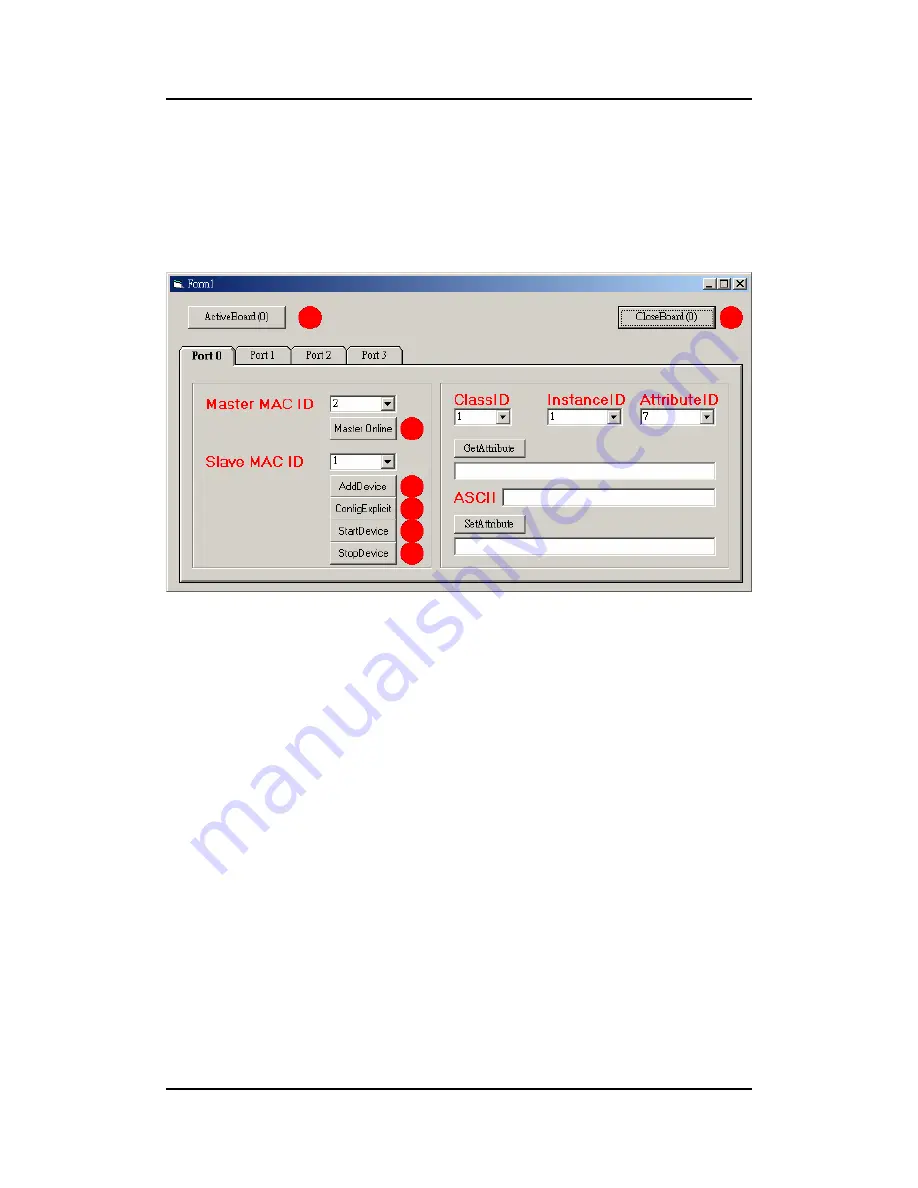
The demo1 program shows users how to set/get the attribute value in the
I-7242D. The I/O data of the Modbus devices also can be driven in the same
way. The frame of demo1 program is shown as figure 9-2. Please do the
following steps to apply the I-7242D in DeviceNet network.
Figure 9-2 The frame of Demo1 program
Step 1:
Start to run the demo program. And first, you must to active the
PISO-CAN board by clicking “Active board” button.
Step 2:
Select “Master MAC ID” as the Master ID and “Slave MAC ID” according
to the I-7242D’s MAC ID in the DeviceNet network. The master device need to
be in on-line mode by clicking the “Master Online” button. The next, add the
I-7242D to the list in PISO-CAN200/400 by clicking the “AddDevice” button.
Then, configure the explicit connection by clicking the “ConfigExplicit” button.
Finally, start to communicate with I-7242D by “StartDevice” button.
Step 3:
When completing the above steps, users can get/set the attribute value
supported in I-7242D in the program. Please refer to chapter 4 to understand
what attributes provided by the I-7242D.


