INSTRUCTION MANUAL
iM323iM323GiM324iM324G
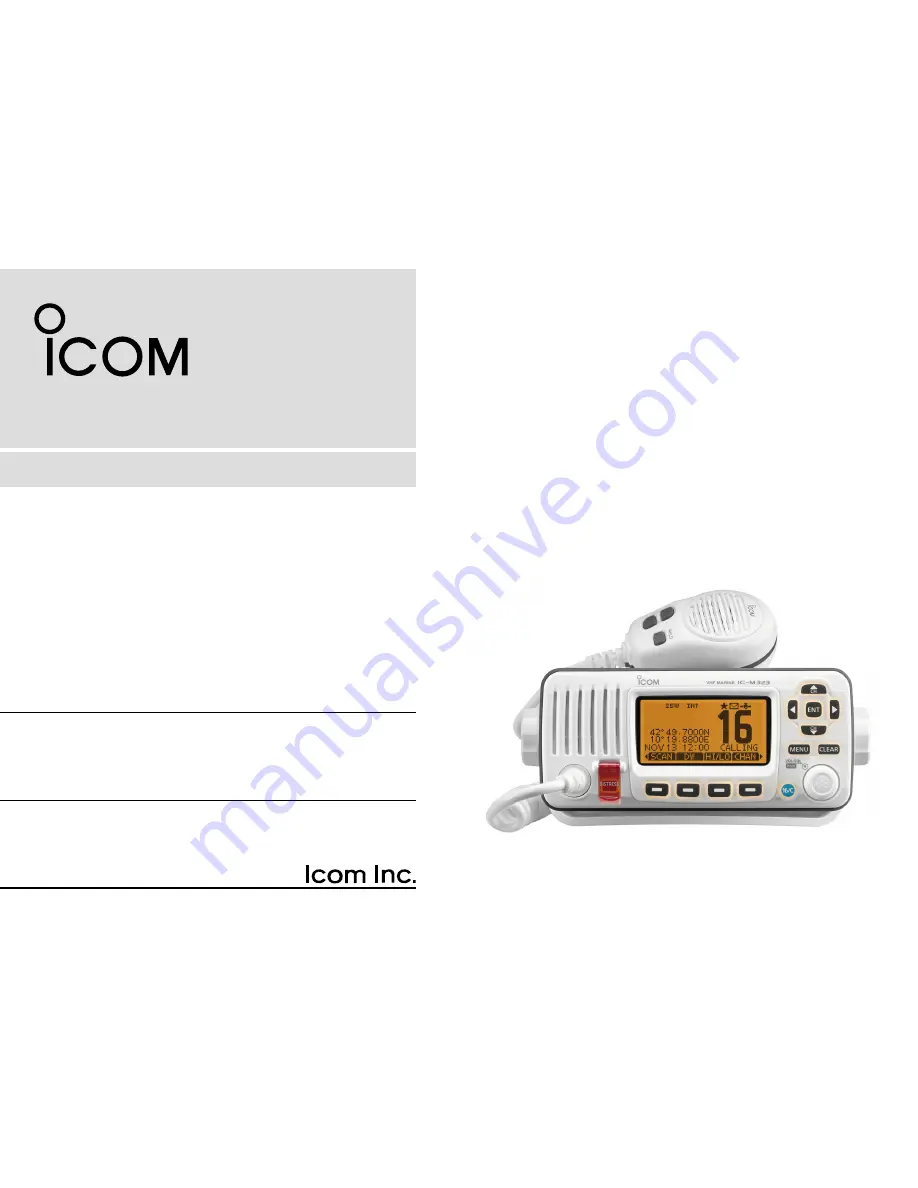
VHF MARINE TRANSCEIVER
This device complies with Part 15 of the FCC Rules. Operation is subject to the condition that this device does not cause harmful interference.
Page 1: ...UCTION MANUAL iM323 iM323G iM324 iM324G VHF MARINE TRANSCEIVER This device complies with Part 15 of the FCC Rules Operation is subject to the condition that this device does not cause harmful interfer...
Page 2: ...lt in DSC meets ITU Class D requirement Rugged waterproof construction Easy to make an individual DSC calls using the optional MA 500TR Class B AIS Transponder IMPORTANT READ ALL INSTRUCTIONS carefull...
Page 3: ...d above ii INSTALLATION NOTE Installation The installation of this equipment should be made in such a manner as to respect the EC recommended electromagnetic field exposure limits 1999 519 EC The maxi...
Page 4: ...ius Do not transmit with radio and antenna when persons are within the MPE radius of the antenna unless such persons such as driver or radio operator are shielded from antenna field by a grounded meta...
Page 5: ...mettre l aide de la radio et de l antenne lorsque des personnes se trouvent l int rieur du rayon d exposition maximale admissible de cette antenne moins que ces personnes comme le conducteur ou l op...
Page 6: ...n raisonnable contre le brouillage pr judiciable lorsque cet appareil est utilis dans un environnement commercial Cet quipement g n re utilise et peut mettre un rayonnement de fr quence radio S il n a...
Page 7: ...ass DO NOT use or place the transceiver in areas with tem peratures below 20 C 4 F or above 60 C 140 F or in areas subject to direct sunlight such as the dashboard DO NOT use harsh solvents such as be...
Page 8: ...onnement solaire direct telles le tableau de bord NE PAS nettoyer l appareil avec des solvants agressifs tels que benz ne ou alcool susceptibles d endommager les sur faces expos es du bo tier En cas d...
Page 9: ...Slovakia Slovenia Spain Sweden Switzerland Turkey United Kingdom LI LT LU MT NL NO PL PT RO SK SI ES SE CH TR GB TABLE OF CONTENTS FOREWORD i IMPORTANT i EXPLICIT DEFINITIONS i IN CASE OF EMERGENCY ii...
Page 10: ...Distress call 23 Transmitting DSC calls 27 Receiving DSC calls 45 Transmitt ed Call log 57 Receiv ed Call log 58 DSC Settings 60 Making an Individual call using an AIS transponder 64 8 MENU SCREEN OP...
Page 11: ...plication This government issued license states the call sign which is your craft s identification for radio purposes 2 OPERATOR S LICENSE A Restricted Radiotelephone Operator Permit is the license mo...
Page 12: ...nd so on pp 11 66 Push to check Favorite channels change the scanning direction or manually resume a scan p 17 t CLEAR KEY CLEAR pp 7 12 66 Push to cancel the entered data or to return to the previ ou...
Page 13: ...a regular channel Channel Weather channel pp 9 11 Push to selects and toggles the regular channel and Weather channel Only U S A and Australian version transceivers AquaQuake p 15 While holding down...
Page 14: ...9 Appears when the Call channel is selected t DUPLEX ICON p 10 Appears when a duplex channel is selected y FAVORITE CHANNEL ICON p 17 Appears when a Favorite Tag channel is selected u MESSAGE ICON p...
Page 15: ...is connect ed and no time is manually input NOTE for the IC M323 and IC M324 These models do not come with the internal GPS Therefore the GPS receiver needs to be connected or the time manually needs...
Page 16: ...to only low power While holding down HI LO turn ON the power to turn the Microphone Lock function ON or OFF p 13 Softkey function Various functions can be assigned to the softkeys When the key functi...
Page 17: ...code turn OFF the power then turn it ON again Enter your MMSI code in the following manner e Select a desired number using Dial or Push ENT or Dial to set it To move the cursor select either arrow or...
Page 18: ...de turn OFF the power then turn it ON again Enter your ATIS code in the following manner e Select a desired number using Dial or Push ENT or Dial to set it To move the cursor select either arrow or th...
Page 19: ...el CH WX appears only for U S A version transceiver Call channel D Each regular channel group has a separate leisure use Call channel The Call channel is monitored during Tri watch The Call channels c...
Page 20: ...e Dial or push e to select CHAN Group and then push ENT Rotate Dial or push r to select the desired channel group and then push ENT U S A USA International INT CAN Canada ATIS or DSC channel groups ma...
Page 21: ...shing Y Z on the microphone selects only Favorite chan nels When weather alert is OFF When weather alert is ON Adjusting the volume squelch level The volume and squelch level can be adjusted with VOL...
Page 22: ...and 1W appears when low power is selected Choose low power for short range communications choose high power for longer distance communications Some channels are for only low power Hold down PTT to tra...
Page 23: ...channel as the Call t channel Push CLEAR to cancel Channel name programming Each channel can be assigned a unique alphanumeric ID of up to 10 characters Capital letters 0 to 9 some symbols _ and a sp...
Page 24: ...ous screen Microphone Lock function The Microphone Lock function electrically locks and the HI LO keys on the supplied microphone This prevents accidental channel changes and function access While hol...
Page 25: ...VOL SQL Dial Push VOL SQL Dial one or more times to display the q backlight adjustment screen Rotate VOL SQL Dial to adjust the brightness of the w LCD and key backlight and then push ENT The desired...
Page 26: ...p 77 PRIORITY SCAN The Priority scan sequentially searches through all Favor ite channels while monitoring Channel 16 When a signal is detected on Channel 16 the scan pauses until the signal disappea...
Page 27: ...Favorite channels Starting a scan First set the scan type Priority or Normal scan and scan resume timer in the Menu screen p 68 Select the desired channel group p 10 q Set the Favorite channels as de...
Page 28: ...during Tri watch A beep tone sounds when a signal is received on Channel 16 To cancel Dualwatch or Tri watch push DW again r DUALWATCH TRI WATCH SIMULATION Dualwatch Tri watch Call channel Ch 88 Ch 16...
Page 29: ...as 0 and the second digit is other than 0 for a Group ID The first two digits are 0 for any Coast station ID Repeat step r e to enter all 9 digits After entering the 9 digit code push ENT or Dial to s...
Page 30: ...ID The first two digits are 0 for any Coast station ID Repeat step r e to input the specific 9 digits group code After entering the 9 digit code push ENT or Dial to set it t Group ID name programming...
Page 31: ...s case push MENU to exit the MENU screen Rotate Dial or push w Y Z to select a desired ID name then push DEL Push OK to delete the ID and return to the INDIVIDUAL e ID or GROUP ID list screen Push CAN...
Page 32: ...desired number using Dial or Y Z Push ENT or Dial to set it To move the cursor select either arrow or then push ENT or Dial Select N North latitude or S South latitude when the cursor is on the N or...
Page 33: ...is automatically selected and the Distress call is transmitted After transmitting the call the transceiver waits for an ac w knowledgment call The Distress call is automatically transmitted every 3 5...
Page 34: ...The nature of the distress is stored for 10 minutes after a selec tion is made Push EXIT to return to the normal operating mode Push BACK to return to the previous screen The Distress call confirmatio...
Page 35: ...using the microphone A distress alert contains Nature of distress Selected in step w Position information The latest GPS or manual input position is held for 23 5 hours or until the power is turned O...
Page 36: ...BACK to return to waiting for an acknowledgement call Push FINISH e Push EXIT to return to waiting for an acknowledgement call The Distress cancel call is transmitted r Channel 16 is automatically se...
Page 37: ...operating mode Push BACK to return to the previous screen About Manual Inputting Enter a desired individual ID in the following way Select a desired number using Dial or Push ENT or Dial to set it To...
Page 38: ...l an acknowledgement is re y ceived When the acknowledgement Able to comply is received u beeps sound and the screen below is displayed Push ALARM OFF to stop the beeps and then select the intership c...
Page 39: ...tered the MENU screen After communicating push EXIT to return to the normal i operating mode Convenient When the optional MA 500TR CLASS B AIS TRANSPONDER is connected to your transceiver you can tran...
Page 40: ...w is displayed Push ALARM OFF to stop the beeps Push ACK w Select one of three options then push ENT e Push EXIT to return to the normal operating mode Push BACK to return to the previous screen Able...
Page 41: ...g mode u Manual ACK Enter INDIVIDUAL ACK in the DSC CALLS menu q When no Individual call has been received Individual ACK item will not be displayed Select a desired individual address or ID code to r...
Page 42: ...turn to the normal operating mode Push BACK to return to the previous screen Select a desired intership channel using Dial or e Y CH Z CH then push ENT Intership channels are already preset into the t...
Page 43: ...sh CALL to transmit the Group call t If Channel 70 is busy the transceiver stands by until the channel becomes clear After the Group call has been transmitted the following y screen is displayed Annou...
Page 44: ...ries Push EXIT to return to the normal operating mode Push BACK to return to the previous screen Select a desired traffic channel using Dial or e Y Z then push Dial or ENT The selected channel is disp...
Page 45: ...Dial or Y Z then push Dial or ENT The ID code for the Position Request Call can be set irst p 20 When Manual Input is selected set a desired 9 digit MMSI ID code for the individual you wish to call A...
Page 46: ...l becomes clear After the Position Request Call has been transmitted the t following screen is displayed When the acknowledgement call is received beeps sound y and the following screen is displayed P...
Page 47: ...ual Input using Dial or Y Z then push Dial or ENT The ID code for the Individual call can be set irst p 20 When Manual Input is selected set a desired 9 digit MMSI ID code for the individual you wish...
Page 48: ...tion and time have been manually programmed the screen shown below appears Edit your latitude and longitude position and UTC time as follows Push CHG then edit your latitude and longitude position and...
Page 49: ...ut using Dial or Y Z then push Dial or ENT The ID code for the Individual call can be set irst p 20 When Manual Input is selected set a desired 9 digit MMSI ID code for the individual you wish to call...
Page 50: ...l becomes clear After the Polling Request Call has been transmitted the t following screen is displayed When the acknowledgement call is received beeps sound y and the following screen is displayed Pu...
Page 51: ...e Individual call can be set irst p 19 When Manual Input is selected set the 9 digit MMSI ID code for the individual you wish to call Push EXIT to return to the normal operating mode Push BACK to retu...
Page 52: ...by until the channel becomes clear After the Test call has been transmitted the following t screen is displayed When the acknowledgement call is received beeps sound y and the following screen is disp...
Page 53: ...layed Push ALARM OFF to stop the beeps Push ACK w Push EXIT to return to the normal operating mode Push INFO to display the Test call information About Received call information Push EXIT to return to...
Page 54: ...mal operating mode Push BACK to return to the previous screen Select a desired Test call to reply to using Dial or w Y Z then push Dial or ENT The Test ACK confirmation screen is displayed e Push CALL...
Page 55: ...ceived beeps sound q and the screen shown below is displayed Push ALARM OFF to stop the beeps Push ACK w Push EXIT to return to the normal operating mode Push INFO to display the Test call information...
Page 56: ...rmal operating mode Push BACK to return to the previous screen Select a desired Position Request call to reply to using w Dial or Y Z then push Dial or ENT The Position Reply call confirmation screen...
Page 57: ...e position and UTC time as follows Push CHG then edit your latitude and longitude posi tion and UTC time Select a desired number using Dial or Y Z Push ENT or Dial to set it To move the cursor select...
Page 58: ...w Push EXIT to return to the normal operating mode Push INFO to display the Position Report Request call informa tion About Received call information Push EXIT to return to the normal operating mode...
Page 59: ...o return to the normal operating mode Push BACK to return to the previous screen Select a desired Position Report Request call to reply to w using Dial or Y Z then push Dial or ENT The Position Report...
Page 60: ...the screen as shown below is displayed Push ALARM OFF to stop the beeps Push ACK w Push EXIT to return to the normal operating mode Push INFO to display the Polling Request call information About Rece...
Page 61: ...ating mode Push BACK to return to the previous screen Select a desired Polling Request call to be replied using w Dial or Y Z then push Dial or ENT The Polling Request Reply call confirmation screen i...
Page 62: ...select your desired action w IGN Push to return to the normal operating mode The transceiver exits the DSC mode By pushing PTT the transceiver also exits the DSC mode continues to blink and the Call i...
Page 63: ...y to select your desired action w IGN Push to return to the normal operating mode The transceiver exits the DSC mode By pushing PTT the transceiver also exits the DSC mode continues to blink and the C...
Page 64: ...esired action w IGN Push to ignore the Call and return to the normal operating mode The transceiver exits the DSC mode continues to blink and the Call is stored in the Received Call Log INFO Push to d...
Page 65: ...ear depending on the received Category Push a softkey to select your desired action w IGN Push to ignore the Call and return to the normal operat ing mode The transceiver exits the DSC mode continues...
Page 66: ...is not pushed within 2 minutes the next screen may appear depending on the received Category Push a softkey to select your desired action w IGN Push to ignore the Call and return to the normal operat...
Page 67: ...ending on the received Category Push a softkey to select your desired action w IGN Push to ignore the Call and return to the normal operat ing mode The transceiver exits the DSC mode continues to blin...
Page 68: ...alarm and the blinking q backlight If ALARM OFF is not pushed within 2 minutes the next screen may appear depending on the received Category Push a softkey to select your desired action w EXIT Push to...
Page 69: ...xt screen may appear depending on the received Category Push a softkey to select your desired action w IGN Push to ignore the Call and return to the normal operat ing mode The transceiver exits the DS...
Page 70: ...SC mode continues to blink and the Call is stored in the Received Call Log Transmitted Call log The transceiver automatically stores up to 50 transmitted calls and the logs can be used as a supplement...
Page 71: ...n MENU DSC Calls Received Call Log Push MENU Rotate Dial then push ENT Push w Y Z to select Distress then push ENT The Distress messages are stored in Distress appears when there are unread DSC messag...
Page 72: ...en there are no unread DSC messages No icon appears when there are no DSC messages Push BACK to return to the previous screen Push EXIT to return to the normal operating mode Push e Y Z to select the...
Page 73: ...eply Polling Re ply or Test Acknowledgement Call respectively When INDIVIDUAL ACK is set to Auto TX the trans ceiver automatically transmits the Acknowledgment call including Unable to Comply No Reaso...
Page 74: ...el 16 Switch function to Auto No Delay 10 Second Delay or OFF then push ENT Push BACK to return to the previous screen default Auto No Delay After receiving a Distress call and ACPT is pushed on the c...
Page 75: ...Rotate Dial or push e Y Z to set the Alarm setting to ON or OFF Push EXIT to return to the normal operating mode r Channel 70 Squelch level D Set the squelch level on Channel 70 The transceiver has 1...
Page 76: ...ttings DSC Loop Test Push MENU Rotate Dial then push ENT Push ENT to start the DSC loop test w Push BACK to cancel and return to the DSC Settings menu When the transmit DSC and receive DSC signals are...
Page 77: ...the normal operating mode Oth erwise you cannot make an individual DSC call using the tran sponder Push DSC to display the voice channel selection screen w and then push Y or Z to select a desired voi...
Page 78: ...stop the beeps and then select the intership channel specified in step w A different intership channel will be selected if the station you called cannot use the channel To reply push PTT and speak at...
Page 79: ...tion Example Set the channel group to USA Push MENU q Rotate Dial or push w to select the root item Radio Settings and then push ENT If or is continuously held down the items are sequentially highligh...
Page 80: ...61 Group ID p 20 Alarm p 62 Individual ACK p 60 CH 70 SQL Level p 63 Position ACK p 60 DSC Loop Test p 63 3Appears only when no GPS information is received Radio Settings D Item Ref Item Ref Scan Typ...
Page 81: ...scan pauses until the signal disappears Normal scan When ON is selected the scan pauses for 5 seconds and then resumes even if a signal has been received on any channel Priority scan When ON is select...
Page 82: ...the tones to have confirmation beeps sound when a key is pushed Key Assignment D Desired functions can be assigned to Dial and the softkeys When the KEY ASSIGNMENT screen is displayed rotate q Dial o...
Page 83: ...tating Dial adjusts the audio volume CH is assigned to the 3rd position and pushing Dial three times selects CH The channel number is displayed and ro tating Dial will select the desired channel You c...
Page 84: ...ush ENT to set it is displayed next to the selected option Push EXIT to exit the Menu screen e Push CLEAR or BACK to return to the previous screen Not DSC Related Default 10 min When the LCD displays...
Page 85: ...a output Default OFF When receiving a DSC call this function makes the trans ceiver send the DSC data from its NMEA Output port to a connected device All Stations Outputs the call from any vessel from...
Page 86: ...ther ships Green Listener B Data L NMEA Out Yellow Listener A Data H NMEA Out Connect to NMEA Out lines of a GPS receiver for position data A NMEA 0183 ver 2 0 or later RMC GGA GNS GLL and VTG sentenc...
Page 87: ...e a PH M3 6 screw not supplied Connect to the MA 500TR D Connect the transceiver to the high density D Sub 15 pin connector of the MA 500TR using the OPC 2014 cable Af ter connecting an Individual DSC...
Page 88: ...ctioning track down the source of the problem repair it and replace the damaged fuse with a new one of the proper rating Fuse rating 10 A Cleaning If the transceiver becomes dusty or dirty wipe it cle...
Page 89: ...t 1 meter away from the vessel s magnetic navigation compass NOTE Check the installation angle the function display may not be easy to read at some angles NOTE for the IC M323G IC M324G IC M323G IC M3...
Page 90: ...mount the transceiver Slide the transceiver through the hole as shown below w Attach the clamps on either side of the transceiver with 2 e M5 8 mm supplied bolts Make sure that the clamps align parall...
Page 91: ...ately 180 W 82 H 135 D mm Projections not included Weight approximately 1 2 kg Transmitter D Output power 25 W 1 W Modulation system Variable reactance frequency modulation Max frequency deviation 5 0...
Page 92: ...LASS B AIS TRANSPONDER To transmit individual DSC calls to a selected AIS targets Approved Icom optional equipment is designed for optimal perfor mance when used with an Icom transceiver Icom is not r...
Page 93: ...160 925 76 4 156 825 156 825 86 157 325 161 925 07 156 350 160 950 17 2 156 850 156 850 27 157 350 161 950 67 156 375 156 375 77 156 875 156 875 87 157 375 157 375 P4 3 161 425 161 425 88 157 425 157...
Page 94: ...000 60 156 025 160 625 61A 61A 156 075 156 075 62A 156 125 156 125 63A 156 175 156 175 64 156 225 160 825 64A 64A 156 225 156 225 65A 65A 156 275 156 275 66A 66A 1 156 325 156 325 67 2 67 156 375 156...
Page 95: ...89 12 TEMPLATE 1 2 3 4 5 6 7 8 9 10 11 12 13 14 15 16 Cut here Unit mm R12 Max 180 82 165 1 62 4...
Page 96: ......
Page 97: ...table level Remove the water with the AquaQuake func tion p 14 p 14 p 15 Transmitting is impossi ble or high power can not be selected Some channels are programmed for low power or receive only by reg...
Page 98: ...MEMO...
Page 99: ...MEMO...
Page 100: ...Osaka 547 0003 Japan A 7182D 1EX Printed in Japan 2014 Icom Inc Printed on recycled paper with soy ink Intended Country of Use AT FI IT PL GB RO BE FR LV PT IS TR CY DE LT SK LI HR CZ GR LU SI NO DK...