Installation
22
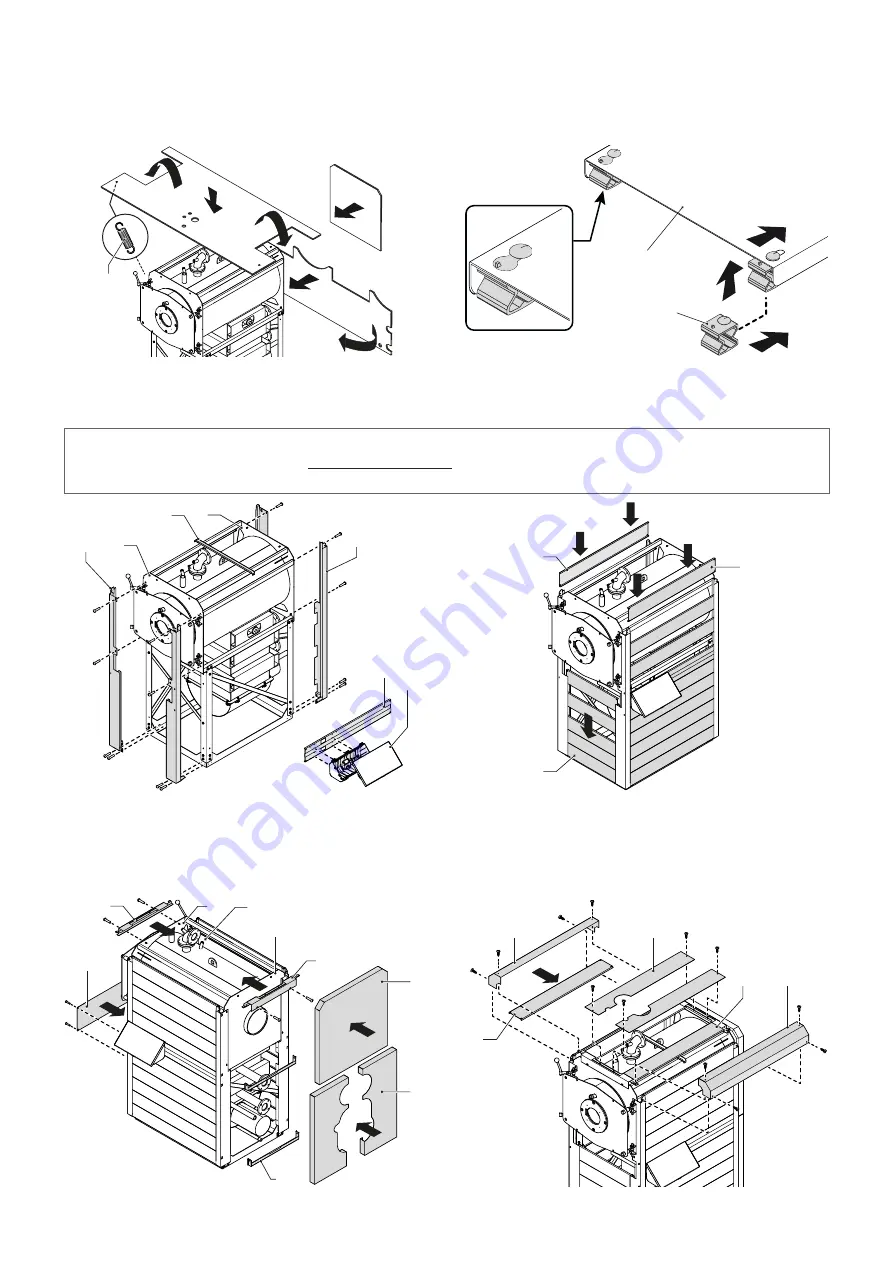
INSULATING CASING ASSEMBLY
To fit the insulating casing proceed as follows:
–
wrap the thermally insulating mats around the body del Gruppo Termico and lock them with the supplied springs (1)
–
prepare all the slats (2) inserting the locking plugs (3) in the corners of each one of them, as shown in the figure below
1
2
3
–
open the control panel (4) and fasten it to the panel supporting slat (5) using the supplied screws and nuts
–
fasten the front (7) and rear (8) pillars to the base and to the plates (6) using the supplied screws and nuts
–
insert the slats (2) on the lateral and front side
m
IMPORTANT
–
The panel supporting slat (5) must be the seventh one on the side featuring the control panel.
–
The cross beam (9) must be fastened to the two square tubes to support the upper slats.
8
7
5
6
6
4
9
2
2
2
–
insert the control panel probes in the pockets (10) located in the Boiler and properly route the electrical cables for the
required connections
–
fasten the two cross beams (11) to the plates (6), insert the upper slats (12), fasten the central jigs (13) and the end profiles (14)
using the supplied self-threading screws
–
fasten the front plate (15) and the three rear closing panels (16).
16
16
11
6
10
11
9
6
15
14
12
14
12
13


