20
PREP
ARING THE
APPLIANCE
HOW TO UNPACK THE APPLIANCE (versions with PM)
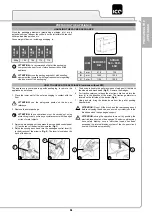
The appliance is contained in specific packaging, to remove the
appliance do as follows:
1. Place the lower part of the outer packaging in contact with the
floor.
ATTENTION:
use the pictograms printed on the box as
reference.
2. Remove the outer package.
ATTENTION:
these operations must be carried out using
protective gloves to avoid any possible contact with the edges
or tips of metal objects.
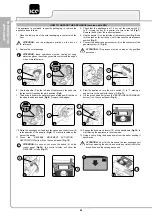
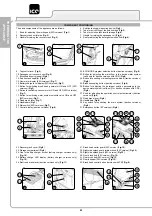
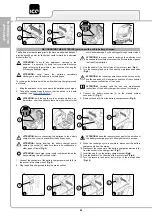
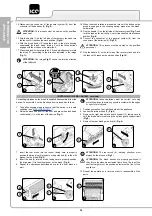
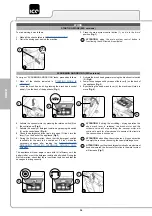
3. Check that the appliance is off, if not, set the main switch (1)
to “0”, turning the key (2) a quarter of a turn to the left (
Fig.1
).
Remove the key from the instrument panel.
4. Grip the handle (3) on the left side of the recovery tank (
Fig.2
) and
turn the tank as far as it will go, until it reaches the maintenance
position (
Fig.3
).
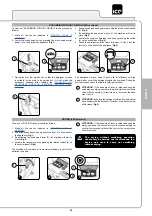
5. Connect the battery hopper connector (4) to the connector of the
general system (5) (
Fig. 4
).
ATTENTION:
This process must be carried out by qualified
personnel.
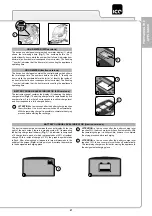
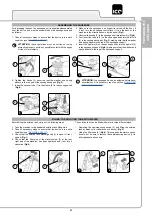
6. Grip the handle (3) on the left side of the recovery tank and turn
the tank until it reaches the work position (
Fig.5
).
7.
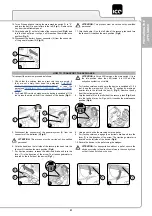
The device is fixed to the pallet by means of wedges (6) that block
the wheels and brush head (
Fig.6
). Remove the wedges.
8.
Start the appliance, turn the main switch (1) to "I", making a
quarter turn to the right with the key (2)
Fig.7)
).
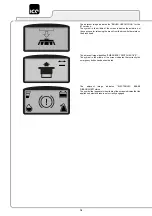
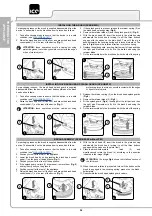
9. Lift the brush head unit, press the “BRUSH HEAD COMMAND”
button (7) on the control panel (
Fig.8
).
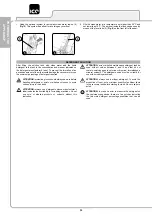
10. Raise the squeegee unit and turn the squeegee control lever (8)
in the direction of the arrow in (
Fig.9
). The lever is located on the
back of the device.
11. Press the “REVERSE MOVEMENT ACTIVATION -
DEACTIVATION” button (9) on the control panel (
Fig.10
).
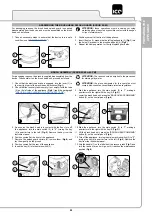
ATTENTION:
As soon as you press the button (9) on the
control panel (
Fig.10
), the control display will show the
“REVERSE” screen (
Fig.11
).
12. Engage the dead man's levers (10) on the handlebars (
Fig.12
) to
start moving the appliance in reverse mode.
13. Using a chute, bring the device down from the pallet, pushing it
backwards.
ATTENTION:
Do not fit the brush and the rear squeegee unit
before unloading the device, and avoid any violent jolts to the
brush head and the squeegee support.
2
2
1
5
4
3
1
4
3
5
3
6
6
2
7
1
7
8
8
9
10
9
12
10
11

