

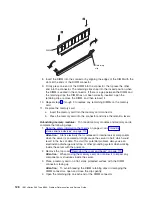

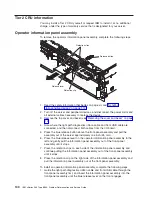
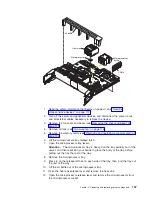


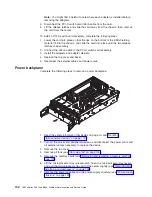

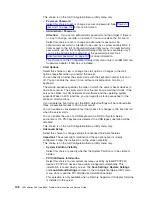

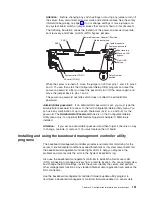

Heat sink
Microprocessor
Microprocessor
baffle
VRM 4
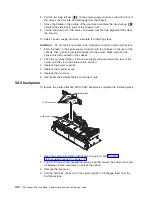
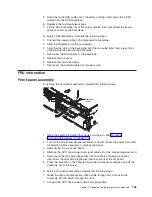
FR
ONT
Air baffle
FR
ONT
FR
ONT
FR
ONT
1.
Read
the
safety
information
that
begins
on
page
vii,
and
2.
Turn
off
the
server
and
peripheral
devices,
and
disconnect
the
power
cords
and
all
external
cables
necessary
to
replace
the
device.
3.
Remove
the
top
cover
and
bezel
(see
4.
Remove
all
fans
(see
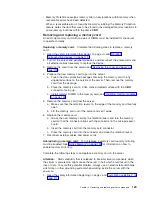
5.
Remove
the
memory
cards
(see
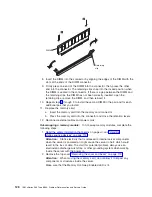
6.
Lift
the
microprocessor-tray
release
latch.
7.
Open
the
microprocessor-tray
levers.
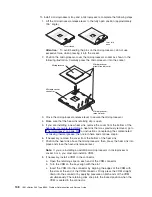
Attention:
The
microprocessor
tray
is
heavy.
Pull
the
tray
partially
out
of
the
server,
and
then
reposition
your
hands
to
grasp
the
body
of
the
tray,
before
pulling
out
the
tray
the
rest
of
the
way.
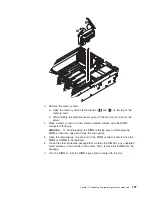
8.
Remove
the
microprocessor
tray.
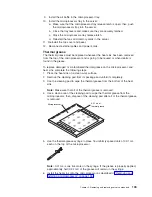
9.
Press
in
on
the
release
latches
on
each
side
of
the
tray;
then,
pull
the
tray
out
the
rest
of
the
way.
10.
Lift
the
air
baffle
out
of
the
microprocessor
tray.
11.
Open
the
heat
sink-release
lever
and
remove
the
heat
sink.
12.
Open
the
microprocessor-release
lever
and
remove
the
microprocessor
from
the
microprocessor
socket.
Chapter
4.
Removing
and
replacing
server
components
137
Summary of Contents for xSeries 366
Page 1: ...IBM xSeries 366 Type 8863 Problem Determination and Service Guide...
Page 2: ......
Page 3: ...IBM xSeries 366 Type 8863 Problem Determination and Service Guide...
Page 8: ...vi IBM xSeries 366 Type 8863 Problem Determination and Service Guide...
Page 28: ...12 IBM xSeries 366 Type 8863 Problem Determination and Service Guide...
Page 160: ...144 IBM xSeries 366 Type 8863 Problem Determination and Service Guide...
Page 170: ...154 IBM xSeries 366 Type 8863 Problem Determination and Service Guide...
Page 181: ...V video connector 6 VRM LED 64 W Web site 1 weight 3 World Wide Web 1 Index 165...
Page 182: ...166 IBM xSeries 366 Type 8863 Problem Determination and Service Guide...
Page 183: ......
Page 184: ...Part Number 31R1508 Printed in USA 1P P N 31R1508...


