Chapter
3.
Installing
the
Device
Driver
Software
(AIX)
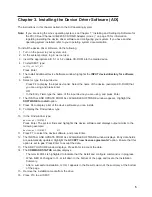
The
instructions
in
this
chapter
pertain
to
the
AIX
operating
system.
Note:
If
you
are
using
the
Linux
operating
system,
see
Chapter
7,
“Installing
and
Setting
Up
Software
for
the
PCI-X
Dual
Channel
Ultra320
SCSI
RAID
Adapter
(Linux
),”
on
page
15
for
information
regarding
installing
the
device
driver
software
and
configuring
your
system.
If
you
have
another
operating
system
installed,
refer
to
your
operating
system
documentation.
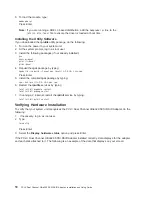
To
install
the
device
driver
software,
do
the
following:
1.
Turn
on
the
power
to
your
system
unit.
2.
At
the
system
prompt,
log
in
as
root
user.
3.
Insert
the
appropriate
AIX
5.1
or
5.2
update
CD-ROM
into
the
media
device.
4.
To
start
SMIT,
type:
smitty
install_all
Press
Enter.
5.
The
Install
Additional
Device
Software
window
highlights
the
INPUT
device/directory
for
software
option.
6.
Select
or
type
the
input
device:
v
Press
F4
to
display
the
input
device
list.
Select
the
name
of
the
device
(example:
CD-ROM)
that
you
are
using
and
press
Enter
OR
v
In
the
Entry
Field,
type
the
name
of
the
input
device
you
are
using,
and
press
Enter.
7.
The
INSTALL
AND
UPDATE
FROM
ALL
AVAILABLE
SOFTWARE
window
appears.
Highlight
the
SOFTWARE
to
install
option.
8.
Press
F4
to
display
a
list
of
the
device
software
you
can
install.
9.
To
display
the
Find
window,
type:
/
10.
In
the
Find
window,
type:
devices.pci.14107802
Press
Enter.
The
system
finds
and
highlights
this
device
software
and
displays
output
similar
to
the
following
example:
devices.pci.14107802
All
11.
Press
F7
to
select
the
device
software,
and
press
Enter.
12.
The
INSTALL
AND
UPDATE
FROM
ALL
AVAILABLE
SOFTWARE
window
displays.
Entry
data
fields
are
automatically
updated.
Highlight
the
ACCEPT
new
license
agreements?
option.
Ensure
that
this
option
is
set
to
yes.
Press
Enter
to
accept
the
data.
13.
The
ARE
YOU
SURE
window
displays.
Press
Enter
to
accept
the
data.
14.
The
COMMAND
STATUS
window
displays.
v
The
term
RUNNING
is
highlighted
to
indicate
that
the
install
and
configure
command
is
in
progress.
v
When
RUNNING
changes
to
OK
,
scroll
down
to
the
bottom
of
the
page
and
locate
the
Installation
Summary.
v
After
a
successful
installation,
SUCCESS
appears
in
the
Result
column
of
the
summary
at
the
bottom
of
the
page.
15.
Remove
the
installation
media
from
the
drive.
16.
Press
F10
to
exit
SMIT.
5
Summary of Contents for Ultra320
Page 1: ...PCI X Dual Channel Ultra320 SCSI RAID Adapter Installation and Using Guide SA23 1324 01...
Page 2: ......
Page 3: ...PCI X Dual Channel Ultra320 SCSI RAID Adapter Installation and Using Guide SA23 1324 01...
Page 8: ...vi PCI X Dual Channel Ultra320 SCSI RAID Adapter Installation and Using Guide...
Page 10: ...viii PCI X Dual Channel Ultra320 SCSI RAID Adapter Installation and Using Guide...
Page 18: ...6 PCI X Dual Channel Ultra320 SCSI RAID Adapter Installation and Using Guide...
Page 24: ...12 PCI X Dual Channel Ultra320 SCSI RAID Adapter Installation and Using Guide...
Page 26: ...14 PCI X Dual Channel Ultra320 SCSI RAID Adapter Installation and Using Guide...
Page 40: ...28 PCI X Dual Channel Ultra320 SCSI RAID Adapter Installation and Using Guide...
Page 44: ...32 PCI X Dual Channel Ultra320 SCSI RAID Adapter Installation and Using Guide...
Page 46: ...34 PCI X Dual Channel Ultra320 SCSI RAID Adapter Installation and Using Guide...
Page 53: ......
Page 54: ...Part Number 80P5517 Printed in USA SA23 1324 01 1P P N 80P5517...


