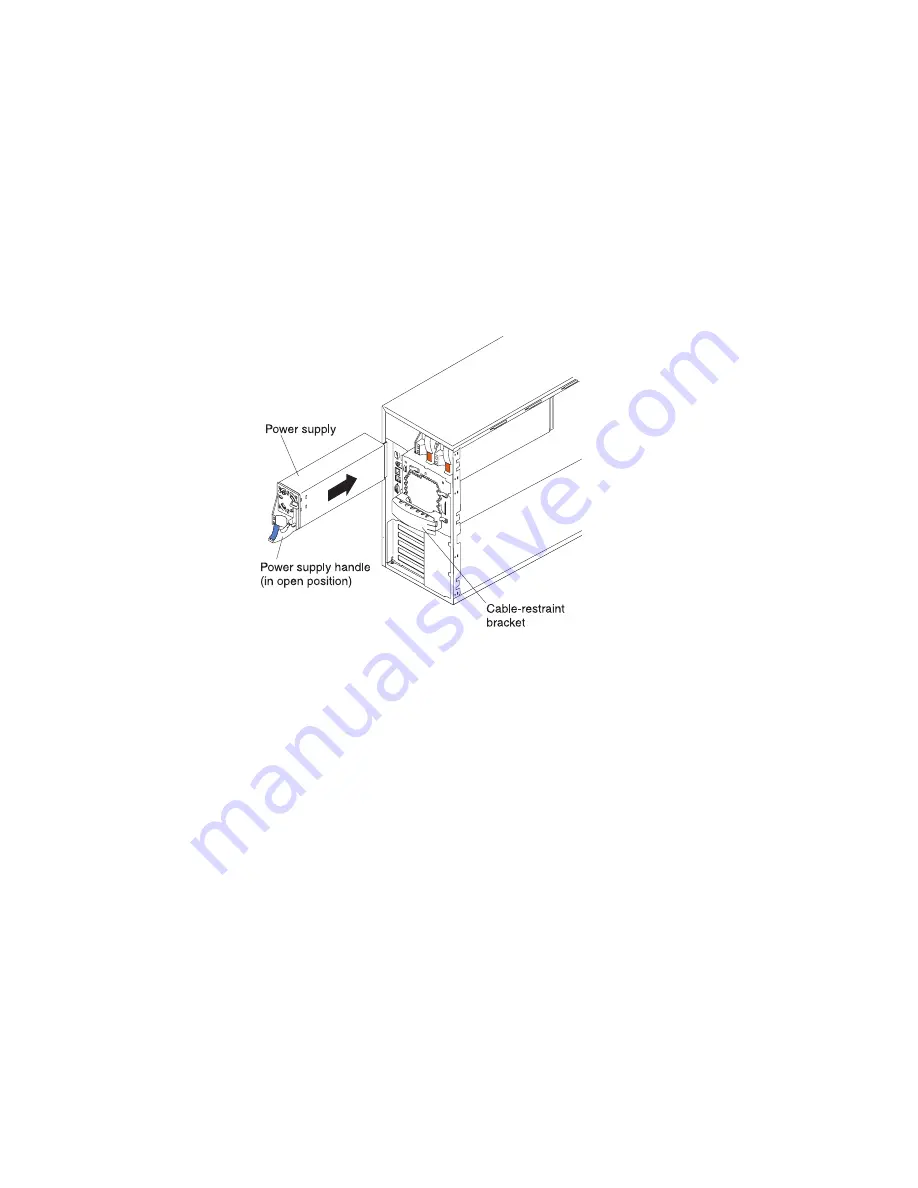
Replacing a hot-swap power supply
After you replace a power supply, verify that the power-supply status indicators (AC
Power LED and DC Power LED) are on, indicating that the power supply is
operating properly.
Notes:
1. You do not need to switch off the power to the appliance to install hot-swap
power supplies.
2. When replacing a power supply, do not remove the power supply until you are
ready to install its replacement.
To replace a hot-swap power supply:
1. Remove the power supply that you want to replace.
2. Install the replacement power supply in the bay:
a. Place the handle on the power supply in the open position (that is,
perpendicular to the power supply) and slide the power supply into the
chassis.
b. Gently close the handle to seat the power supply in the bay.
3. Plug the power cord for the power supply you just installed into the power cord
connector.
4. Route the power cord through the cable-restraint bracket.
5. Plug the power cord into a properly grounded electrical outlet.
6. Verify that the DC Power LED and AC Power LED on the power supply are on,
indicating that the power supply is operating correctly.
Figure 24. Installing a hot-swap power supply
Chapter 4. Adding and replacing components
65
Summary of Contents for totalstorage 200
Page 1: ...IBM TotalStorage Network Attached Storage Models 200 and 225 Service Guide ...
Page 2: ......
Page 3: ...IBM TotalStorage Network Attached Storage Models 200 and 225 Service Guide ...
Page 8: ...vi Models 200 and 225 Service Guide ...
Page 12: ...x Models 200 and 225 Service Guide ...
Page 14: ...xii Models 200 and 225 Service Guide ...
Page 16: ...xiv Models 200 and 225 Service Guide ...
Page 30: ...14 Models 200 and 225 Service Guide ...
Page 58: ...42 Models 200 and 225 Service Guide ...
Page 108: ...92 Models 200 and 225 Service Guide ...
Page 120: ...104 Models 200 and 225 Service Guide ...
Page 130: ...114 Models 200 and 225 Service Guide ...
Page 134: ...118 Models 200 and 225 Service Guide ...
Page 149: ...Appendix D Notices 133 ...
Page 150: ...134 Models 200 and 225 Service Guide ...
Page 151: ...Appendix D Notices 135 ...
Page 152: ...136 Models 200 and 225 Service Guide ...
Page 153: ...Appendix D Notices 137 ...
Page 154: ...138 Models 200 and 225 Service Guide ...
Page 167: ...Appendix D Notices 151 ...
Page 179: ......


