


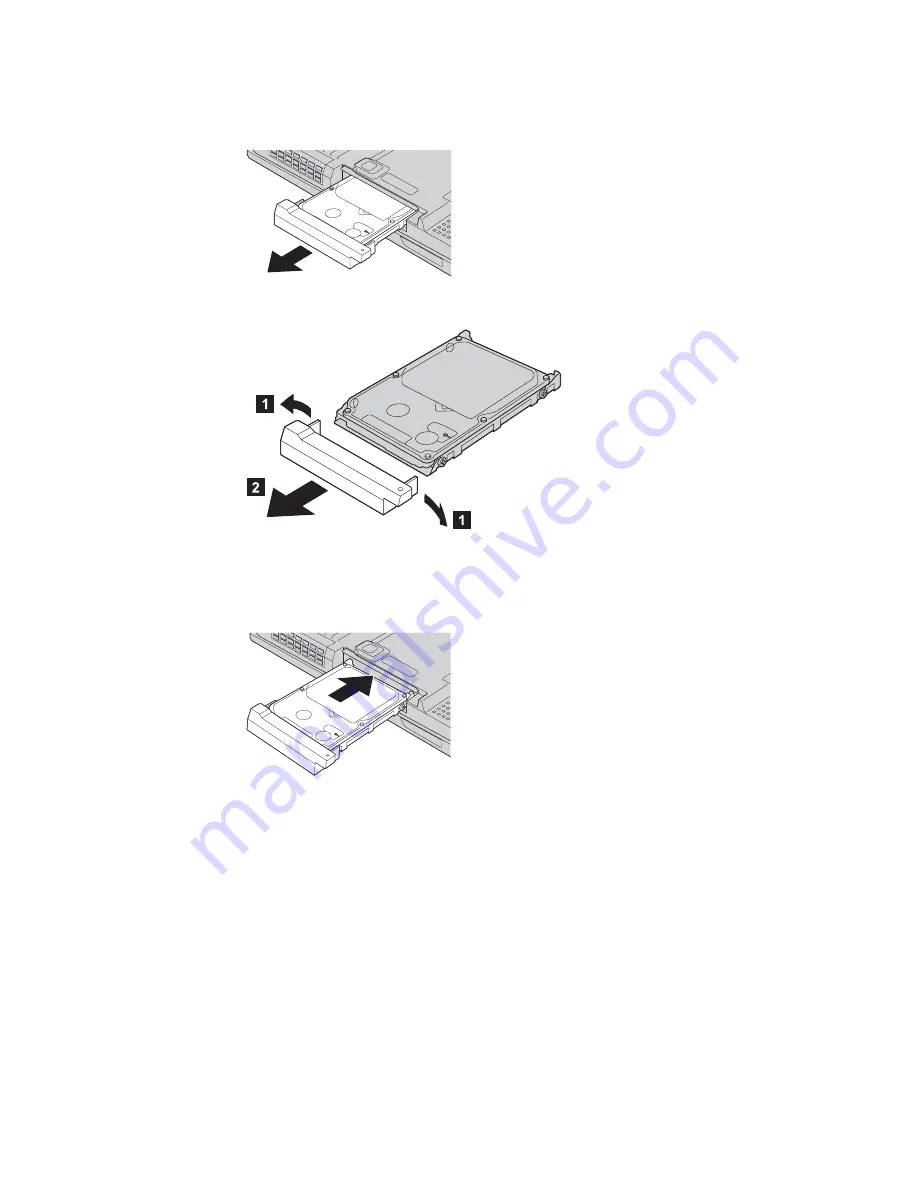
5.
Remove the hard disk drive by pulling the cover away from the
computer.
6.
Detach the cover from the hard disk drive.
7.
Attach the cover to a new hard disk drive.
8.
Insert the hard disk drive and its cover into the hard disk drive bay; then
firmly install them.
9.
Reinstall the screw.
10.
Reinstall the battery.
11.
Turn the computer over again. Connect the ac adapter and the cables to
the computer.
Upgrading the hard disk drive
Chapter 2. Solving computer problems
35
Summary of Contents for Thinkpad X30 Series
Page 1: ...ThinkPad X30 Series Service and Troubleshooting Guide...
Page 2: ......
Page 3: ...ThinkPad X30 Series Service and Troubleshooting Guide...
Page 6: ...iv ThinkPad X30 Series Service and Troubleshooting Guide...
Page 8: ...vi ThinkPad X30 Series Service and Troubleshooting Guide...
Page 12: ...x ThinkPad X30 Series Service and Troubleshooting Guide...
Page 22: ...Caring for your ThinkPad computer 10 ThinkPad X30 Series Service and Troubleshooting Guide...
Page 50: ...Replacing the battery 38 ThinkPad X30 Series Service and Troubleshooting Guide...
Page 56: ...Getting help and service 44 ThinkPad X30 Series Service and Troubleshooting Guide...
Page 62: ...50 ThinkPad X30 Series Service and Troubleshooting Guide...
Page 78: ...66 ThinkPad X30 Series Service and Troubleshooting Guide...
Page 84: ...72 ThinkPad X30 Series Service and Troubleshooting Guide...
Page 85: ...Appendix D Notices 73...
Page 87: ...Appendix D Notices 75...
Page 93: ...Appendix D Notices 81...
Page 94: ...82 ThinkPad X30 Series Service and Troubleshooting Guide...
Page 95: ...Appendix D Notices 83...
Page 96: ...84 ThinkPad X30 Series Service and Troubleshooting Guide...
Page 98: ...86 ThinkPad X30 Series Service and Troubleshooting Guide...
Page 99: ......
Page 100: ...Part Number 92P1305 1P P N 92P1305...


