
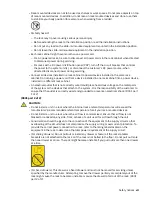
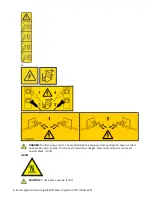


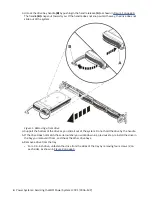
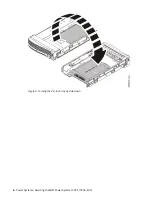

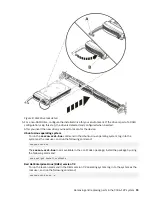


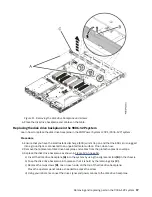


3. Unlock the drive bay handle (B) by pushing in the handle release (A) as shown in Figure 1 on page 4.
The handle (B) snaps out towards you. If the handle does not snap out all the way, the drive does not
slide out of the system.
Figure 1. Removing a front drive
4. Support the bottom of the drive as you slide it out of the system. Do not hold the drive by the handle.
5. If the drive does not match the serial number you wrote down in a previous step, reinstall the drive in
the bay you removed it from, and check the other drive bays.
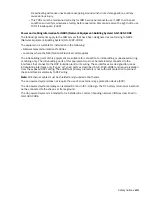
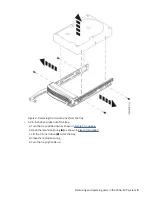
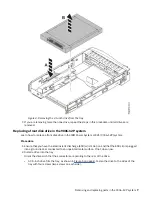
6. Remove a drive from the tray.
• For a 3.5-inch drive, unfasten the drive from the sides of the tray by removing four screws (2 on
each side), as shown in Figure 2 on page 5.
4 Power Systems: Servicing the IBM Power System LC921 (9006-12P)
Summary of Contents for Power System LC921 9006-12P
Page 1: ...Power Systems Servicing the IBM Power System LC921 9006 12P IBM...
Page 14: ...xiv Power Systems Servicing the IBM Power System LC921 9006 12P...
Page 118: ...104 Power Systems Servicing the IBM Power System LC921 9006 12P...
Page 120: ...106 Power Systems Servicing the IBM Power System LC921 9006 12P...
Page 131: ......
Page 132: ...IBM...


