8. Route the cables through the cable management arm. To route the cables through the cable
management arm, open the baskets, route the cables through the arm, and then re-latch the baskets
until they are fully seated.
9. Plug the system power cords and the power cords for any other attached devices into the alternating
current (AC) power source. You have finished installing the cable management arm and connecting
and routing power cables.
10. If you are installing the system into a 7014-T42 or 9363-RC4 rack, the cable management arm must
be mounted so that it hinges on the left of the rear of the system. You must also perform additional
tasks so that the rack rear door will close. To install the cable management arm on a 7014-T42 or
9363-RC4 rack, complete the following steps:
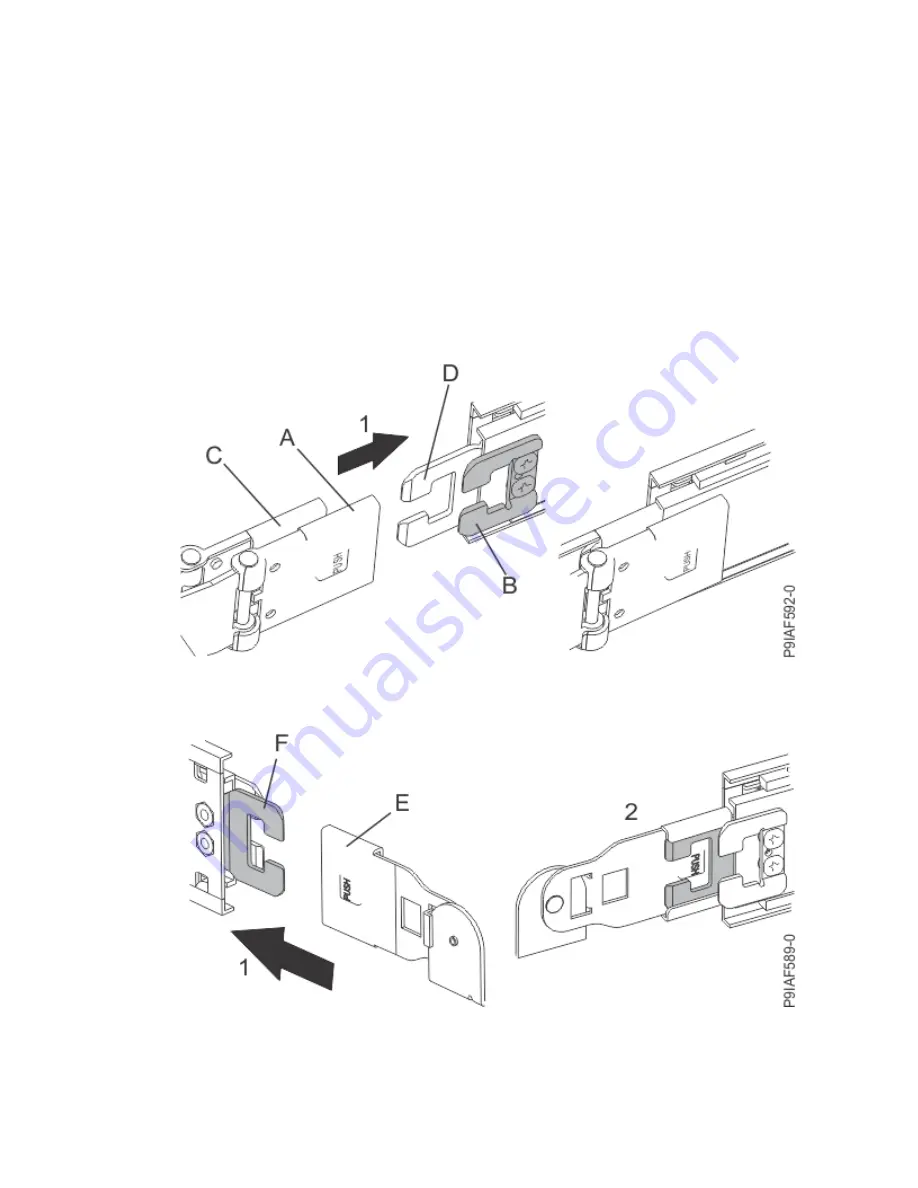
a. Insert the inner cable management arm tab (A) to the inner mounting bracket (B) until the outer
mounting bracket (D) clicks into place.
Note: To avoid damage when the system is placed in the service position, ensure that the middle
pin is between each arm.
Figure 10. Inserting the mounting brackets
b. On the opposite side of the rack, insert the reversible CMA latch (E) to the outer cable
management arm tab (F) until it clicks into place.
Figure 11. Attaching the extension tab to the cable management arm to the outer cable
management arm tab
c. Remove the three outer cable management arm baskets from the rear of the cable management
arm.
10 Power Systems: Installing the System and Ordered Parts for the IBM Power System IC922 (9183-22X)


