background image

18

Additional Information

Self-diagnosis Function

This monitor is equipped with a self-diagnosis function.  If
there is a problem with your monitor or computer(s), the
screen will go blank and the 

u

 indicator will either light up

green or flash orange.

If the 

u

u

u

u

u

 indicator is green

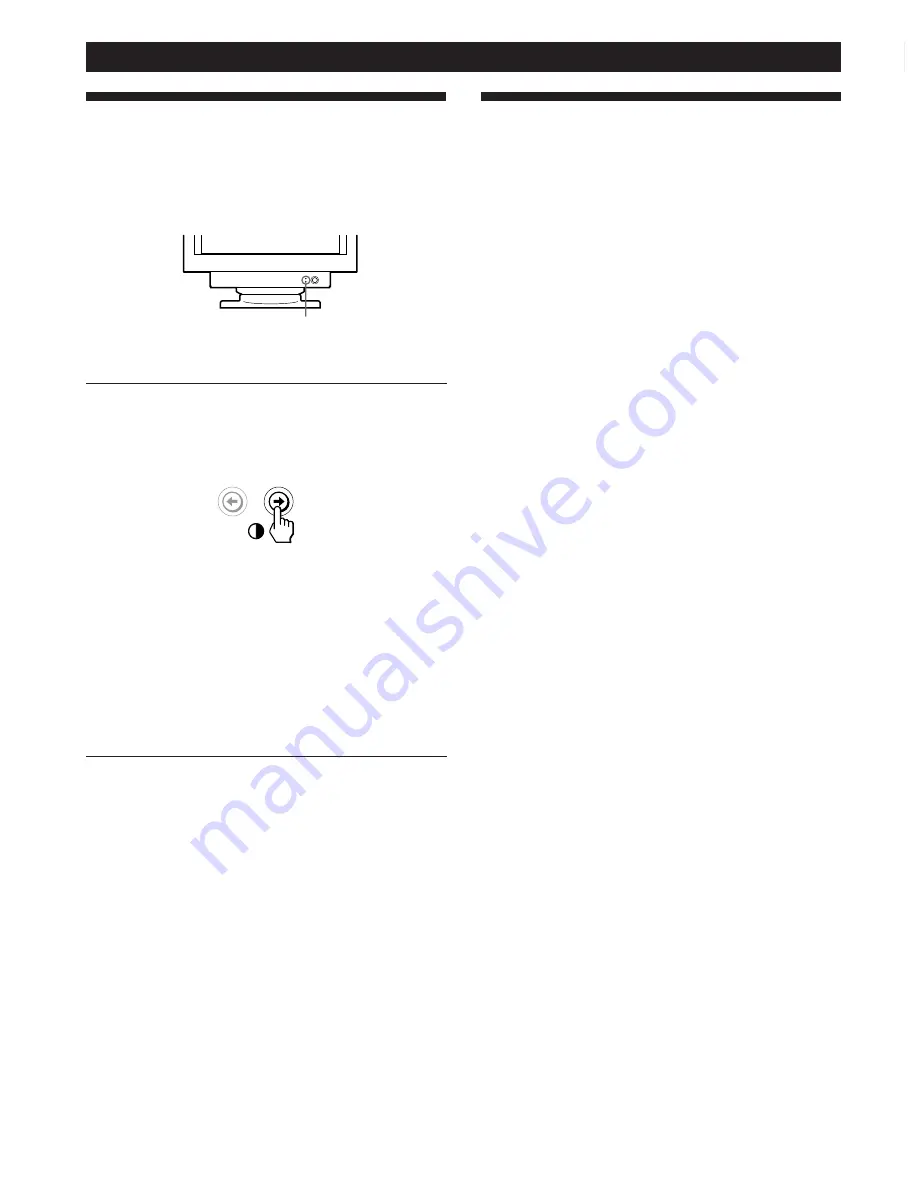
1

Remove any plugs from the video input 1 and 2
connectors, or turn off the connected computer(s).

2

Press and hold the 

>

/

 button for 2 seconds.

If all four color bars appear (white, red, green, blue), the
monitor is working properly. Reconnect the video input
cables and check the condition of your computer(s).

If the color bars do not appear, there is a potential
monitor failure. Inform your service representative of
the monitor’s condition.

If the 

u

u

u

u

u

 indicator is flashing orange

Press the 

u

u

u

u

u

 button to turn the monitor off and on.

If the 

u

 indicator lights up green, the monitor is

working properly.

If the 

u

 indicator is still flashing, there is a potential

monitor failure. Count the number of seconds between
orange flashes of the 

u

 indicator and inform your

service representative of the monitor’s condition. Be sure
to note the model name and serial number of your
monitor. Also note the make and model of your
computer and video board.

u

 indicator

Specifications

Picture tube

0.25 – 0.27 mm aperture grille pitch
19 inches measured diagonally
90-degree deflection

Viewable image size

Approx. 365 

×

 273 mm (w/h)

(14 

3

/

8


×

 10 

3

/

4

 inches)

18.0” viewing image

Resolution

Horizontal: Max. 1600 dots
Vertical: Max. 1200 lines

Standard image area

Approx. 330 

×

 264 mm (w/h)

(13 

×

 10 

1

/

2

 inches)

or
Approx. 352 

×

 264 mm (w/h)

(13 

7

/

8


×

 10 

1

/

2

 inches)

Deflection frequency

Horizontal: 30 to 94 kHz
Vertical: 50 to 160 Hz
256 

<

 Total Line 

<

 2048

AC input voltage/current

100 to 240 V, 50 – 60 Hz, 1.8 – 1.0 A

Power consumption

Max. 130 W

Dimensions

462.2 

×

 477.5 

×

 475.5 mm (w/h/d)

(18 

1

/

4


×

 18 

7

/

8


×

 18 

3

/

4

 inches)

Mass

Approx. 25 kg (55 lb 2 oz)

Design and specifications are subject to change without
notice.

Summary of Contents for P92

Page 1: ...3 862 445 11 1 Operating Instructions P92 Color Monitor EN ...

Page 2: ...EFAHRENHINWEIS Um die Gefahr eines elektrischen Schlags zu vermeiden folgendes beachten Unter keinen Umständen die Abdeckungen abnehmen Das Produkt nicht in Betrieb nehmen wenn der Sockel nicht montiert ist Das Gerät nicht während eines Gewitters an eine Steckdose anschließen oder von ihr trennen Das Netzkabel ist an eine ordnungsgemäß verdrahtete und geerdete Steckdose anzuschließen Jedes Gerät m...

Page 3: ...ccare la spina dalla presa di alimentazione che deve essere facilmente accessibile Manipulación El monitor de color es pesado por lo que debe manipularlo con cuidado IBM recomienda moverlo con la ayuda de dos personas PERIGO Para evitar o perigo de choques eléctricos Não retire as coberturas Não utilize este produto antes de montar a base Não ligue nem desligue este produto durante uma tempestade ...

Page 4: ... eller lyfts av två personer VAARA Sähköiskun vaaran välttämiseksi Älä avaa laitteen kansia missään tilanteessa Älä käytä laitetta ellei jalustaa ole kiinnitetty Älä kytke laitetta pistorasiaan tai irrota sitä pistorasiasta ukonilman aikana Virtajohto on kytkettävä asianmukaisesti johdotettuun ja maadoitettuun pistorasiaan Kaikki muutkin laitteet joihin tämä tuote on liitetty on kytkettävä asianmu...

Page 5: ...lantıları usulüne uygun olarak yapılmış bir prize takılmalıdır Bu cihazın bağlanacağı diğer tüm cihazlar da elektrik ve toprak bağlantıları usulüne uygun olarak yapılmış prize takılmış olmalıdır Monitörün elektrikle bağlantısını kesmek için fişini prizden çekmeniz gereklidir Priz kolayca erişilebilecek bir yerde olmalıdır Kaldırma Renkli monitörünüz ağırdır kaldırırken dikkatli olunuz IBM monitörü...

Page 6: ...rams or services do not imply that IBM intends to make these available in all countries in which IBM operates Any reference to an IBM product program or service is not intended to state or imply that only IBM s product program or service may be used Any functionally equivalent product program or service that does not infringe any of IBM s intellectual property rights or other legally protectable r...

Page 7: ...Using the COLOR On screen Display 10 Using the SCREEN On screen Display 10 Using the OPTION On screen Display 12 Using the LANG Language On screen Display 14 Resetting the Adjustments 14 Technical Features Power Saving Function 15 Preset Modes 15 Plug Play 15 Damper Wires 15 Additional Information Warning Messages 16 Troubleshooting 16 Self diagnosis Function 18 Specifications 18 TABLE OF CONTENTS...

Page 8: ... sunlight excessive dust mechanical vibration or shock Do not place the monitor near equipment which generates magnetism such as a transformer or high voltage power lines Maintenance Clean the cabinet panel and controls with a soft cloth lightly moistened with a mild detergent solution Do not use any type of abrasive pad scouring powder or solvent such as alcohol or benzine Do not rub touch or tap...

Page 9: ...as the buttons when adjusting other items 6 u power switch and indicator pages 15 18 Turns the monitor on or off The indicator lights up in green when the monitor is turned on and lights up in orange when the monitor is in power saving mode Pin No 1 2 3 4 5 6 7 Pin No 8 9 10 11 12 13 14 15 Rear 7 AC IN connector Provides AC power to the monitor 8 Video input 1 connector HD15 Inputs RGB video signa...

Page 10: ...PUT SIGNAL appears on the screen see Warning Messages on page 16 to a computer with an HD15 video output to a computer with a 13W3 video output 9 Video input 2 connector 13W3 cable Inputs RGB video signal 0 700 Vp p positive Pins serve a dual purpose as combined sync input and as H sync input if V Sync is present on pin no 9 Display Data Channel DDC Standard by VESA Note If you use a computer or v...

Page 11: ... malfunction Although the signals for picture aspect ratio 5 4 resolution 1280 1024 do not fill the screen to the edges the picture is accurately displayed Selecting the On screen Display Language If you need to change the OSD language see Using the LANG Language On screen Display on page 14 The default setting is English Selecting the Input Signal This monitor has two signal input connectors HD15...

Page 12: ...horizontal and vertical frequencies for the received input signal appear in the BRIGHTNESS CONTRAST OSD Customizing Your Monitor BRIGHTNESS CONTRAST 26 26 80 0kHz 75Hz 5 Press the buttons to select 1 or 2 When 1 is selected The signal from the computer connected to the HD15 connector is input to the monitor When 2 is selected The signal from the computer connected to the 13W3 connector is input to...

Page 13: ...s are both reset to the factory settings CENTER 26 73 Introducing the On screen Display System Most adjustments are made using the MENU OSD MENU OSD Press the button to display the MENU OSD This MENU OSD contains links to the other OSDs described below 1 COLOR Displays the COLOR OSD for adjusting the color temperature 2 CENTER Displays the CENTER OSD for adjusting the centering of the picture 3 SC...

Page 14: ...he picture side balance adjust the picture width adjust the picture shape balance ROTATION GEOMETRY 26 Using the SIZE On screen Display The SIZE settings allow you to adjust the size of the picture Once the setting is adjusted it will be stored in memory for the current input signal 1 Press the button The MENU OSD appears 2 Press the and buttons to select SIZE and press the button again The SIZE O...

Page 15: ...ease the picture width at the top to move the top of the picture to the right to move the top of the picture to the left Using the ZOOM On screen Display The ZOOM settings allow you to enlarge or reduce the picture Once the setting is adjusted it will be stored in memory for the current input signal 1 Press the button The MENU OSD appears 2 Press the and buttons to select ZOOM and press the button...

Page 16: ...can adjust or change the colors of a picture on the screen to match the actual colors of the printed picture Once the setting is adjusted it will be stored in memory for all input signals received 1 Press the button The MENU OSD appears 2 Press the and buttons to select COLOR and press the button again The COLOR OSD appears 3 Press the buttons to select the color temperature There are three color ...

Page 17: ...F 50 For BOT V CONVER BOTTOM CANCEL MOIRE ADJ MOIRE ADJUST Press to shift red shadows up and blue shadows down to shift red shadows down and blue shadows up to turn CANCEL MOIRE ON to turn CANCEL MOIRE OFF or to adjust the screen until the moire is at a minimum Select CANCEL MOIRE ADJ MOIRE ADJUST To turn the moire cancellation function ON or OFF CANCEL MOIRE must be ON for ADJ MOIRE ADJUST to app...

Page 18: ...steps above The OPTION OSD automatically disappears after about 30 seconds To close the OSD press the button again Changing the on screen display position You can change the OSD position for example when you want to adjust the picture behind the OSD 1 Press the button The MENU OSD appears 2 Press the and buttons to select OPTION and press the button again The OPTION OSD appears 3 Press the buttons...

Page 19: ...ntrol lock Repeat steps 1 through 3 above and press the buttons to select UNLOCK Setting the power saving delay time You can set the delay time before the monitor enters the power saving mode See page 15 for more information on this monitor s power saving capabilities 1 Press the button The MENU OSD appears 2 Press the and buttons to select OPTION and press the button again The OPTION OSD appears ...

Page 20: ... the and buttons to select the OSD containing the item you want to reset 2 Press the buttons to select the item you want to reset 3 Press the reset button Resetting all of the adjustment data for the current input signal When there is no OSD displayed press the reset button All of the adjustments data for the current input signal is reset to the factory settings Note that adjustment data not affec...

Page 21: ... active off mode and the u indicator lights up orange Once the horizontal and vertical sync signals are detected the monitor automatically resumes its normal operation mode Damper Wires When viewing a white background very thin horizontal lines may be visible on the screen as shown below These lines are the shadows of the damper wires and are characteristic of CRTs that use aperture grilles The wi...

Page 22: ...or is in power saving mode Try pressing any key on the computer keyboard Check that your computer power switch is in the on position Check that the input select setting is correct Check that the video signal cable is properly connected and all plugs are firmly seated in their sockets Ensure that no pins are bent or pushed in the HD15 or 13W3 video input connector Check that the video board is comp...

Page 23: ... blue shadows appear along the edges of images adjust the convergence pages 10 11 If the moire is cancelled the picture may become fuzzy Decrease the moire cancellation effect pages 10 11 Isolate and eliminate any potential sources of electric or magnetic fields Common causes for this symptom are electric fans fluorescent lighting or laser printers If you have another monitor close to this monitor...

Page 24: ...or is working properly If the u indicator is still flashing there is a potential monitor failure Count the number of seconds between orange flashes of the u indicator and inform your service representative of the monitor s condition Be sure to note the model name and serial number of your monitor Also note the make and model of your computer and video board u indicator Specifications Picture tube ...

Page 25: ...ipment This device complies with Part 15 of the FCC Rules Operation is subject to the following two conditions 1 this device may not cause harmful interference and 2 this device must accept any interference received including interference that may cause undesired operation Responsible Party International Business Machines Corporation Old Orchard Road Armonk NY 10504 Telephone 1 919 543 2193 Power ...

Page 26: ...iesem Gerät zusammengestellte Anlage auch den technischen Bestimmungen dieser Amtsblätter genügen muß Aus ergonomischen Gründen wird empfohlen die Grundfarbe Blau nicht auf dunklem Untergrund zu verwenden schlechte Erkennbarkeit Augenbelastung bei zu geringem Zeichenkontrast Aus ergonomischen Gründen sollten nur Darstellungen auf dunklem Hintergrund bei Vertikalfrequenzen ab 60 Hz ohne Zeilensprun...

Page 27: ...en zu gewährleisten Es sind ordnungsgemäß abgeschirmte und geerdete Kabel und Stecker zu verwenden um das Störungspotential in bezug auf Radio und Fernsehempfang oder andere elektrische oder elektronische Geräte zu reduzieren Solche Kabel und Stecker sind bei autorisierten IBM Fachhändlern erhältlich In Übereinstimmung mit EN 50082 1 1992 Leistungskriterium A wird darauf hingewiesen daß bestimmte ...

Page 28: ...reseller will repair it or replace it with one that is at least functionally equivalent without charge The replacement may not be new but will be in good working order If IBM or your reseller is unable to repair or replace the Machine you may return it to your place of purchase and your money will be refunded If you transfer a Machine to another user warranty service is available to that user for ...

Page 29: ...or tort claim IBM is liable only for 1 damages for bodily injury including death and damage to real property and tangible personal property and 2 the amount of any other actual direct damages or loss up to the greater of U S 100 000 or the charges if recurring 12 months charges apply for the Machine that is the subject of the claim UNDER NO CIRCUMSTANCES IS IBM LIABLE FOR ANY OF THE FOLLOWING 1 TH...

Page 30: ... be provided on an exchange basis and will be either new equivalent to new or reconditioned All replaced parts and products become the property of IBM This warranty does not cover the repair of damage to the product resulting from Accident disaster misuse and abuse Use of parts not manufactured or sold by IBM Modification of the product Service provided by anyone other than IBM or an authorised IB...

Page 31: ...reece Iceland Italy Ireland Luxembourg Netherlands Norway Portugal Spain Sweden Switzerland and United Kingdom Group B Countries Albania Bosnia Herzegovina Bulgaria Croatia Czechia Russia Armenia Bellarus Georgia Kirghizia Hungary Kazakhstan Macedonia Moldova Poland Romania Slovakia Serbia Montenegro Slovenia Ukraine On Site Service Some IBM products are sold with a service entitlement which is de...

Page 32: ...l or personal property caused by IBM negligence General No statements contained herein shall affect the statutory rights of consumers International Warranty Service IBM International hardware warranty service is available for those customers travelling to countries in which their PC products are announced and sold by IBM or IBM resellers upon registering with IBM International Warranty Service Off...

Page 33: ...Warranty Service via their local IBM Office Notes 1 International Warranty Service is not available on IBM Options unless they are installed in or connected to an IBM System Unit which is registered for International Warranty Service 2 Customers are not required to register their machine for International Warranty Service if relocation is within the countries of Group A or Group B 4 ...

Page 34: ...omer warranty Parts are for service use only Part No M T Model Description 61H0222 6557 03N Monitor UVNH Pearl White 61H0223 6557 43N Monitor UVNH Stealth Gray 61H0224 6557 03S Monitor UVSH Pearl White 61H0216 6557 43S Monitor UVSH Stealth Gray 61H0226 Video Cable Pearl White 61H0227 Video Cable Stealth Gray ...

Reviews: