11
Getting Started
F
GB
ES
C
Customizing Your Monitor
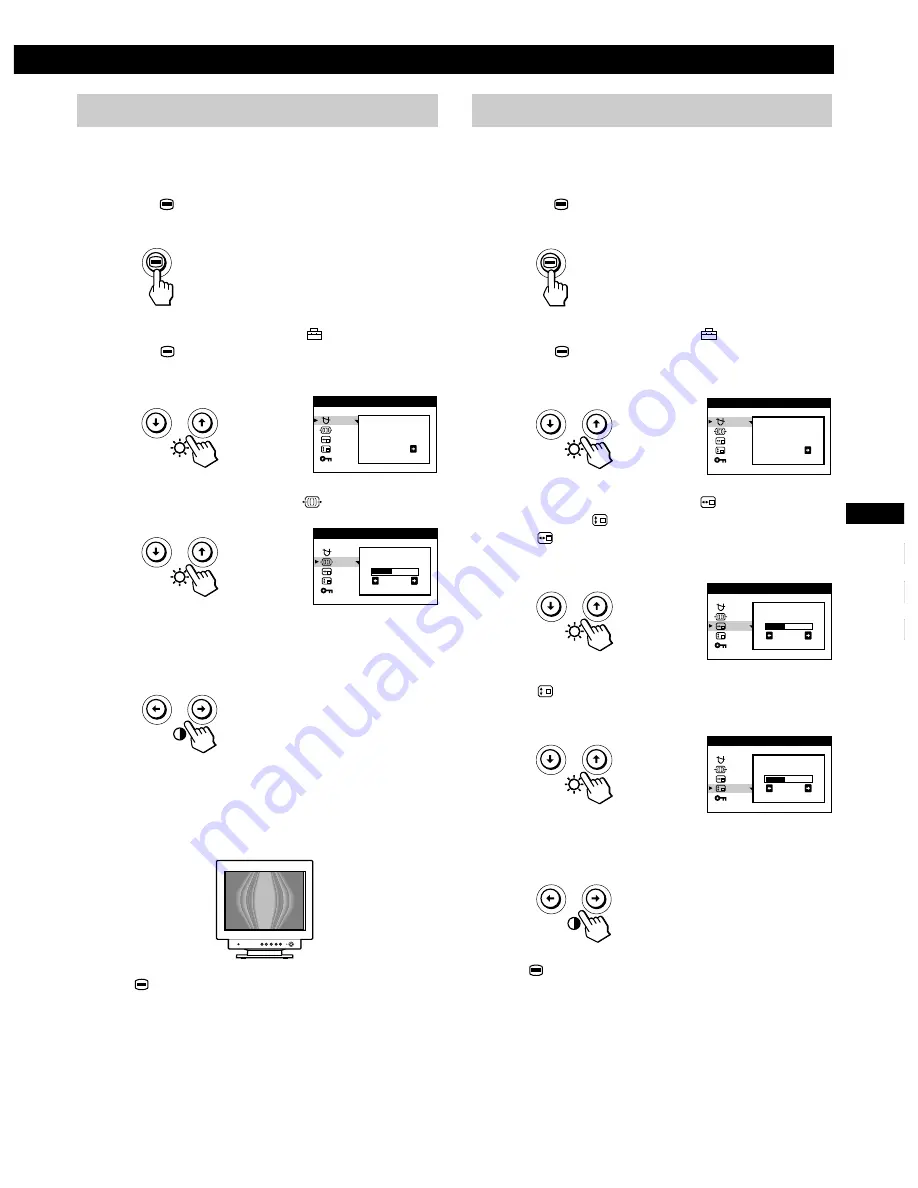
Changing the on-screen display position
You can change the OSD position (for example, when you
want to adjust the picture behind the OSD).
1
Press the
button.
The MENU OSD appears.
2
Press the
.
/
>
buttons to select “
OPTION,” and
press the
button again.
The OPTION OSD appears.
3
Press the
.
/
>
buttons to select “
(OSD H
POSITION)” or “
(OSD V POSITION).”
Select “
(OSD H POSITION)” to adjust the horizontal
position.
Select “
(OSD V POSITION)” to adjust the vertical
position.
4
Press the
?
/
/
buttons to move the OSD to the
desired position.
Press the
button once to return to the MENU OSD, and
twice to return to normal viewing. If no buttons are pressed,
the OSD closes automatically after about 30 seconds.
To reset, press the
?
(reset) button while the OSD is on.
DEGAUSS
ON
OPT I ON
OSD H
POS I T I ON
2 6
OPT I ON
OSD V
POS I T I ON
2 6
OPT I ON
Adjusting the moire
If elliptical or wavy patterns appear on the screen, adjust the
moire cancellation level.
1
Press the
button.
The MENU OSD appears.
2
Press the
.
/
>
buttons to select “
OPTION” and
press the
button again.
The OPTION OSD appears.
3
Press the
.
/
>
buttons to select “
MOIRE* ADJUST.”
4
Press the
?
/
/
buttons to adjust the amount of
moire cancellation until the moire effect is at a
minimum.
*
Moire is a type of natural interference which products soft, wavy
lines on your screen. It may appear due to interference between
the pattern of the picture on the screen and the phosphor pitch
pattern of the monitor.
Example of moire:
Press the
button once to return to the MENU OSD, and
twice to return to normal viewing. If no buttons are pressed,
the OSD closes automatically after about 30 seconds.
To reset, press the
?
(reset) button while the OSD is on.
DEGAUSS
ON
OPT I ON
MO I RE
AD J US T
2 6
OPT I ON


