Attention:
Wait at least 30 seconds, until the hard disk drives stop spinning,
before you proceed to the next step. The activity LED on the control panel
turns off when the hard disk drive has stopped spinning (see “Blade server
controls and LEDs” on page 3).
4.
Pull the two release handles to the open position. The blade server moves out
of the bay approximately 0.6 cm (0.25 inch).
5.
Pull the blade server out of the bay.
6.
Place either a blade filler or another blade server in the bay within 1 minute.
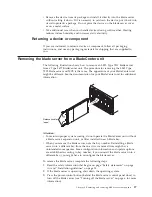
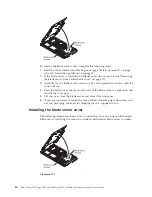
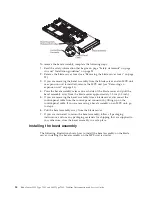
Installing the blade server in a BladeCenter unit
The following illustration shows how to install a single-width type of blade server
into a Type 8677 BladeCenter unit. The procedure for installing the double-width
type of blade server is the same. The appearance of your BladeCenter unit might
be different; see the documentation for your BladeCenter unit for additional
information.
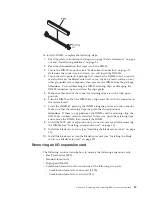
Release handles
(open)
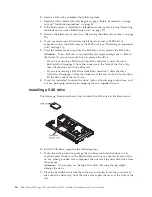
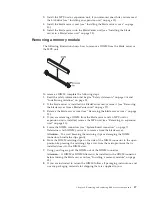
To install a blade server in a BladeCenter unit, complete the following steps.
Statement 21
CAUTION:
Hazardous energy is present when the blade server is connected to the power
source. Always replace the blade cover before installing the blade server.
1.
Read the safety information that begins on page “Safety statements” on page
viii and “Installation guidelines” on page 25.
2.
If you installed a blade filler or another blade server in the bay from which you
removed the blade server, remove it from the bay.
28
BladeCenter LS22 Type 7901 and LS42 Type 7902: Problem Determination and Service Guide
Summary of Contents for LS42 - BladeCenter - 7902
Page 1: ...BladeCenter LS22 Type 7901 and LS42 Type 7902 Problem Determination and Service Guide...
Page 2: ......
Page 3: ...BladeCenter LS22 Type 7901 and LS42 Type 7902 Problem Determination and Service Guide...
Page 12: ...x BladeCenter LS22 Type 7901 and LS42 Type 7902 Problem Determination and Service Guide...
Page 76: ...64 BladeCenter LS22 Type 7901 and LS42 Type 7902 Problem Determination and Service Guide...
Page 192: ...180 BladeCenter LS22 Type 7901 and LS42 Type 7902 Problem Determination and Service Guide...
Page 193: ......
Page 194: ...Part Number 49Y0107 Printed in USA 1P P N 49Y0107...

