The Configuration/Setup Utility program and the EISA
Configuration program configure the system hardware and
PCI interrupt requests. These programs do not consider
the requirements of the operating system or the application
programs.
Changing the Software Configuration:
The best way to resolve memory-address conflicts is to
change the addresses used by the application program or
the device driver.
If a device driver is causing a memory-address conflict,
refer to the operating-system documentation or the
documentation supplied with the device drivers.
Resolving Hardware Configuration
Conflicts:
Use the following information to help resolve hardware
configuration conflicts:
1. Run the Setup program to view and change
resources used by the system board functions and
the PCI interrupt requests (IRQs), if necessary.
Record the current settings before making any
changes. (See “Configuration/Setup Utility Program”
on page 33.)
2. Determine which adapter or device is causing the
error. The EISA Configuration program specifies how
the server checks for resource conflicts. Initially, this
verification mode is set to automatic. Use the
Advanced selection of the EISA Configuration
Diskette's View or edit details screen to change the
setting (see “EISA Configuration Advanced Function”
on page 26).
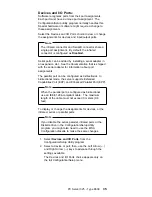
The automatic verification mode might disable
adapters or system board features. For example, if
you choose IRQ 4 for an adapter, the program
disables Serial Port 1, which uses IRQ 4. If this
happens, and you do not want this feature disabled,
choose another IRQ for the adapter.
If you set the verification mode to
manual, the
configuration utility program does
not try to resolve a
conflict. Instead, you have to determine if a resource
conflict has occurred and then resolve the conflict.
When the verification mode is set to manual, an
asterisk (*) appears on the View or edit details screen
next to adapters in conflict.
If the EISA Configuration program cannot resolve a
configuration error, it
deactivates the adapter and
displays the deactivated status (
<>
) on the View or
edit details screen. Use the Advanced selection of
the EISA Configuration Diskette's View or edit details
screen to update or copy the server's system
PC Server 325 - Type 8639
31
Summary of Contents for 8639 - PC Server 325
Page 97: ...Drawer Model Rails Drives 92 PC Server HMM...
Page 102: ...Operator Panel and Cable Note Loosen do not remove screw Screw PC Server 325 Type 8639 97...
Page 108: ...System Board Note Note A black square indicates pin 1 PC Server 325 Type 8639 103...
Page 120: ...Parts Listings 1 2 3 4 5 6 7 8 9 10 12 11 13 14 15 16 17 18 20 19 PC Server 325 Type 8639 115...
Page 121: ...21 23 24 25 22 26 27 28 29 30 116 PC Server HMM...
Page 129: ...124 PC Server HMM...
Page 145: ...IBM Part Number 84H3049 Printed in U S A S84H 3 49...


