3301690 CPU Card
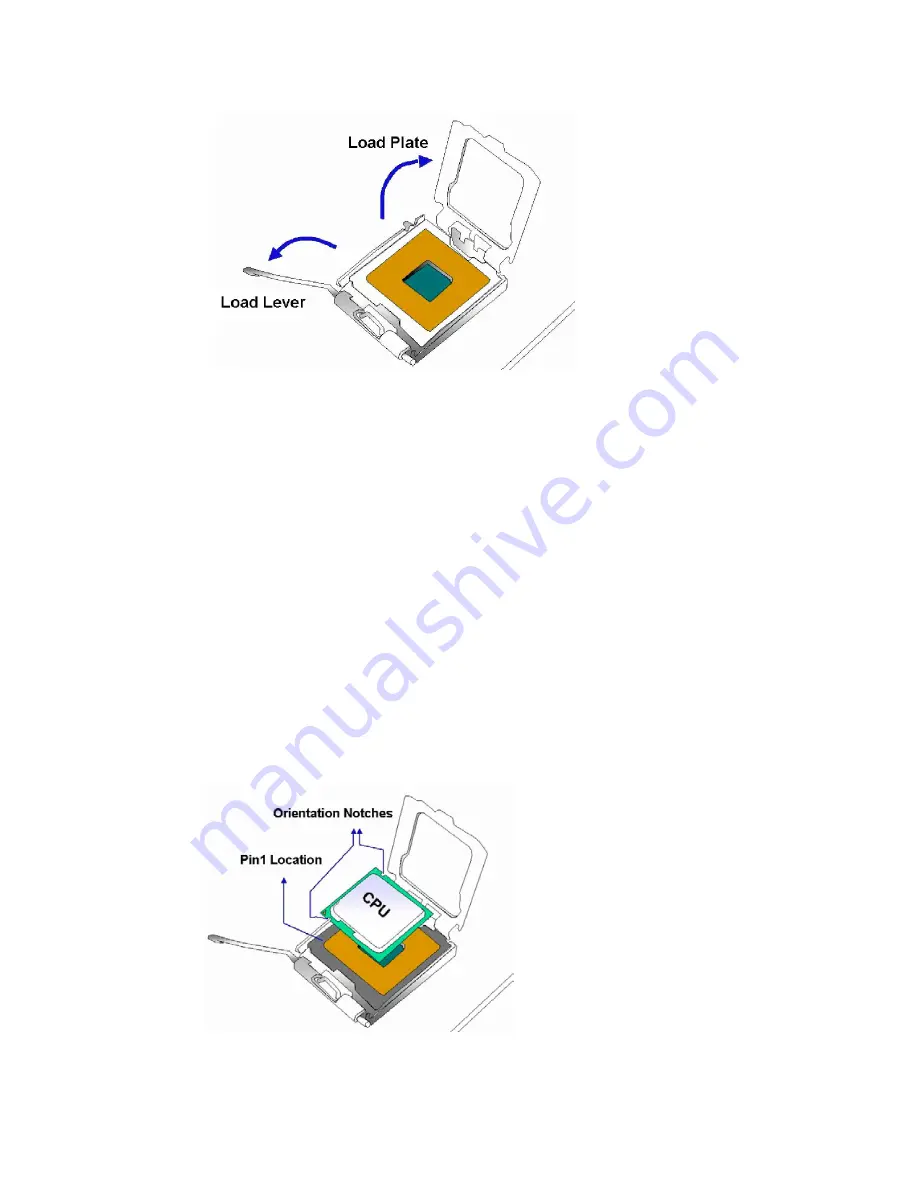
Figure 4-3: Open the CPU Socket Load Plate
Step 3: Inspect the CPU and the socket
. Make sure that the pins on the CPU are not
bent. Also make sure socket contacts are free of foreign material. If you see any
debris in the socket remove it using compressed air.
Step 4: Insert the 775-pin CPU
. To insert the CPU refer to
Figure 4-4
and follow the five
steps below.
1. Hold the CPU by the LGA edges marked by back lines.
2. Orient the CPU with the IHS (Integrated Heat Sink) side facing upward.
3. Locate pin 1 and the two orientation notches on the CPU.
4. Carefully match the two orientation notches on the CPU with the alignment
keys of the socket.
5. Carefully place the CPU into the socket with a gentle and vertical motion.
Figure 4-4: Insert the CPU
67
Summary of Contents for 3301690
Page 1: ...User s Manual 3301690 1...
Page 15: ...3301690 CPU Card Chapter 1 1 Introduction 15...
Page 20: ...3301690 CPU Card Chapter 2 2 Detailed Specifications 20...
Page 29: ...3301690 CPU Card Chapter 3 3 Connectors and Jumpers 29...
Page 60: ...3301690 CPU Card Figure 3 22 J_CMOS1 Jumper Location 60...
Page 61: ...3301690 CPU Card Chapter 4 4 Installation and Configuration 61...
Page 75: ...3301690 CPU Card Chapter 5 5 AMI BIOS Setup 75...
Page 102: ...3301690 CPU Card BIOS Menu 14 PCI PnP Configuration Part 1 102...
Page 125: ...3301690 CPU Card Chapter 6 6 Software Drivers 125...
Page 144: ...3301690 CPU Card Figure 6 24 Ethernet Driver Installation Confirmation 144...
Page 145: ...3301690 CPU Card Appendix A A BIOS Configuration Options 145...
Page 149: ...3301690 CPU Card Appendix B B Watchdog Timer 149...
Page 152: ...3301690 CPU Card This Page is Intentionally Left Blank 152...
Page 153: ...3301690 CPU Card Appendix C C Address Mapping 153...
Page 156: ...3301690 CPU Card Appendix D D External AC 97 Audio CODEC 156...
Page 172: ...3301690 CPU Card E Index 172...


