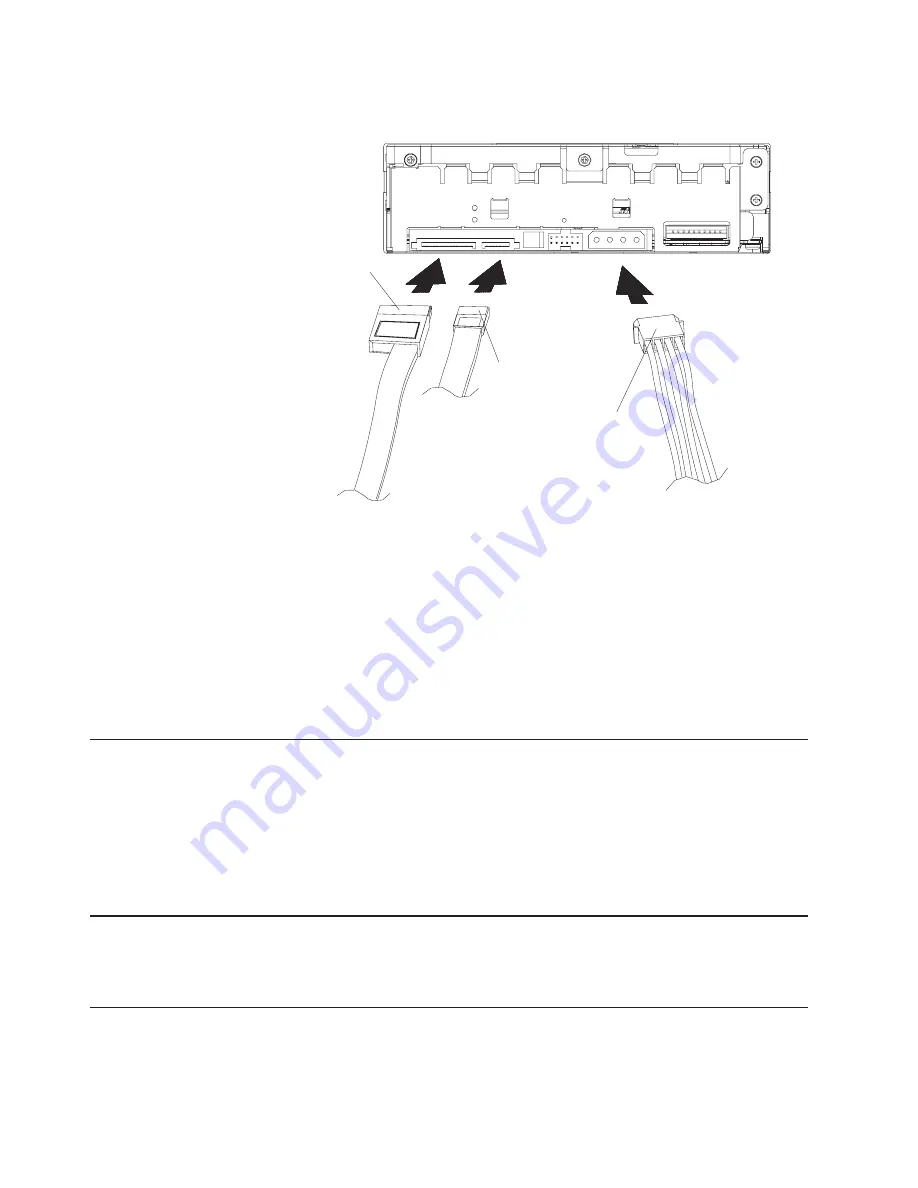
1.
Connect
the
SATA
data
cable
to
the
system
board
or
SATA
adapter
on
the
server,
and
then
connect
it
to
the
tape
drive.
SATA data cable
Tape drive power cable
SATA power
cable
Attention:
a.
Do
not
connect
both
the
SATA
power
cable
and
the
tape
drive
power
cable.
If
you
connect
both
power
cables
to
the
tape
drive,
you
might
damage
the
tape
drive.
b.
Do
not
force
the
tape
drive
power
cable
into
the
tape
drive
power
connector.
If
the
tape
drive
power
cable
is
upside
down
and
you
force
the
connection,
you
might
damage
the
tape
drive.
2.
Connect
either
the
SATA
power
cable
to
the
SATA
power
connector
or
the
tape
drive
power
cable
connector
to
the
four-pin
connector
on
the
tape
drive
as
shown
in
the
previous
illustration.
Completing
the
installation
Check
your
work
before
you
close
the
server:
1.
Make
sure
that
the
power
cable
and
SATA
cable
are
securely
connected,
and
that
the
cables
are
neatly
routed.
2.
Replace
the
server
cover
and
secure
it
in
place.
3.
Reconnect
the
cables
to
the
server
and
then
reconnect
the
power
cords
to
the
server.
Turning
on
the
server
Turn
on
all
the
attached
devices;
then,
turn
on
the
server.
The
tape
drive
performs
a
power-on
self-test
(POST)
within
15
seconds.
Updating
the
configuration
In
most
servers,
the
Configuration/Setup
Utility
program
automatically
recognizes
the
new
tape
drive.
However,
you
might
have
to
provide
information
about
system
changes
after
you
restart
the
server.
6
160/320
GB
DLTV4
Tape
Drive:
Installation
and
User’s
Guide
Summary of Contents for 160 GB DLTV4
Page 2: ......
Page 3: ...160 320 GB DLTV4 Tape Drive Installation and User s Guide...
Page 16: ...8 160 320 GB DLTV4 Tape Drive Installation and User s Guide...
Page 26: ...18 160 320 GB DLTV4 Tape Drive Installation and User s Guide...
Page 28: ...20 160 320 GB DLTV4 Tape Drive Installation and User s Guide...
Page 54: ...46 160 320 GB DLTV4 Tape Drive Installation and User s Guide...
Page 55: ......
Page 56: ...Part Number 42D8811 Printed in USA 1P P N 42D8811...


