background image


23 

7.1.3


Replacing the motor filter 


1.


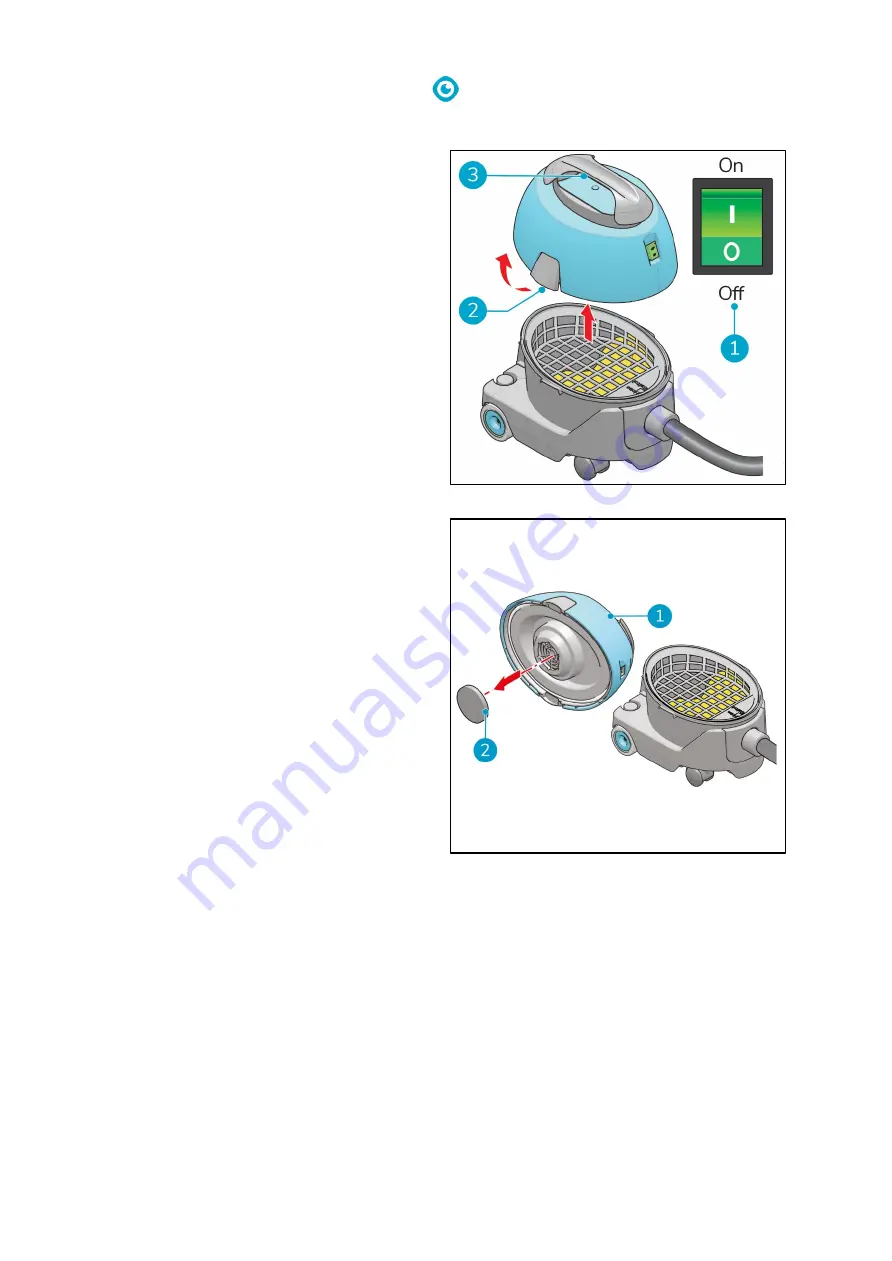
Turn off the i vac 5® with the ON/OFF switch 

(Figure 18, pos 1). 


2.


Release the latches (Figure 18, pos 2). 


3.


Lift the head by the handle (Figure 18, 

pos 3). 


4.


Place the head on on a level surface  

(Figure 19, pos 1). 


5.


Remove the old motor filter (Figure 19,  

pos 2). 


6.


Place the new motor filter (Figure 19,  

pos 2). 


Figure 18 


Figure 19 


Summary of Contents for i-vac 5

Page 1: ...1 i vac 5 Continuously easy User manual i team Professional b v Hoppenkuil 27b 5626 DD Eindhoven The Netherlands T 31402662400 E hello i teamglobal com I www i teamglobal com...

Page 2: ...the English Language Future Cleaning Technologies B V Hoppenkuil 27b 5626 DD Eindhoven The Netherlands T 31402662400 E hello i teamglobal com I www i teamglobal com Model C05 Date 10 04 2020 Product...

Page 3: ...e Netherlands When this manual mentions the partner your local i team resell and support service partner is referred to Purpose of the user manual The purpose of the user manual is to provide the user...

Page 4: ...followed can lead to injuries of the operator or bystanders light and or moderate damage to the product or the environment CAUTION Indicates a hazardous situation which if the safety instructions are...

Page 5: ...3 Safety 12 3 1 General Safety Instructions 12 3 2 Risks during operation 12 4 Transport and storage 13 5 Assembly and installation 14 5 1 Unboxing 14 5 2 Assembly 15 5 3 Replacing the dust bag 16 6 O...

Page 6: ...6 7 5 Storage 25 8 Trouble shooting 26 9 Decommissioning and disposal 27 10 Attachments 28 10 1 CE Certificate 28...

Page 7: ...e read in full before the first actions This manual describes the correct method of use safety measures maintenance and transport i team continuously improves all their products based on user experien...

Page 8: ...l is trained by an experienced operator who has read and understood the instructions in this manual Keep the i vac 5 and the accessories clean In order to use the i vac 5 on different types of surface...

Page 9: ...f the i vac 5 without consultation and permission from the manufacturer This affects the warranty see 1 6 1 5 Specifications Figure 3 Body size 380 x 330 x 380 mm Carrying weight 4 8 kg Weight with ca...

Page 10: ...ernative supplies voids manufacturer s warranty The warranty period is 1 year 1 7 Identification Each i vac 5 has a unique serial number that can be found on the bottom of the main body and on the bot...

Page 11: ...it to reach out to difficult spots It can be combined with different tools to use the i vac 5 on different types of surfaces The i vac 5 consists of Legend 1 An ON OFF switch 6 A hose connector 2 A m...

Page 12: ...in power cable instead pull at the power plug 3 2 Risks during operation WARNING STOP OPERATION IMMEDIATELY if the i vac 5 does not perform properly or makes unusual noise Service the i vac 5 before y...

Page 13: ...13 4 Transport and storage do not store the i vac 5 outdoors store the i vac 5 in a dry place...

Page 14: ...th 2 additional tools for vacuuming different types of surfaces 5 1 Unboxing The i vac 5 and its components and accessories are packed in 1 box Figure 6 Legend 1 1x hose 5 1x crevice tool 2 1x main po...

Page 15: ...os 2 into the connector Figure 7 pos 3 3 Place the main power cable plug into the clamp Figure 7 pos 4 4 Insert the hose Figure 7 pos 9 into the hose intake Figure 7 pos 8 5 Turn the hose clockwise to...

Page 16: ...sure that the hose is removed from the i vac 5 before removing the dust bag You cannot remove the dust bag with the hose in place 1 Turn off the i vac 5 with the ON OFF switch Figure 8 pos 1 2 Remove...

Page 17: ...re 10 pos 3 to seal the dust bag 9 Fold the ends of the dust bag Figure 10 pos 2 towards each other 10 Remove the old dust bag Figure 10 pos 4 11 Slide the cardboard collar of the new filter bag Figur...

Page 18: ...18 14 Place the hose Figure 12 pos 1 into the hose connector Figure 12 pos 2 turn it clockwise to lock it 15 Place the head Figure 13 pos 1 onto the can Figure 12 Figure 13...

Page 19: ...19 16 Fasten the latches Figure 14 pos 1 Figure 14 ATTENTION Make sure that the head is correctly placed on the can otherwise false air may be sucked in and this affects the performance of the i vac 5...

Page 20: ...it through a fiber cloth 3 Make sure that the dust bag is placed in the i vac 5 see 5 2 4 Make sure that you have the correct tool for the intended purpose see Figure 2 5 Check the brush from the too...

Page 21: ...om the holder Figure 17 pos 3 4 Start vacuuming Figure 17 6 2 1 After operation 1 Press the ON OFF switch Figure 17 pos 2 to switch off the i vac 5 2 Remove the main power cable from the wall socket F...

Page 22: ...intenance and assembling disassembling of the i vac 5 may only be operated by a person who has correctly read and understood the instructions in this manual is trained by an experienced operator who h...

Page 23: ...switch Figure 18 pos 1 2 Release the latches Figure 18 pos 2 3 Lift the head by the handle Figure 18 pos 3 4 Place the head on on a level surface Figure 19 pos 1 5 Remove the old motor filter Figure...

Page 24: ...21 7 2 Tool condition Check the condition of the tool for wear and tear before use Only change the tool when the machine is turned off 7 3 Damaged or worn parts Damaged or worn parts need to be replac...

Page 25: ...ssary may cause damage to the i vac 5 and may cause a risk to the operator Check the i vac 5 for damage or defects before you use it Check the dust bag every week and replace it if it is full Change t...

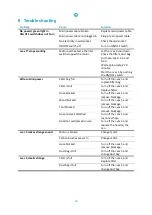
Page 26: ...bag full Turn off the i vac 5 and replace filter bag Filter is full Turn off the i vac 5 and Replace filters Hose blocked Turn off the i vac 5 and remove blockage Wand blocked Turn off the i vac 5 and...

Page 27: ...s and needs to be disposed of according to your local laws and regulations regarding recycling of electrical equipment Before disposal please 1 Remove all loose components like the tools hose and wand...

Page 28: ...28 10 Attachments 10 1CE Certificate...

Page 29: ...29 This document is part of the technical file of the i vac 5 and will be available upon request...

Reviews: