background image


www.i-sens.com                                                                                                   19 


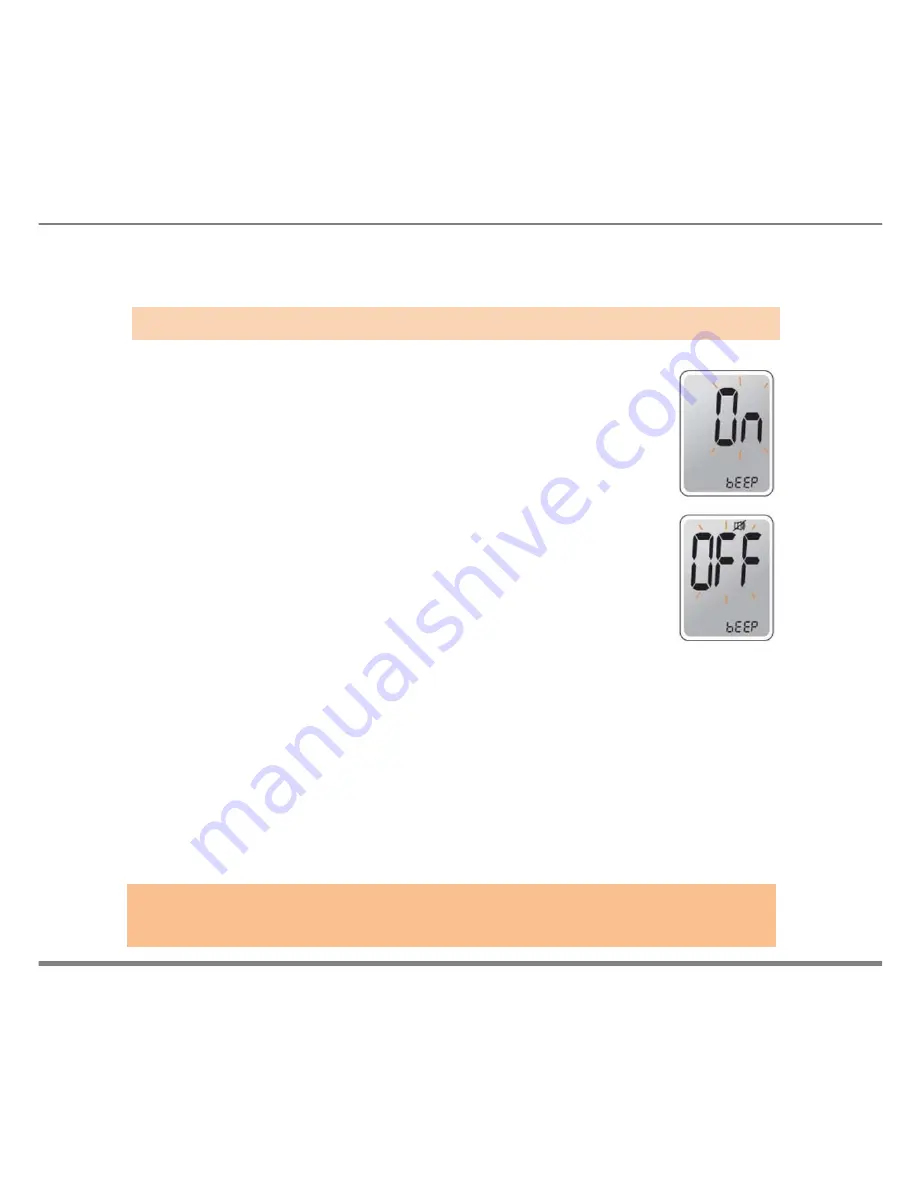
Setting the Sound On/Off


On the sound option menu, pressing the 

 or 

, the 

screen will display the On or OFF. Press the 

S

 button to 

confirm the selection.


The meter will beep in the following instances,   

if the meter’s sound is set to On. 


When the test strip is inserted in the meter


When the blood sample is absorbed into the test 

strip and the test starts


When the test result is displayed


When you push the   

S

 button or 

button to check 

the memory


When you push the 

  button to set the post-

meal (PP2) alarm


When it is time for a preset blood glucose test


If the sound is set to OFF, none of the sound   
functions will work 


Note:


Only when the sound is set to OFF, icon appears on the display 

Step 9


Summary of Contents for AutoChek t

Page 1: ...5 6 Wolgye4 dong Nowon gu Seoul 139 845 Korea www i sens com Medical Technology Promedt Consulting GmbH Altenhofstrasse 80 D 66386 St Ingbert Germany 2012 i SENS Inc All Rights Reserved PGA1E3121 REVx...

Page 2: ...Owner s Booklet Blood Glucose Monitoring System Data Transmission...

Page 3: ...for the quantitative measurement of glucose in fresh capillary whole blood samples drawn from the fingertips and alternative sites such as the forearm palm thigh and calf The AutoChek t Blood Glucose...

Page 4: ...oChek t Blood Glucose Meter Display 14 Adjusting the Date Time and Unit 15 Setting up Your System 15 Setting the Sound On Off 19 Setting the Cellular function On Off 20 Setting the Test Result Reset 2...

Page 5: ...3 Meter Memory 44 Setting the post meal alarm PP2 alarm 46 Setting the Alarm Function 46 Setting the Time Alarms alarm 1 3 48 Charging Your AutoChek t Blood Glucose Meter 50 Caring for Your System 52...

Page 6: ...eal insulin injection or exercise The following chart explains the symbols you ll find in the AutoChek t User Manual product packaging and product inserts For in vitro diagnostic use This product fulf...

Page 7: ...rrors in monitoring by using the no coding function The AutoChek t blood glucose meter should be used only with the AutoChek t strip Do not use the system for testing newborns or pregnant women becaus...

Page 8: ...seconds Sample type Fresh capillary whole blood Calibration Plasma equivalent Assay method Electrochemical Power 3 7V Lithium Polymer Battery Rechargeable Type Memory 250 test result Size 45L x 96 9W...

Page 9: ...blood glucose monitoring system package The exact contents are listed on the main box The cable for data transmission can be ordered separately Please contact your authorized i SENS sales representati...

Page 10: ...e AutoChek t blood glucose monitoring system measures blood glucose quickly and accurately It automatically absorbs the small blood sample applied to the narrow edge of the test strip Autochek t Blood...

Page 11: ...ed according to its storage and handling methods Store test strips in a cool and dry place at a temperature of 1 30 C 34 86 F Keep away test strips from direct sunlight or heat and do not refrigerate...

Page 12: ...com 12 Display Shows results and messages Buttons Select or changes information S Button Turns the meter on off and confirms menu selections Test Strip Port Insert test strip here Autochek t Blood Glu...

Page 13: ...on port Charging the Battery or Used to transfer data from the meter to a computer a Mini USB Cable Autochek t Blood Glucose Meter Note The mini USB cable for data transmission to PC can be ordered Se...

Page 14: ...blood glucose Battery icon Battery level indicator Post meal test flag Appears during post Meal testing and When post meal test Result are displayed Test result Test results displaying panel Decimal...

Page 15: ...3 seconds to turnon the meter After all the segments flash across the screen the SET character icon will be displayed on the screen Press the S button again to enter the year setting mode Enter the SE...

Page 16: ...orrect year appears Press and hold the button to scroll through the numbers quickly After setting the year press the S button to confirm your selection and enter the month setting mode A number indica...

Page 17: ...ur or 24 hour clock format Press the or to select a format The AM PM icon is not displayed in the 24 hour format After selecting the format press the S button to enter the hour setting mode Press the...

Page 18: ...www i sens com 18 Press the or until the correct minute appears After setting the minute press the S button to enter the unit setting mode Step 8 Setting the Minute...

Page 19: ...n the test strip is inserted in the meter When the blood sample is absorbed into the test strip and the test starts When the test result is displayed When you push the S button or button to check the...

Page 20: ...unction of the meter can be activated or deactivated From the CEL screen press the or button until the On character icon appears on the screen Press the S button to turn on the cellular function of th...

Page 21: ...once the T1 appears press the S button to choose Transfer Mode 1 Once the cellular function of the meter is turned on the meter can transmit the test result data to the designated SMS server once a d...

Page 22: ...n press the or until the correct hour appears After the hour is set press the S button to enter the minute setting mode Press the or until the correct minute appears Once correct hour and minutes are...

Page 23: ...e or to alternate between YES or no To delete all the stored test results press the S button when the screen displays YES Then all the test results stored in the meter will be deleted and the screen w...

Page 24: ...vial When you first open a control solution vial record the discard date date opened plus three months in the space provided on the label Make sure your meter test strips and control solution are at...

Page 25: ...before each test Remove the cap and squeeze the vial to discard the first drop Then wipe the tip with a clean tissue or cloth After the symbol appears on the display apply the solution to the narrow e...

Page 26: ...ould fall within the range on the test strip vial Used strips should be discarded and disposed Note The meter may be turned off if the blood sample is not applied within 2 minutes of the icon appearin...

Page 27: ...the control solution is past its expiration date or is contaminated When the meter the strip or the control solution were exposed to high or low temperatures When the first few drops of the control s...

Page 28: ...strongly discouraged Use a soft cloth or tissue to wipe the lancing device If necessary a small amount of alcohol on a soft cloth or tissue may be used Caution To avoid infection when drawing a sampl...

Page 29: ...ple site with soap and warm water Rinse and dry thoroughly Unscrew the lancing device tip Firmly insert the new lancet into the lancet holder Hold lancet firmly Gently twist to pull off the protective...

Page 30: ...he lancing device hold the tip in one hand Pull the sliding barrel on with the other hand The lancing device is cocked when you feel a click Step 4 Step 5 Note The skin depth to retrieve samples will...

Page 31: ...fter inserting the test strip The post meal flag and the symbol will appear on the screen The test result will also be displayed with the post meal flag If you do not want to save the result the resul...

Page 32: ...ion window actual size of 0 5 After the symbol appears on the screen Apply the blood sample to the narrow end of the test strip till the meter beeps If the confirmation window filled before the meter...

Page 33: ...counts down from 5 to 1 The result will be automatically stored in the meter s memory If the test strip is removed after the test result is displayed the meter will be automatically turned off after...

Page 34: ...r measuring Blood glucose and discard an used test strip the meter will starting the data transfer operation Snd will be appeared on the screen Once the data transfer begins the progress indication da...

Page 35: ...ule then BGM sends all test results to the server once a day only at a reserved time At the reserved time GSM meter wakes up automaticallyandgathering all measured data of the day The data will be sen...

Page 36: ...www i sens com 36 When the meter successfully sent the test result SUCC ESS will be appeared at the bottom of the screen Step 4...

Page 37: ...e adjusting In the sleep mode press the button until display TIM When TIM appears release the button When the Autochek t retrieve cellular network time it will display the local time at the bottom of...

Page 38: ...ve cover on the lancet Push the lancet ejector forward with the thumb and simultaneously pull out the sliding barrel to dispose the used lancet into a proper biohazard container Step 1 Step 2 Cautions...

Page 39: ...ay not be simple for everyone and the following precautions should be observed during testing You should consult with your doctor before using alternate site testing Please understand the following in...

Page 40: ...Do not rely on the AST results for changing one s treatment method The amount glucose in alternative sites differs from person to person Before using AST please consult your regular physician Situati...

Page 41: ...Use a fingertip for drawing if you suffer from hypoglycemia or have experienced hypoglycemic shock or symptoms drawing if you suffer from hypoglycemia or have experienced hypoglycemic shock or sympto...

Page 42: ...please contact your healthcare professional immediately The Lo icon appears when the result is less than 20 mg dL 1 1 mmol L and indicates hypoglycemia If the Lo icon is displayed again on re testing...

Page 43: ...tes NIH Publication No 05 4642 January 2005 Reminders Your target ranges Time of day from your healthcare expert Before breakfast Before lunch or dinner 1 hour after meals 2 hour after meals Between 2...

Page 44: ...30 and 90 days Viewing Test Result Stored in the Meter s Memory Press the or S button to turn the meter on p The current date and time will be displayed at the bottom of the screen for 2 seconds foll...

Page 45: ...button to return to the result seen previously After checking the stored test results press the S button to turn off the meter Step 3 Note Bypressing the button the latest test result saved in the me...

Page 46: ...s can be turned of by inserting a test strip Setting the post meal alarm PP2 alarm Without inserting a test strip press and hold the button for 3 seconds to set the post meal alarm The PP2 character t...

Page 47: ...the button for 3 seconds The PP2 character the bell icon and then the OFF character will be appeared on the screen Then the screen will be switched automatically to the memory check mode without the...

Page 48: ...the OFF character blinks on the screen By pressing the button the alarm1 is set and the On character will be displayed on the screen Press the button again to cancel the alarm1 The OFF icon will be b...

Page 49: ...will start blinking Press the button to set the accurate minute Press the S button to finish and to enter the alarm 2 mode Repeat steps 2 to 5 to set the remaining time alarms alarm 2 3 Press the S b...

Page 50: ...Plug the mini USB cable into AC adaptor Plug the other end of the mini USB cable into the BGM s charging port which is located on the side of the BGM Once the mini USB cable is plugged the BGM will st...

Page 51: ...is completed the End will be appeared at bottom left of the screen Step 2 Caution If the meter won t charge please do not attempt to take apart repair or modify the meter Please contact your authoriz...

Page 52: ...s in the portable case to prevent loss Caution Do not expose the meter to direct sunlight or heat for an extended period of time Prevent the entry of dirt dust blood or water at the meter s test strip...

Page 53: ...lied before the icon appeared Repeat the test with a new test strip and wait until the icon appears before applying the blood sample The temperature during the test was above or below the operating ra...

Page 54: ...strip was used Test strip was not inserted properly Repeat the test with a AutoChek t test strip Insert a test strip with the contacting bars facing upwards and push in gently until the meter beeps Th...

Page 55: ...insertion Check if the SIM card is Properly inserted in the Meter If the SIM card is Properly inserted Check If there is any defect on the SIM card Radio Signal error Can t detect GSM Signal Or Signal...

Page 56: ...in The meter or contact The service provider To see if there is any Network issue Message Send error Your data transmission is Not successful Try to send the test Result data one more time If the met...

Page 57: ...window is filled adequately Repeat the test after inserting a new test strip The test result doesn t match your expectation Repeat the test after inserting a new test strip Check the validity period o...

Page 58: ...ment The following results were obtained by 110 diabetic patients at clinic centers Accuracy results for glucose concentration 75 mg dL 4 2 mmol L Accuracy results for glucose concentration 75 mg dL 4...

Page 59: ...age 86 1 mg dL 4 8 mmol L SD 3 2 mg dL 0 2 mmol L Blood average 124 5 mg dL 6 9 mmol L CV 4 1 Blood average 189 1 mg dL 10 5 mmol L CV 2 6 Blood average 334 5 mg dL 18 6 mmol L CV 2 8 Total Precision...

Page 60: ...or service of the meter Any claim must be made within the warranty period The i SENS company will at its discretion repair or replace a defective meter or meter part that is covered by this warranty...

Page 61: ......

Reviews: