background image


72

• 

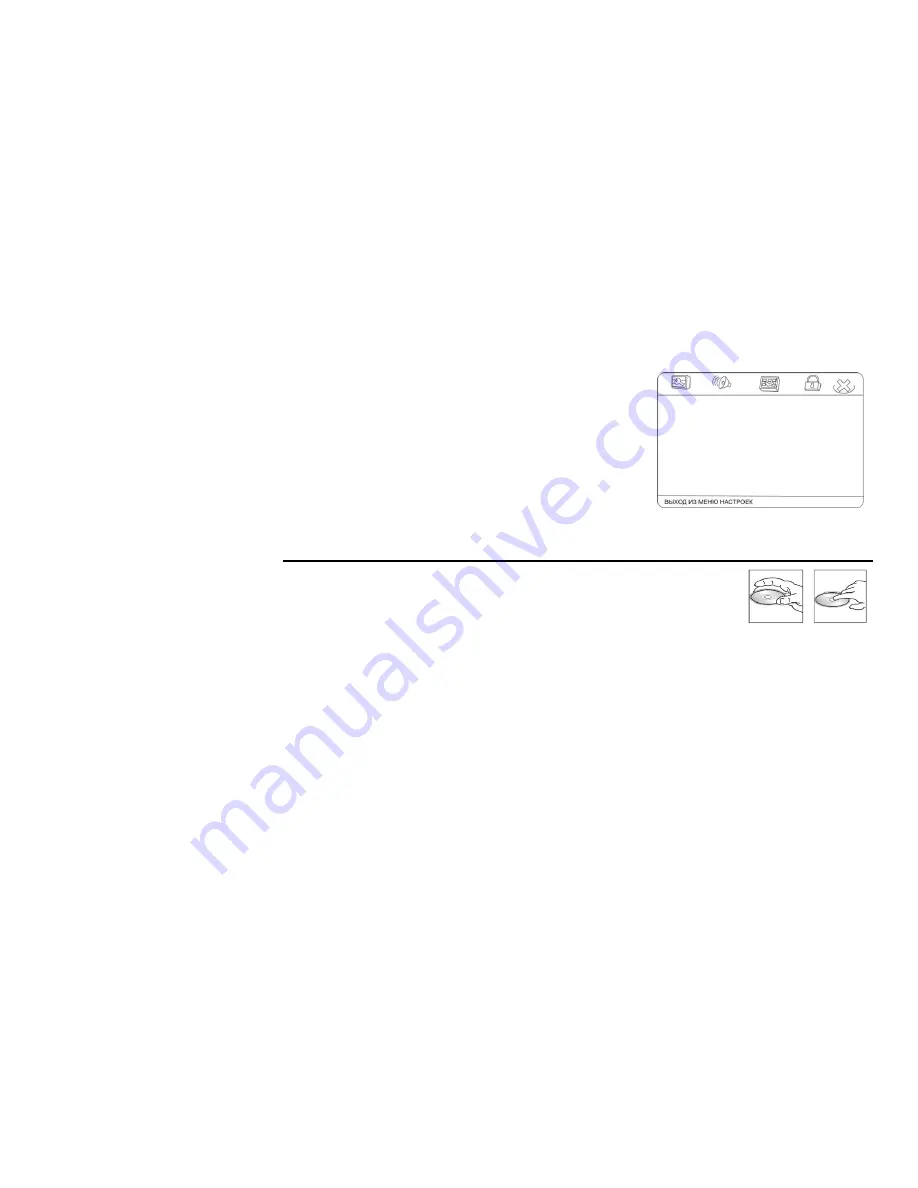
ВЫХОД


Выход


из


меню


настроек


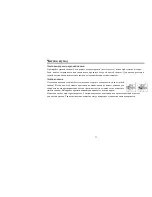
Обращение


с


дисками


• 

Грязные

поцарапанные


или


погнутые


диски


могут


вызвать


искажение


звука


или


шумы

• 

Держите


диск


только


за


края

  (

как


показано


на


рисунке

). 

Чтобы


обеспечить


чистоту

не


прикасайтесь


к


его


поверхности

• 

Диски


должны


храниться


в


их


чехлах


после


использования

чтобы


не


поцарапать


их


поверхность

• 

Не


подвергайте


диски


действию


прямого


солнечного


света

повышенной


влажности

повышенным


температурам


или


действию


пыли

• 

Продолжительное


влияние


предельных


температур


может


изогнуть


диск

  (

например

пребывание


дисков


в


автомобиле


в


летнее


время

). 

• 

Не


царапайте


и


не


пишите


что

-

либо


на


любой


стороне


диска

Острые


пишущие


инструменты


или


чернила

используемые


в


них

могут


повредить


поверхность


диска

• 

Не


оставляйте


никаких


следов


на


рабочей


стороне


диска

.


• 

Не


прикрепляйте


этикетки


или


стикеры


к


любой


стороне


диска

.


Summary of Contents for Excellence H-CDM4007

Page 1: ...EXCELLENCE by H CMD4008 MULTIMEDIA DVD CD MP3 RECEIVER WITH BUILT IN 3 TFT DISPLAY Instruction manual DVD CD MP3 3 TFT...

Page 2: ...and or adjusting the product and keep the manual for reference in the future Table of contents Table of contents 2 Important safeguards 3 Installation connection 4 Controls 6 General operations 12 Di...

Page 3: ...ards such as electrical shock or laser beam exposure If you have parked the car for a long time in hot or cold weather wait until the temperature in the car becomes normal before operating the unit DO...

Page 4: ...re the holder in place 3 Secure the rear of the unit Fix the rear of the unit to the car body by rubber cushion 1 Dashboard 2 Nut 5 mm 3 Spring washer 4 Screw 5 x 25 mm 5 Screw 6 Strap 7 Plain washer...

Page 5: ...al connection Caution Do not interchange the connection of the wiring For some car models you may need to modify wiring of the supplied power cord Contact your authorized car dealer before installing...

Page 6: ...us menu 2 MODE button Press the MODE button to select the mode RADIO DISC USB SD AUX 3 VOL knob MENU button Rotate VOL knob clockwise to increase the volume level rotate anticlockwise to decrease the...

Page 7: ...ss the button is ENTER function During playback press the PTY BND PLAY PAUSE button to pause or resume playing 10 REL button Press the REL button to release the front panel 11 buttons During playback...

Page 8: ...output press it again to resume volume 17 USB slot Inner panel 18 SD MMC slot 19 Disc loading slot 20 EJECT button Press it to eject the disc 21 RESET button Press the RESET button to set the unit wi...

Page 9: ...equalizer preset modes to adjust the sound quality 5 SETUP button in playback mode press to display system setting menu 6 ENTER buttons fast reverse fast forward previous track next track upwards dow...

Page 10: ...or VCD disc press it to show the disc menu 21 STOP button press it to stop playback 22 PLAY button press it to start playback 23 AMS PROG button in radio mode press to scan and automatically store sta...

Page 11: ...re children cannot reach If a child accidentally swallows the battery consult a doctor immediately Do not recharge short disassemble or heat the battery or dispose it in a fire Do not expose or bring...

Page 12: ...the volume level and radio current settings will be memorized and when you turn the unit on it will resume the stored status that you set Volume control Rotate the VOL knob on the panel clockwise or...

Page 13: ...ME ADJUST DEFAULT Press the MENU button VOL knob on the panel or press the ENTER button on the RC to enter the submenu selected Rotate the VOL knob on the panel or press the cursor buttons on the RC t...

Page 14: ...2 seconds or press the ENTER button the setting will be saved automatically Note If turning off the power all the settings of each mode will be saved If turning off the ACC power or reset the unit al...

Page 15: ...t the 2 digit number use the digital buttons in sequence For example to insert number 14 press 1 4 Information on the display In DVD mode press the DISP button on the RC to display GO TO SELECT In VCD...

Page 16: ...al tuning Press and hold for 2 seconds the button on the RC press repeatedly the button to start manual searching the station When the button is pressed the station is sought in the direction of highe...

Page 17: ...conds the LOC SUB T button on the RC shortly to turn the LOCAL function ON or OFF When the LOCAL function is on the local stations stations with weak radio signal can be played When the LOCAL function...

Page 18: ...AIRS INFO SPORT EDUCATE DRAMA CULTURE SCIENCE VARIED POP M ROCK M EAST M LIGHT M CLASSIC OTHER M WEATHER FINANCE CHILDREN SOCIAL RELIGION PHONE IN TRAVEL LEISURE JAZZ M COUNTRY M NATION M OLDIES M FOL...

Page 19: ...important part of DVD disc The memory volume of the disc is rather big that makes possible to record several films on one disc For example if a disc contains three films they may be divided into Title...

Page 20: ...aracters Max Track number is 448 Max nested directory is 8 levels The max album number is 99 The max length of each track is 99 minutes 59 seconds Supported sampling frequency for MP3 disc 8 KHz 48 KH...

Page 21: ...Ericsson Nokia Motorola HP Palm Sanyo Microsystems etc Capacity 16 MB 1 GB Loading a disc 1 Turn the power on 2 Press the REL button on the panel to open the front panel 3 Insert the disc with the pr...

Page 22: ...button on the panel Playing pausing To ensure good system performance wait until the unit finishes reading the disc information before proceeding After inserting the disc playback will start automatic...

Page 23: ...he beginning of the playing another track it resumes normal playback Repeat playback During playback press the RPT SEEK button on the RC or AMS RPT on the panel to select the repeat mode CHAPTER TITLE...

Page 24: ...RC repeatedly to select the audio language to listen if the disc supports multi language mode Selecting the channel for VCD only During VCD disc playback press ST AUDIO button on RC repeatedly to sel...

Page 25: ...2 If the menu consists a list of titles you can select a desired one using the buttons or digit buttons 3 The VCD starts playing the selected title automatically or press ENTER button to confirm the s...

Page 26: ...LE CHAPTER TIME 3 Press GOTO to go to the selected item 4 In time search mode press the numeric buttons to enter the time you want to start playback from hh mm ss For example to enter time 18 20 00 pr...

Page 27: ...he picture Press to play MP3 Note When playing a disc or memory card combined with MP3 MP4 WMA DivX files the unit will only read the files with same format automatically For example if the unit read...

Page 28: ...d folders per disc is 448 The unit may not play tracks in the order of Track numbers The unit plays only the audio tracks if a disc contains both audio tracks and MP3 files When playing a disc of 8 kb...

Page 29: ...D R or CD RW media data may not be properly written depending on its manufacturing quality In this case data may not be reproduced correctly High quality CD R or CD RW disc is recommended Up to 16 cha...

Page 30: ...PS When the unit connects to the normal TV set the wide screen image shows on the full screen but some part is cut off 4 3 LB When the unit connects to the normal TV set the wide screen image shows an...

Page 31: ...1 CH format Stereo The audio out format is stereo even if the original sound is 5 1 CH format V surr The audio out is virtual surround sounds only for 5 1 CH player SPDIF SETUP SPDIF OUTPUT SPDIF OFF...

Page 32: ...These are the initial settings by your preference If a setting is supported by disc content it will work Otherwise the disc default value works And these settings can be changed respectively by press...

Page 33: ...l submenu PASSWORD When the password mode is ON you can change the password Select PASSWORD CHANGE Use the cursor buttons to select the desired field In the OLD PASSWORD field insert the old password...

Page 34: ...ction sheet to either side of a disc Cleaning Cleaning the cabinet and panel Wipe with a soft cloth If the cabinet is very dampen not dropping wet the cloth with a weak solution of soapy water and the...

Page 35: ...off until the ambient temperature returns to normal No sound Volume is in minimum Wiring is not properly connected Adjust volume to a desired level Check wiring connection The operation keys do not wo...

Page 36: ...178 x 50 x 166 mm 1 55 kg Working temperature range 10 60 ESP function 40 sec for Audio CD 120 sec for MP3 TFT display Screen size 3 inches Resolution 320 x 240 dpi Aspect ratio 16 9 4 3 Contrast rat...

Page 37: ...ct to change without notice Mass and dimension are approximate Audio specification Maximum output 2 Vrms 3 dB Frequency response 20 Hz 20 KHz S N ratio A vtd 55 dB mono Separation 30 dB 65 dB 1KHz Lin...

Page 38: ...38 38 39 40 43 49 53 56 57 3 66 68 72 73 74 75...

Page 39: ...39 10...

Page 40: ...40 4 5 5 5 1 2 3 1 2 5 3 4 5 x 25 5 6 7 4...

Page 41: ...41...

Page 42: ...42...

Page 43: ...43 1 PWR B CK SETUP 2 MODE MODE RADIO DISK USB SD AUX 3 MENU VOL MENU...

Page 44: ...44 AUDIO PICTURE EXPERT TIME ADJ DEFAULT 4 5 PTY RADIO PTY PTY 6 AF RADIO AF 7 TFT 8 AMS RPT RADIO AMS RPT AMS RPT 9 BND PLAY PAUSE BND PLAY PAUSE ENTER BND PLAY PAUSE 10 REL 11...

Page 45: ...45 12 LOUD LOUD 13 TA RADIO TA TA 14 EQ 15 AUX 16 MUTE 17 USB 18 SD MMS 19 20 EJECT 21 RESET...

Page 46: ...46 1 POWER 2 MODE RADIO DISK USB SD AV 3 DISP DVD 4 EQ 5 SETUP 6 ENTER ENTER 7 TITLE 8 ANGLE 9 GOTO 10 CLEAR 11 10...

Page 47: ...RPT SEEK RADIO 13 0 9 Radio 7 TA 8 AF 9 PTY TA AF PTY 14 VOL VOL 15 BACK 16 MUTE 17 SLOW 18 SLOW 19 MENU 20 PBC VCD 21 STOP 22 PLAY 23 AMS PROG Radio VCD CD 24 ZOOM 25 LOC SUB T FM DVD 26 RDM SEEK VC...

Page 48: ...48 Radio 27 BAND P N DVD VCD PAL MULTI NTSC 28 ST AUDIO FM DVD VCD 1 2 CR 2025 3V 3 6...

Page 49: ...49 RESET PWR BACK VOL VOL VOL VOL 0 63 Mute MUTE...

Page 50: ...O DISC USB USB SD MMC SD MMC AV EQ EQ VOL FLAT CLASSIC POP ROCK JAZZ OFF OFF o MENU MENU AUDIO PICTURE EXPERT TIME ADJUST DEFAULT MENU MENU BASS TREBLE EQ FLAT CLASSIC POP ROCK JAZZ OFF BALANCE L R FA...

Page 51: ...51 BRIGHTNESS CONTRAST COLOUR HUE 0 63 DX LOC ST MONO WOOFER BEEP LOUD TIME DISP TIME FMT 12AM 24AM HOUR MINUTE MENU ENTER ENTER BACK BACK PWR BACK...

Page 52: ...52 14 1 4 DVD DISP VCD CD DISP...

Page 53: ...53 RDS RDS BND P N BND PLAY PAUSE FM1 FM2 FM3 AM 24 18AM 6AM BND FM AM 1 6 1 6...

Page 54: ...54 AMS RPT PROG AMS 5 AMS RPT 6 AMS RPT LOC SUB T ST AUDIO RDS PI PS TP PTY TA AF DATA PI PS...

Page 55: ...EWS AFFAIRS INFO SPORT EDUCATE DRAMA CULTURE SCIENCE VARIED POP M ROCK M EAST M LIGHT M CLASSIC OTHER M WEATHER FINANCE CHILDREN SOCIAL RELIGION PHONE IN TRAVEL LEISURE JAZZ M COUNTRY M NATION M OLDIE...

Page 56: ...56 PBC PBC 1 3 1 2 3...

Page 57: ...DVD video SVCD VCD HDCD MP3 MP4 WMA DivX MPEG4 MP3 mp3 WMA wma MP4 avi DIVX3 11 4 0 5 0 6 0 and XVID MPEG 2 vob MPEG 1 dat JPEG jpg ISO 9660 ISO 9660 Joliet 30 448 8 99 99 59 MP3 8 48 44 1 P3 32 320 1...

Page 58: ...T 16 FAT 32 FAT 12 16 200 500 FAT 32 200 500 1 32 32 2 id3tag ver 2 0 32 6 7 USB 2 0 USB USB 2 0 8 M 1 SD SD Cannon Fuji film Palm Motorola Microsoft IBM HP Compaq Sharp Samsung 8 M 1 MMC MMC Ericsson...

Page 59: ...59 4 5 MODE DVD DVD MP3 PLAY 6 REL 7 EJECT 8 11 SD MMC USB SD MMC USB SOURCE MODE PLAY PAUSE PLAY BND...

Page 60: ...60 STOP PLAY STOP x2 x4 x8 x16 x32 DVD VCD SLOW 1 2 1 4 1 8 1 16 NORMAL SEEK RPT AMS RPT...

Page 61: ...61 A B DVD VCD 1 0 A B 2 0 A B 3 CD VCD MP3 RDM SEEK DVD P N BAND NTSC PAL AUTO DVD DVD ANGLE DVD DVD ST AUDIO...

Page 62: ...62 CD VCD ST AUDIO Mono Left MonoRight Mix Mono Stereo DVD LOC SUB T DVD VCD ZOOM 2X 3X 4X 1 2X 1 3X 1 4X DVD TITLE ENTER PLAY PAUSE CD VCD MP3 RDM SEEK 1 MENU 2...

Page 63: ...63 3 ENTER PBC VCD VCD PBC 1 1 PBC 2 3 ENTER 4 STOP VCD 5 PBC 1 AMS PROG 2 ENTER 3 4 ENTER 5 PLAY GOTO DVD VCD...

Page 64: ...64 1 GOTO VCD GOTO DVD 2 ENTER 3 GOTO 4 18 20 00 1 8 2 0 0 0 GOTO 03 28 28 GOTO 13 1 3 GOTO DVD DVD PACKING BRAKE...

Page 65: ...65 MP3 MP3 MP3 MP3 MP4 WMA Divx MP3 MP3 Divx MP4 WMA MP3 PREV NEXT...

Page 66: ...66 3 3 3 MPEG 3 3 CD ROM CD R CD RW 3 ISO 9660 3 3 mp3 3 mp3 MP3 PC 8 448 3 8 VBR CD R CD RW MP3 3 44 1 128 448 3...

Page 67: ...67 ISO 9660 8 CD R MP3 CD R CD RW 3 CD R CD RW CD R CD RW 16 1 ID3TAG...

Page 68: ...68 1 SETUP 2 3 ENTER PLAY 4 5 SETUP T 4 3 PS 4 3LB 16 9 4 3 4 3 DVD DVD 16 3 4 3 DVD DVD...

Page 69: ...69 LT RT PRO LOGIC Dolby 5 1 5 1 CH SPDIF SPDIF SPDIF L R LS RS SPDIF RAW...

Page 70: ...70 SPDIF PCM DVD Dolby Digital LPCM PAL NTSC Multi Multi NTSC PAL NTSC PAL SETUP NTSC PAL DVD MULTI PAL NTSC...

Page 71: ...71 AUDIO SUBTITLE 8 DVD 5 1 6 136900...

Page 72: ...72...

Page 73: ...73...

Page 74: ...74 POWER 10 30 30...

Page 75: ...12 15 50 4 DVD SVCD VCD HDCD MP3 MP4 WMA CDDA JPEG CD R RW DVD R RW DivX MPEG4 178 50 166 1 55 10 60 ESP 40 CD 120 3 3 480 240 dpi 16 9 4 3 300 1 350 2 PAL NTSC FM 65 0 74 0 85 0 MHz 6 18 AM 522 1620...

Page 76: ...76 2 RMS 3 20 20 A vtd 55 30 65 1 CD 2000...

Reviews: