30
System setup
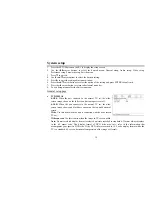
1. Press the SETUP button on the RC to display the setup screen.
2. Use the
◄
/
►
cursor buttons to select the desired menu: General setup, Audio setup, Video setup,
Preference setup, Password setup, Exit the menu.
3. Press
▼
to enter it.
4. Use
the
▲
/
▼
cursor buttons to select the desired setting.
5. Press
►
to enter the setting adjustment window.
6. Press
the
▲
/
▼
cursor buttons to select the option of the setting and press ENTER to confirm it.
7. Press
the
◄
cursor button to return to horizontal menu list.
8. To exit Setup menu select the Exit setup menu.
General setup page
•
TV DISPLAY
4:3/PS
: When the unit connects to the normal TV set, the wide-
screen image shows on the full screen, but some part is cut off.
4:3/LB
: When the unit connects to the normal TV set, the wide-
screen image shows and black bars appear on the top and bottom of
screen.
Wide
: Use this item when the unit is connected with the wide screen
TV set
.
Wide squeeze:
Use this item to widen the image to TV screen width.
Note:
No matter which display format is selected a picture recorded in standard 4:3 format always displays
in the 4:3 aspect ratio. The display format of DVD titles may vary; refer to the information that
accompanies your specific DVD title. If the DVD title is recorded in 16:9 wide display format while the
TV is a standard 4:3 screen, horizontal compression of the image will result.
Summary of Contents for Excellence H-CDM4007
Page 38: ...38 38 39 40 43 49 53 56 57 3 66 68 72 73 74 75...
Page 39: ...39 10...
Page 40: ...40 4 5 5 5 1 2 3 1 2 5 3 4 5 x 25 5 6 7 4...
Page 41: ...41...
Page 42: ...42...
Page 43: ...43 1 PWR B CK SETUP 2 MODE MODE RADIO DISK USB SD AUX 3 MENU VOL MENU...
Page 45: ...45 12 LOUD LOUD 13 TA RADIO TA TA 14 EQ 15 AUX 16 MUTE 17 USB 18 SD MMS 19 20 EJECT 21 RESET...
Page 48: ...48 Radio 27 BAND P N DVD VCD PAL MULTI NTSC 28 ST AUDIO FM DVD VCD 1 2 CR 2025 3V 3 6...
Page 49: ...49 RESET PWR BACK VOL VOL VOL VOL 0 63 Mute MUTE...
Page 52: ...52 14 1 4 DVD DISP VCD CD DISP...
Page 53: ...53 RDS RDS BND P N BND PLAY PAUSE FM1 FM2 FM3 AM 24 18AM 6AM BND FM AM 1 6 1 6...
Page 54: ...54 AMS RPT PROG AMS 5 AMS RPT 6 AMS RPT LOC SUB T ST AUDIO RDS PI PS TP PTY TA AF DATA PI PS...
Page 56: ...56 PBC PBC 1 3 1 2 3...
Page 60: ...60 STOP PLAY STOP x2 x4 x8 x16 x32 DVD VCD SLOW 1 2 1 4 1 8 1 16 NORMAL SEEK RPT AMS RPT...
Page 65: ...65 MP3 MP3 MP3 MP3 MP4 WMA Divx MP3 MP3 Divx MP4 WMA MP3 PREV NEXT...
Page 67: ...67 ISO 9660 8 CD R MP3 CD R CD RW 3 CD R CD RW CD R CD RW 16 1 ID3TAG...
Page 68: ...68 1 SETUP 2 3 ENTER PLAY 4 5 SETUP T 4 3 PS 4 3LB 16 9 4 3 4 3 DVD DVD 16 3 4 3 DVD DVD...
Page 69: ...69 LT RT PRO LOGIC Dolby 5 1 5 1 CH SPDIF SPDIF SPDIF L R LS RS SPDIF RAW...
Page 71: ...71 AUDIO SUBTITLE 8 DVD 5 1 6 136900...
Page 72: ...72...
Page 73: ...73...
Page 74: ...74 POWER 10 30 30...

