


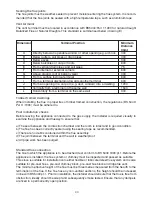


34
The Draught Diverter should be fi tted to the top of the Firebox as shown on drawing F(a), and
then standard fl ue system can be connected from this point.
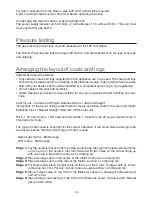
Please follow this procedure to turn a closed system into a standard outlet:
1. Remove the front of the stove by gently pulling the jacket towards you.
2. Install the downdraught outlet which you will fi nd in a box in the combustion chamber.
3. The connecting cables from the downdraught outlet must be attached to the cables from the
burner.
4. Make sure that the sensor (TTB) and the cables from the downdraught outlet always face the
rear. Then lead the cables down between the rear side of the combustion chamber and the
inner side of the rear of the stove.
5. Now lead the cables down to the burner and attach them to the two cables from the valve.
How the cables are connected is not important.
6. Remove the pressure equalisation hatch (F(b)) in the bottom of the combustion chamber by
removing the two bolts beneath the combustion chamber.
7. Replace the front of the stove.
Important
· The draft diverter for use with standard fl ue connection incorporates the fl ue spillage monitoring
system.
· The spillage monitoring system must not be put out of action.
· Only original manufacturer’s parts must be used in service replacement of the spillage monitor-
ing system.
Ventilation (G.B. only)
The Carmen Balanced Flue or natural draught has no requirement for additional ventilation in
the room.
The Figaro Balanced Flue has no requirement for additional ventilation in the room.
The Figaro Natural Draught requires additional ventilation in the room in a size of 100 cm
2
Connecting the appliance
Connecting the gas
Ensure that the gas supply pipework is capable of delivering the required volume of gas in
accordance with the relevant British Standards.
Do not make any connections to the appliance until the pipe work has been purged to expel
any dust or debris. Failure to do this may result in a blockage in the system that will invalidate
the guarantee.
Final connection should be made using 8 mm or 12 mm semi rigid pipe no more than 1 metre
in length. The nut and olive is supplied to make installation easier.
The gas supply to the stove should terminate with a standard type safety/restrictor tap.
For gas connection from R/H Side, a straight piece of pipe will be required. For gas connection
from the L/H Side, a pipe with a “U” bend will be required.
Summary of Contents for Carmen gas
Page 2: ...2...
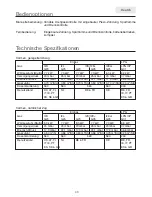
Page 4: ...4 650 A A 186 1077 869 462 532 A A 650 A A 182 850 686 442 528 A A Figaro gas Carmen gas A B...
Page 6: ...6 G A E B C F F J H I D F K L G A H I D K F J a b E F...
Page 7: ...7 G G1 G4 G5 G6 G7 G8 G9 G10 G11 G2 G3...
Page 8: ...8 H H1 H2 H3 H4 H5...
Page 50: ...50...
Page 51: ...51...