Poseidon2
– Family manual
HW group
www.HW-group.com
7 / 104
Poseidon2: first steps
1) Connecting the cables
Turn the unit and write down its MAC address that is printed on the label on the side.
Set the switches:
DIP1=Off, DIP2=Off
.
Connect the unit to the Ethernet (with a patch cable to a switch, cross-over cable to a PC), RJ-
45 port.
Plug the power adapter into a mains outlet and connect it to the Poseidon2 power input.
The green
POWER
LED lights up.
If the Ethernet connection works properly, the
LINK
LED lights up after a short while, and then
flashes whenever data are transferred (activity indication).
2) Configuring the IP address
– UDP Config
UDP Config
utility
– root directory of the supplied CD (Windows and Linux versions).
Available for download at
www.HW-group.com
Software > UDP Config.
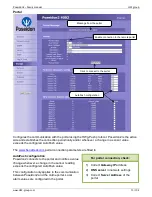
Click the icon to launch
UDP Config
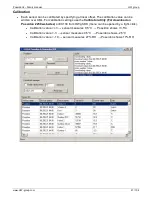
. The program automatically looks for connected devices.
Automatic device discovery works only in the local network.
Individual Poseidon2 units are identified by their MAC addresses (on the label at the bottom).
Double-click a MAC address to open a basic device configuration dialog.
Double click for
details


