G.13
TE 250 - 310 2012 I.E. / TE 250 - 310 2012 I.E. USA
TC 250 2012 - TC 250 2012 I.E. USA
TXC 250 - 310 2012 I.E. USA
H11117
ENGINE OVERHAUL
Workshop Manual Ed. 12-2011
*: end gap position "d"
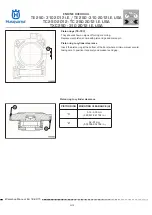
PISTON RING END GAP ALIGNMENT
Piston ring to groove clearance
Use a feeler gauge to measure the axial clearance (H) of piston rings. If the
piston ring is marked on one side, that side must be facing up.
Piston pin to small end clearance (A)
:
0,019 ÷ 0,01 mm (0,00075 ÷ 0,00040 in.)
Big end side clearance (B)
:
0,018 ÷ 0,030 mm (0,00071 ÷ 0,0012 in.).
Big end axial clearance
Measure axial clearance "A" between crankshaft (1) and connecting rod (2)
using a feeler gauge. Compare measured clearance with the table below.
PISTON
RING
MOUNTING CLEARANCE (H)
"A"
0.02-0.06 mm
(0.00078-0.02362 in.)
"B"
0.01-0.18 mm
(0.00039-0.00708 in.)
STANDARD
0.29-0.43 mm
(0.00985-0.016942 in.)


