background image

25 Sp

S

P

33

32

24

23

22

2

3

1

4

5

21

*

6

8

9

10

11

16

15

14

13

12

17

18

19

20

25

29

30

31

28

27

26

Para ordenar repuestos, sirvase llamar al concesionario
más cercano a su domicilio

* Las roscas de la conexión entre el tanque

externo de pintura y la manguera de material
son de 9,5mm (3/8”) NPS (M)

Operation

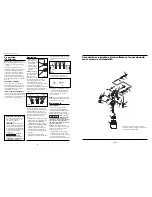
1. Begin spraying.

Always keep the
gun at right angles
to the work by
flexing your wrist
while making the
paint stroke. (See
Figure 6).

NOTE: 

Do 

not

keep

the wrist stiff during
the stroke and do

not

“fan” the gun

from side to side in
an arc while spraying. This type of
motion brings the gun close to the
surface and deposits a heavy
concentration of material in the center
of each stroke and applies an
insufficient concentration of material at
the end of the stroke. This will make a
very poor, irregular paint job (See
Figure 7).

Keep the nozzle about 6 to 9 inches
from the work surface throughout the
stroke and always keep the gun in
motion while spraying. Stopping gun
movement in mid-stroke will cause a
build up of material and result in
“runs.”

2. “Trigger” the gun properly. Start the

gun moving at the beginning of the
stroke BEFORE SQUEEZING THE
TRIGGER and release the trigger
BEFORE STOPPING GUN MOVEMENT
at the end of the stroke. This
procedure will “feather” (blend)
each stroke with the next without
showing overlap or unevenness (See
Figure 8).

3. The amount of material being

applied can be varied by the speed of

the stroke, distance from the surface
and adjustment of the fluid control
knob.

4. Overlap strokes just enough to

obtain an even coat (See Figure 9).

5. Use a piece of cardboard as a shield

to catch overspray at the edges of
the work to protect other surfaces.
Use masking tape to cover other
areas if needed.

NOTE: 

Two thin coats of material will

yield better results and have less chance
of runs than one heavy layer.

Maintenance

DAILY CLEAN-UP

Local codes may require specific
cleaning methods and equipment.
Follow local codes and manufacturer’s
recommendations for the use and
disposal of spray materials and solvent.

Clean spray gun 
immediately after

use. Paint and other materials dry
quickly in the small passages rendering
gun useless due to the difficulty of
removing hardened materials from the
passages inside the gun.

NOTE:

In the instructions below,

“solvent” refers to the specific solvent
for the material used (eg: lacquer
thinner for lacquer, etc ).

1. Spray guns with canister—Remove

and empty the canister; then rinse
with a solvent recommended for the
paint or other material used.

2. Refill canister with clean solvent and 

NOTICE

Preparation
(Continued)

NOTE: 

If there is sagging, too much

material is being applied. If there is an
“orange peel” effect, the material is
too thick.

If the spray is too fine (excessive
overspray), caused by too much air for
the amount of paint being sprayed,
reduce the air pressure or open the
fluid control to spray more material.

If the spray is too coarse (spitting
globs), reduce the amount of material
with the fluid control knob or thin the
material.

DISTANCE ADJUSTMENTS

Start 6” away from work surface. If
pattern begins to run, move back an
inch and try again. The pattern will be
dry and thin and may feel rough if
sprayed from too far away.

SPEED OF STROKE ADJUSTMENTS

If speed of stroke is too slow, paint will
be wet on work surface and may run. If
speed of stroke is too fast, paint will be
dry and uneven on work surface.

4

Multi-Purpose Spray Gun

WATER/OIL IN COMPRESSED AIR

All compressor pumps discharge
some condensed water, oil or
contaminates with the
compressed air.

IMPORTANT: 

This condensation

will cause “fish eyes” to appear in
the paint job. Install appropriate
water/oil removal equipment (such
as filters and dryers) and controls as
necessary for the intended
application.

Failure to 
install

appropriate water/oil removal
equipment may result in damage
to machinery or workpiece.

NOTICE

6 - 9”

Figure 6

Thin Coat

Thin Coat

Heavy Coat

Figure 7

INCORRECT

6 - 9”

Pull

Trigger

Start
Stroke

Release
Trigger

End

Stroke

Figure 8

Figure 9

Summary of Contents for HDS530

Page 1: ...mmercial use of this product Pistola Pulverizadora Multiuso Garantía Limitada 1 DURACION A partir de la fecha de compra por el comprador original tal como se especifica a continuación Productos Estándard Standard Duty Un año 2 QUIEN OTORGA ESTA GARANTIA EL GARANTE Campbell Hausfeld The Scott Fetzer Company 100 Production Drive Harrison Ohio 45030 Teléfono 800 543 6400 3 QUIEN RECIBE ESTA GARANTIA ...

Page 2: ...0 degrees See Figure 1 Hand tighten lock ring after adjustment FLUID FEED This model is capable of pressure or siphon feed The gun is shipped in siphon feed mode but should be checked before use to ensure the desired feed method is selected The feed method is easily changed by fully turning the side knob See Figure 2 Spray Gun Terms Continued type of operation is used with a compressor equipped wi...

Page 3: ...face trigger a short one second burst while turning fluid control knob counterclockwise Observe the spray pattern on the target and adjust the fluid control knob until the desired pattern atomization is obtained See Figure 5 NOTICE Preparation MATERIAL PREPARATION 1 Before using desired material in the spray gun spray a compatible thinner or solvent through the gun to remove any contaminants and r...

Page 4: ...cleaning methods and equipment Follow local codes and manufacturer s recommendations for the use and disposal of spray materials and solvent Clean spray gun immediately after use Paint and other materials dry quickly in the small passages rendering gun useless due to the difficulty of removing hardened materials from the passages inside the gun NOTE In the instructions below solvent refers to the ...

Page 5: ... 20 psi Hold a piece of wadded cloth tightly around the air cap opening s and pull the trigger The air will back up through the fluid tip and force the paint out of the hose and back into the tank 3 Pour the paint from tank and use solvent and rags to clean 4 Put enough solvent into the tank to wash the hose and gun thoroughly Close the tank and spray from the gun until the solvent comes out clean...

Page 6: ... solvente en el tanque para limpiar a fondo la manguera y la pistola Cierre el tanque y comience a rociar hasta que el solvente salga limpio 5 Desconecte la manguera de material y séquela con aire comprimido para sacarle los residuos de solvente Cuando le aplique aire comprimido a la manguera para secarla cerciórese de mantenerla alejada de cualquier persona para evitar que le caigan residuos de s...

Page 7: ... una superficie amplia gire la perilla de control en sentido contrario a las agujas del reloj Si desea un patrón circular gírela en el mismo sentido de las agujas del reloj Vea la Figura 4 3 Gire la perilla de control totalmente en el mismo sentido de las agujas del reloj para cerrarlo 4 Con la pistola a 8 pulgadas 20 3 cm de la superficie oprima el gatillo por un AVISO 22 Sp Pistola Pulverizadora...

Page 8: ... de Suministro de Aire Coloque el tornillo en el orificio inferior Desconéctelo del extremo inferior de la parte superior del tanque Figura 2 8 Multi Purpose Spray Gun Limited Warranty Husky Spray Gun by Campbell Hausfeld 1 DURATION From the date of purchase by the original purchaser as follows Standard Duty Products One Year 2 WHO GIVES THIS WARRANTY WARRANTOR Campbell Hausfeld Scott Fetzer Compa...

Page 9: ...nistradas por el fabricante del material utilizado Nunca rocíe acidos materiales corrosivos químicos tóxicos fertilizantes o pesticidas Si usa estos materiales podrían ocasionarle la muerte o heridas de gravedad 5 Mantenga a los visitantes alejados ADVERTENCIA ADVERTENCIA PELIGRO ADVERTENCIA MANUAL MÉMENTO Gardez votre preuve datée d achat à fin de la garantie Joignez la à ce manuel ou classez la ...

Page 10: ...ronnement propre Ne pas diriger le pistolet vers la poussière ou le débris afin d éviter des blessures personnelles ainsi que le dommage à l objet de travail Ne pas utiliser une pression qui dépasse la pression de service de nimporte quelle pièce tuyau raccords etc du système Garder le tuyau à l écart des objets pointus L éclatement des tuyaux peut causer des blessures graves Inspecter les tuyaux ...

Page 11: ...its À Service Standard Standard Duty Un An 2 GARANTIE ACCORDÉE PAR GARANT Campbell Hausfeld Scott Fetzer Company 100 Production Drive Harrison Ohio 45030 Téléphone 800 543 6400 3 BÉNÉFICIAIRE DE CETTE GARANTIE ACHETEUR L acheteur original sauf en cas de revente du produit Campbell Hausfeld 4 PRODUITS COUVERTS PAR CETTE GARANTIE Tous les outils de fixation cloueuses et agrafeuses outils pneumatique...

Page 12: ...orsque la démarcation doit Préparation Suite 1 Régler la pression d air au pistolet selon les recommandations fournies avec les matériaux de pulvérisation Cette pression varie de 207 345 kPa 2 Ajuster la taille de débit à la forme désirée Pour un plein débit tourner le bouton de réglage de débit au sens contraire des aiguilles d une montre Pour une configuration ronde tourner le bouton de réglage ...

Page 13: ...Enlever le capuchon d air et le tremper dans un solvant jusqu à ce qu il soit propre au besoin utiliser un petit pinceau pour enlever les taches rebelles Des cure dents ou des petits pinceaux peuvent être utilisés pour nettoyer les conduits d air TOUTEFOIS NE JAMAIS UTILISER D OBJETS MÉTALLIQUES POUR NETTOYER LES ORIFICES CALIBRES S ILS SONT ENDOMMAGÉS LA AVIS 13 Fr PULVÉRISATION SERA DE MAUVAISE ...

Page 14: ...e d air 1 4po NPS M DH102800AV 1 26 Obturateur d appareil de robinetterie 1 27 Ressort de pression siphon 1 28 Assemblage de soupape 11mm Hex Soupape raccord et bouton 1 29 Bague de retenue Bague en E 1 30 Goupille de gâchette 1 31 Gâchette DH103200AV 1 32 Joint d étanchéité de la boîte 3 DH420400AV 1 33 Boîte 1 litre DH054001AV 1 NÉCESSAIRES D ENTRETIEN ET DE RÉPARATION Nécessaire de joint d étan...

Reviews: