INSTALLATION
5
■
■
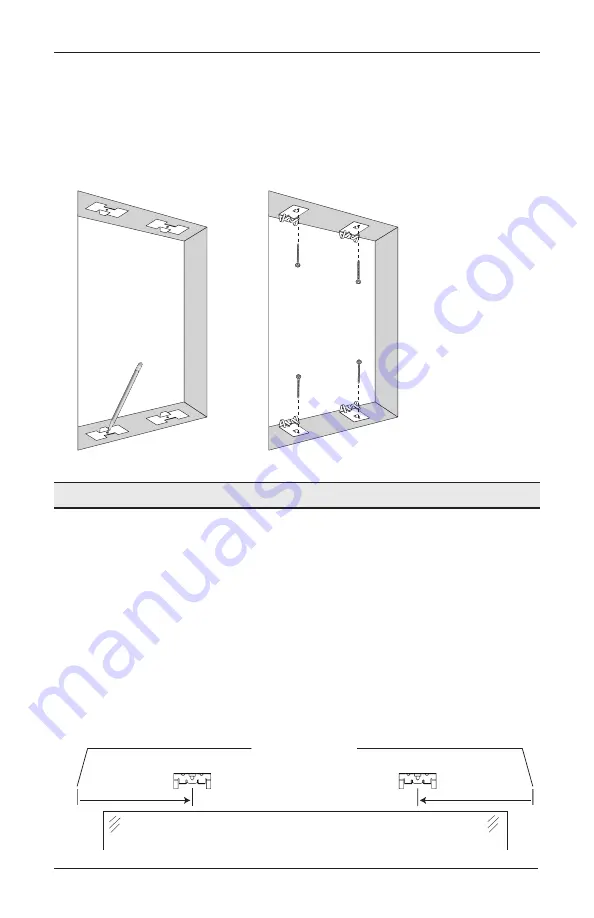
Mark the screw holes.
■
■
Carefully remove the templates from the mounting surfaces.
■
■
Drill the screw holes using a
3
⁄
32
" drill bit.
■
■
Attach the specialty brackets using the screws provided.
IMPORTANT:
The specialty brackets should be aligned and level with each other.
Proceed to “Install the Shade” on page 8.
Mount the Specialty Brackets — Outside Mount
■
■
Your order will include four specialty brackets.
■
■
Center the headrail over the window opening at the desired height. Use a pencil to lightly
mark each end of the headrail.
■
➤
Alternatively, measure the width of the headrail and use that width to mark the rail
end points at the top of the window opening.
■
■
Measure from each end of the headrail to the center of the rectangular hole and mark the
position of each specialty bracket for the headrail.
■
■
Repeat the above steps for the bottom rail.
Headrail End Marks
Window Opening
To center of
rectangular hole
in rail
To center of
rectangular hole
in rail


