background image

41

40

Displa

Displa

y Pr

y Pr

oblems

oblems

There are several main conditions or sources of possible interference that may
cause problems with the quality of the information displayed on the control head.
Look in the following table for some symptoms of display problems and possible
solutions:

Problem

Possible Cause

The control head loses power at
high speeds.

When the boat moves at higher
speeds, the bottom disappears
or suddenly weakens, or the
display contains gaps.

There are no fish detected,
even when you know they are
in the water under the boat, 
or sonar readings seem weak 
or faulty.

If the power output of your boat’s engine is
unregulated, the control head may be protecting
itself using its over-voltage protection feature. Make
sure the input voltage does not exceed 20 Volts.

The transducer position may need to be adjusted. A
mix of air and water flowing around the transducer
(cavitation) may be interfering with the inter-
pretation of sonar data. See your Installation Guide
for suggestions on adjusting the transducer position.

Electrical noise from the boat’s engine may be
interfering with sonar reception. See Finding the
Cause of Noise for more information. 

Sonar readings may be affected if the transducer is
not positioned correctly (i.e. mounted at an angle, not
straight down), or there is some kind of mechanical
interference, either because it is mounted inside a
hull that is too thick for proper sonar transmission,
the bond between the transducer and the hull is not
airtight, or because the transducer is dirty. Check with
your Installation Guide for guidance on re-positioning
the transducer, and make sure the transducer is clean.

Low battery voltage may be affecting the power of
signal transmission.

Electrical noise from the boat’s engine may be
interfering with sonar reception. 

See Finding the

Cause of Noise

for more information.

Finding the C

Finding the C

ause of Noise

ause of Noise

Electrical noise usually affects the display with many black dots at high speeds, and
high sensitivity readings. One or more of the following sources can cause noise or
interference:

Possible Source of Noise

How to Isolate It

Other electronic devices

The boat’s engine

Cavitation from the boat’s
propeller

Turn off any nearby electronic devices to see if the
problem goes away, then turn them on one at a
time to see if the noise re-appears.

To determine whether the boat’s engine is the
source of the noise, increase the RPMs while the
boat is in neutral and stationary to see if the noise
increases proportionately; if noise appears when
you rev the engine, the problem could be the spark
plugs, alternator, or tachometer wiring. Replace the
spark plugs with resistor plugs, install an alternator
filter, or route the control head power and
transducer cables away from the engine wiring.

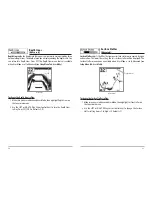
Turbulence created by the propeller can cause
noise; make sure the transducer is mounted at
least 15” (38 cm) from the propeller, and that the
water flows smoothly over the face of the
transducer at all times.

Summary of Contents for 515

Page 1: ...565 525 515 531368 1_A Operations Manual Operations Manual 535 ...

Page 2: ...ry When the boat is moving water depth may change too quickly to allow time for you to react Always operate the boat at very slow speeds if you suspect shallow water or submerged objects WARNING Disassembly and repair of this electronic unit should only be performed by authorized service personnel Any modification of the serial number or attempt to repair the original equipment or accessories by u...

Page 3: ...d 35 Select Readouts Advanced Sonar View Only 36 Depth Offset Advanced 37 Temp Offset Advanced 38 Speed Calibration Advanced with Temp Speed Only 38 T Table of C able of Con ont ten ents ts iii How Sonar Works 1 Single Beam Sonar 1 DualBeam Sonar 1 What s On the Screen 2 Views 4 Sonar View 4 Understanding Sonar History 5 Real Time Sonar RTS Window 5 Sonar Zoom View 6 Big Digits View 7 Bottom Prese...

Page 4: ... FishFinder 565 uses a 200 83 kHz dual beam sonar system with a wide 60 area of coverage DualBeam sonarisoptimizedtoshowthegreatestbottomdefinitionusing a narrow 20 beam yet can still indicate fish found in the wide 60 beam when the Fish ID TM feature is turned on DualBeam is ideal for a wide range of conditions from shallow to very deep water in both fresh and salt water Depth capability is affec...

Page 5: ...elow a certainpoint RTS RealTimeSonar Window SoftBottom Thermoclines layers of water with different temperatures that appear at different depths and different times of the year A thermocline typically appears as a continuous band of many gray levels movingacrossthedisplayatthesamedepth Structure wherefishmaybehiding Fish the FishFinder displays fish as arches and or fish icons and can be set to al...

Page 6: ...setting used in the sonar history window i e Inverse StructureID WhiteLine Bottom Black The depth of the sonar return is indicated by the vertical placement of the return on the display depthscale The Wide RTS Window in dicates the sonar intensity throughtheuseofabargraph Thelengthoftheplottedreturn provides an indication of whether the return is weak or strong Thedepthofthesonar return is indicat...

Page 7: ...fish suspended close to the bottom or within structure In Zoom View the display is split to show a narrow slice of the full range view on the right and the zoomed view on the left The full range view on the right also contains the Zoom Preview Box that shows what part of the full range view is shown in zoom view on the left the Zoom Preview Box tracks the bottom in the full range view As the depth...

Page 8: ...ves theunitchartsthechangesindepthonthedisplaytocreateaprofile of the Bottom Contour The type of bottom can be determined from the return charted on the display A Hard Bottom such as compacted sediment or flat rock appears as a thinner line across the display A Soft Bottom such as mud or sand appears as a thicker line across the display Rocky Bottoms have a broken random appearance The sonar retur...

Page 9: ...nu mode and return to the view If a menu is active pressing EXIT will return to the previous level in the menu system Pressing EXIT will cycle through the available views in reverse order 10 K Ke ey F y Func unctions tions Your Humminbird user interface consists of a set of easy to use keys that work with various on screen views and menus to give you flexibility and control over your fishing exper...

Page 10: ...switch back to Normal Mode For example if you set specific views to be visible while in Advanced User Mode and then return to Normal User Mode those views will still be visible See Setup Menu Tab User Mode for specific instructions on changing to Advanced User Mode Main Menu System Normal User Mode 13 12 P Pow owering Up the Unit ering Up the Unit Turn on your FishFinder by pressing the POWER LIGH...

Page 11: ...king your boat on the water The Simulator is a very powerful tool that simulates on the water operation providing a randomly updated display We recommend going through this manual while using the Simulator since all of the menus function and affect the display the way they actually do when in Normal operating state NOTE To get the full benefit of the Simulator it is important to select Simulator m...

Page 12: ... X PressT TM M menu provides access to the settings most frequently used Press the MENU key once while in any of the Sonar Views to access the Sonar X Pressmenu NOTE Upper Range only appears in Advanced User Mode when in Sonar or Big Digits View NOTE Zoom Level only appears in Sonar Zoom View Sensitivity Sensitivity Sensitivity controls how much detail is shown on the display Increasing the sensit...

Page 13: ...ee Setup Menu Tab User Mode Upper Range is often used with Lower Range To adjust the Upper Range 1 Make sure you are in Advanced Mode then highlight Upper Range on the Sonar X Press menu 2 Use the LEFT or RIGHT 4 Way Cursor Control keys to increase or decrease the Upper Range setting 0 to 790 feet or 0 to 257 meters International Models Only Default 0 L Low ower R er Rang ange e Lower Range sets t...

Page 14: ...als will be clearly visible on the display Structure ID represents weak returns as light pixels and strong returns as dark pixels This has the benefit of ensuring that strong returns willbeclearlyvisibleonthedisplay WhiteLine highlightsthestrongestsonarreturns in white resulting in a distinctive outline This has the benefit of clearly defining the bottom on the display Bottom Black displays all pi...

Page 15: ...the beam and then increases as it moves out again creating a Fish Arch when this distance change is shown on the display Boat speed chart speed and the position of the fish within the sonar beam greatly affect the shape of the arch To turn Fish ID on or off 1 Highlight Fish ID on the Sonar main menu 2 Use the LEFT or RIGHT 4 Way Cursor Control keys to turn the Fish ID setting On or Off On Off Defa...

Page 16: ...l keys to change the Surface Clutter setting Low 1 to High 10 Default 5 Surface Clutter 24 Depth Lines Depth Lines Adv Advanc anced ed Depth Lines divide the display into four equal sections which are separated by three horizontal depth lines The depth of each line is displayed along the depth scale You can either turn Depth Lines On or Off The Depth Lines menu choice is available when User Mode i...

Page 17: ...gh settings add progressive filtering of the sonar returns In some deep water situations the High setting may actually hinder your FishFinder s ability to find the bottom To change the Noise Filter setting 1 Make sure you are in Advanced User Mode then highlight Noise Filter on the Sonar main menu 2 Use the LEFT or RIGHT 4 Way Cursor Control keys to change the Noise Filter setting Off Low Medium H...

Page 18: ... a large sized fish is detected 28 Alarms Menu T Alarms Menu Tab ab From any view press the MENU key twice to access the Main Menu System The Alarms tab will be the default selection NOTE When an alarm is triggered you can silence it by pressing any key The alarm will be silenced and will not be triggered again until you enter a new instance of the alarm condition Depth Alarm Depth Alarm DepthAlar...

Page 19: ...cted to the fishfinder The Low Battery Alarm should be set to warn you when the battery voltage drops below the safety margin that you have determined For instance if you are running a trolling motor battery operated you wouldwanttosettheLowBatteryAlarmtosoundbeforethebatteryvoltagedropstoo low for it to be used to start your main gasoline powered engine To change the Low Battery Alarm setting 1 H...

Page 20: ...age setting Default English 32 Units Depth Units Depth Units Depth selects the units of measure for all depth related readouts To change the Units Depth setting 1 Highlight Units Depth on the Setup menu 2 Use the LEFT or RIGHT 4 Way Cursor Control keys to change the Units Depth setting Meters International Models Only Feet Fathoms Default is Meters for International models and Feet for Domestic mo...

Page 21: ... riplog Reset eset with T with Temp emp Speed Only Speed Only Triplog Reset resets the Triplog to zero and will only appear in the menu if a Temp Speed Accessory is connected and the paddlewheel has moved at least once The Triplog provides the following information timer for elapsed time distance traveled since last reset and average speed Note SeeSetupMenuTab SelectReadouts Advanced tofindouthowt...

Page 22: ... then highlight Depth Offset on the Setup menu 2 Use the LEFT or RIGHT 4 Way Cursor Control keys to change the Depth Offset setting 10 0to 10 0or 3to3meters InternationalModelsOnly Default 0 36 Selec Select R t Readouts eadouts Adv Advanc anced Sonar View Only ed Sonar View Only Select Readouts sets individual digital readouts on the Sonar View This Advanced feature allows you to select what data ...

Page 23: ...ubleshooting tasks Using the Installation Guide that also comes with your FishFinder check to make sure that the transducer cable is securely connected to the FishFinder Reconnect if necessary and power up the FishFinder again to see if this fixes the problem Replace the transducer with a known good transducer if available and power up the control head again Check the transducer cable Replace the ...

Page 24: ...oo thick for proper sonar transmission the bond between the transducer and the hull is not airtight orbecausethetransducerisdirty Checkwith yourInstallationGuideforguidanceonre positioning thetransducer andmakesurethetransducerisclean Low battery voltage may be affecting the power of signal transmission Electrical noise from the boat s engine may be interfering with sonar reception See Finding the...

Page 25: ...atransducerwithtemperaturebuiltinisconnectedatthesametime the TS W or TG W accessory will override the temperature built in to the transducer Be sure to check out our website www humminbird com for additional new and exciting accessories to grow your Humminbird Fishfinder NOTE Accessories require a separate purchase Specifica Specifications tions Depth Capability 800 ft 250 m Power Output 250 Watt...

Page 26: ... By Telephone Monday Friday 8 00 a m to 4 30 p m Central Standard Time 334 687 0503 By e mail typically we respond to your e mail within three business days custserv techsonic com For direct shipping our address is Techsonic Industries Inc Service Department 678 Humminbird Lane Eufaula AL 36027 USA ...

Reviews: