background image

 |


31

Temperature Switch TS 2-1000

30


|  Technical data

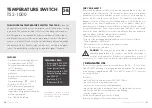
TemperaTure sWITch


TS 2-1000


The unIVersal TemperaTure sWITch Tsm 2100

 is ideal for 

all applications where a precise temperature control in heating or cooling 
is required. The unit can be used in the form of an independent monitor, 
as a frost guard, as a substitute for defective mechanical thermostats or 
as a digital thermometer. If the temperature ranges outside of the preset 
window, a relay will switch each channel individually after an adjustable 
time between 0-8 hrs. Another relay can also be connected to an alarm 
system. An internal beeper will also give an alarm signal if required. 

FeaTures

–    7 different, freely selectable functions
– For temperature sensor Pt1000*
–     Switching  temperature  adjustable   

in 1°C increments

–    Automatic monitoring of sensor for 

malfunction

–    Relay position definable at sensor 

malfunction

–    Temperature range: –99 ... +850°C
–    Accuracy: ≤0.5% Fs ± 0.1°C
–    LCD display shows programmed 

switching temperatures, current 
temperature, setting parameters and the 
min/max temperature

–    Dim.: 160 x 80 x 60 mm

TechnIcal daTa 

 –  Power supply: 230 V/AC
–  2 x Pt 1000 Temperature 

Sensor (Not included)

 – Power consumption: 2 VA
 –  Output: 4 floating relays, 

max. 3000 W

 – Resolution: 0,1°C
 – IP-Protection: IP 20

FOr yOur saFeTy

Please read this manual carefully. It contains important information for the safe 
operation and use of this device. The law requires that we give you important 
information for your safety and that we point out how to avoid damage to 
persons, the device and connected devices. No liabilities will be taken for 
damages or claims resulting out of not reading and/or not following the user 
guide and/or any form of modification on or in the product. Under these 
circumstances, no warranty services will be given. Liability will not be taken for 
consequential damages. These instructions are part of the device and should 
therefore be stored carefully. In order to avoid malfunction, damage and health 
problems, please follow the safety instructions carefully:
– Repairs may only be carried out by an expert.
–  Dispose of the packaging material and keep it out of reach of children.  

There is a danger of suffocation

–  Electrical devices do not belong in the hands of children.  

Store the device in a safe place. 

 danger!


This unit may only be opened or repaired by a person 

authorized and qualified to do so and/or who has the knowledge of 
electrical safety regulations. If the device is opened there is a risk of 

electric shock. Disconnect the device from the mains before opening the device. 

1 desIgnaTed use

The device is designed to switch a connected device (230 V ~ / 50 Hz, Max. 
16A, 3000VA) according to a preprogrammed temperature. The temperature 
switching range is adjustable from –99°C to + 850°C in steps of 1°C. Any other 
use is not permitted.

This device:
–  may only be used with the current of 230 VAC/50Hz.
–  may only be used in dry and clean rooms.  

It may not be used in rooms with high humidity.

–  may not be subjected to mechanical strain or mounted in dusty locations.
–  may not be modified or reworked in any way differing  

from the original version.

Should these mentioned points not be followed,  
then there is a danger of short-circuit and/or electrocution.

gB

* Not included. For modes 2, 4, 5, and 

6 (see page 37) a second temperature 
sensor Pt1000 is required. 

Summary of Contents for TS 2-1000

Page 1: ...www h tronic de Temperaturschalter TS 2 1000 Art Nr 1 11 44 90...

Page 2: ...ages 52 16 Maintenance 52 17 Warranty 53 Temperaturschalter TS 2 1000 Der Temperaturregler TS 2 1000 eignet sich hervorragend f r alle Einsatzbereiche bei denen eine Temperaturregelung im Heiz oder K...

Page 3: ...ingesetzt werden aber auch als Ersatz f r defekte mechanische Thermostate oder f r Digitalthermometer dienen Zu s tz lich verf gt das Ger t ber eine separate Min Max Alarm Einstellung Be fin det sich...

Page 4: ...lsfalle sind un bedingt Ru ckfragen bei Fachleuten Sachverst ndigen oder den Herstellern der verwendeten Baugruppen notwendig Bei Feststellen eines Fehlers in der Zuleitung muss das Ger t unverz glich...

Page 5: ...II der vorgeschrieben Schutzleiter gem VDE angeschlossen wird Die Relaiskontakte arbeiten als potentialfreie Umschaltkontakte und m ssen je nach Anwendung entsprechend beschaltet werden Achtung Schalt...

Page 6: ...ksetzen 6 2 Struktur des Modus Men s bzw des Einstellungsmen s Dieses Men kann aus mehreren Men punkten bestehen die als Liste dar gestellt werden Gleichzeitig wird nur ein Men punkt angezeigt Andere...

Page 7: ...tellten Daten gespeichert T1 AUS In diesem Men Punkt wird die Ausschalttemperatur eingestellt Dr cken Sie zuerst die Taste OK Der Wert kann dann mit den Tasten pq ge ndert werden Wenn die Einstellung...

Page 8: ...niedriger oder gleich mit T AUS ist Hinweis Sind eingestellte Einschalt und Ausschalttemperatur identisch beide Werte sind gleich eingestellt wird das Ger t die Funktion Thermometer ausf hren Dabei w...

Page 9: ...tur T1 2 T1 Min Max 2 T1 EIN 2 T1 AUS 2 T1 Alarm Min 2 T1 Alarm Max 2 T1 Alarm delay 2 T1 Alarm Timer 2 Relais Zustand bei Fehler 2 Piezo Die Parameter haben folgende Bedeutung Funktion In diesem Men...

Page 10: ...EL1 angeschaltet werden soll Einstellungsbereich 1 30 C Hysterese Die ben tigte Hysterese f r den Differenzwert Einstellungsbereich 1 20 C T1 EIN min Minimalwert f r die Solarpanel Temperatur T2 EIN m...

Page 11: ...zpumpe ber Relais an wenn eine Ver nderung nach vorgew hltem Zeitintervall Pumpenintervall bzw Messintervall auftritt Die Pumpe wird entweder durch die eingestellte Be triebs zeit Pumpenlaufzeit oder...

Page 12: ...n diesem Fall m ssen nachfolgende Einstellungen vorgenommen werden Differenz 5 C Hysterese 2 C Pumpenintervall 30 Min Pumpenlaufzeit 5 Min 11 2 Modus Men Zirko Kontroll In diesem Men werden die folgen...

Page 13: ...r Modus ausgef hrt 12 2 Modus Men Manuell In diesem Men werden die folgenden Men punkte angezeigt Name des Modus Relais 1 2 Relais 2 2 Relais ALARM1 2 Relais ALARM2 Pumpenlaufzeit 2 Laufzeit Timer 2 T...

Page 14: ...di Einstellungen auf Werkseinstellungen Vor schlageinstellungen zur ckgesetzt 15 Fehlermeldungen Das Ger t kann folgenden Fehler anzeigen Fehler N1 Err1 Fehler N2 Err2 Fehler N3 Err3 Hinweis Wenn ein...

Page 15: ...g oder Stromart ber br ckte oder falsche Sicherungen bei Fehlbedienung oder Sch den durch fahr l ssige Behandlung fallen nicht unter die Gew hrleistung bzw es erlischt der Garantieanspruch Weitergehen...

Page 16: ...will be taken for damages or claims resulting out of not reading and or not following the user guide and or any form of modification on or in the product Under these circumstances no warranty service...

Page 17: ...or electrocution a damaged power cord must be replaced immediately by our service centre or a similarly qualified person If the power cord is damaged unplug the device immediately and replace the powe...

Page 18: ...erson or a specialist using original components and parts There is the danger of electrocution 5 Mounting The installation may only be done by a qualified person who has knowledge of the current guide...

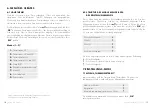
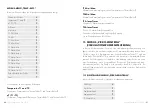
Page 19: ...Mode Thermo switch N1 and N2 Mode Temperature difference Mode Circulation pump control Mode Manual control Calibrating the sensor Reset all Main Menu When the device is connected with the main power s...

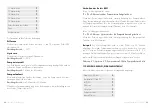
Page 20: ...sensor N2 Input Mode Thermosschalter N1 Thermo switch In this mode the device can be configured as a switch for heating or for cooling Menu Thermoschalter N1 Thermo switch N1 In this mode the device c...

Page 21: ...ched ON if the measured temperature is equal or higher than T EIN The relay is switched OFF if the measured temperature is lower or equal to T AUS T1 Alarm Min In this menu you can enter a minimum tem...

Page 22: ...put values would be as follows switching ON value T1 EIN 23 C and switching OFF value T1 AUS 21 C If the temperature reaches or drops beneath 23 C the relay will switch the cooling on At 21 C the rela...

Page 23: ...easured T2 20 Relay ON T1 25 Relay OFF T1 23 T1 Alarm Timer In this menu on the value of the alarm delay is displayed All other parameters have the same meaning as in the menus mentioned before Every...

Page 24: ...he alarm delay time of the sensor T1 is displayed T2 Alarm Timer In this menu the alarm delay time of the sensor T2 is displayed All other parameters have the same meaning as in the menus mentioned be...

Page 25: ...ay time of the sensor T1 is displayed T2 Alarm Timer In this menu the alarm delay time of the sensor T2 is displayed All other parameters have the same meaning as in the menus mentioned before Every m...

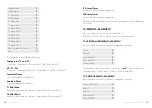
Page 26: ...d the connecting cables to the sensors Sensor 1 R Offset Sensor 1 T Offset 2 Sensor 2 R Offset 2 Sensor 2 T Offset The parameters have the following meanings Sensor 1 R Offset This input allows the of...

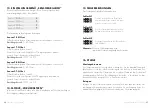
Page 27: ...collecting sites designated for the recycling of electrical and electronic equipment waste This device and or components within the device can be recycled For more information concerning disposal sit...

Page 28: ...an incorrect power source Incorrect and negligent handling This manual is a publication of H TRONIC GmbH Industriegebiet Dienhof 11 92242 Hirschau Germany All rights including translation reserved In...

Page 29: ...z B Fotokopie Mikroverfilmung oder die Erfassung in EDV Anlagen bed rfen der schriftlichen Genehmigung des Herausgebers Nachdruck auch auszugsweise verboten Diese Bedienungsanleitung entspricht dem t...

Reviews: