THT45W-THT46
EN - 23
5.2.7 Image
adjustment
In this section it is possible to define the adjusting mode of the temperature associated
with the image framed on the display. The following modes are available:
Auto
(default)
Manual
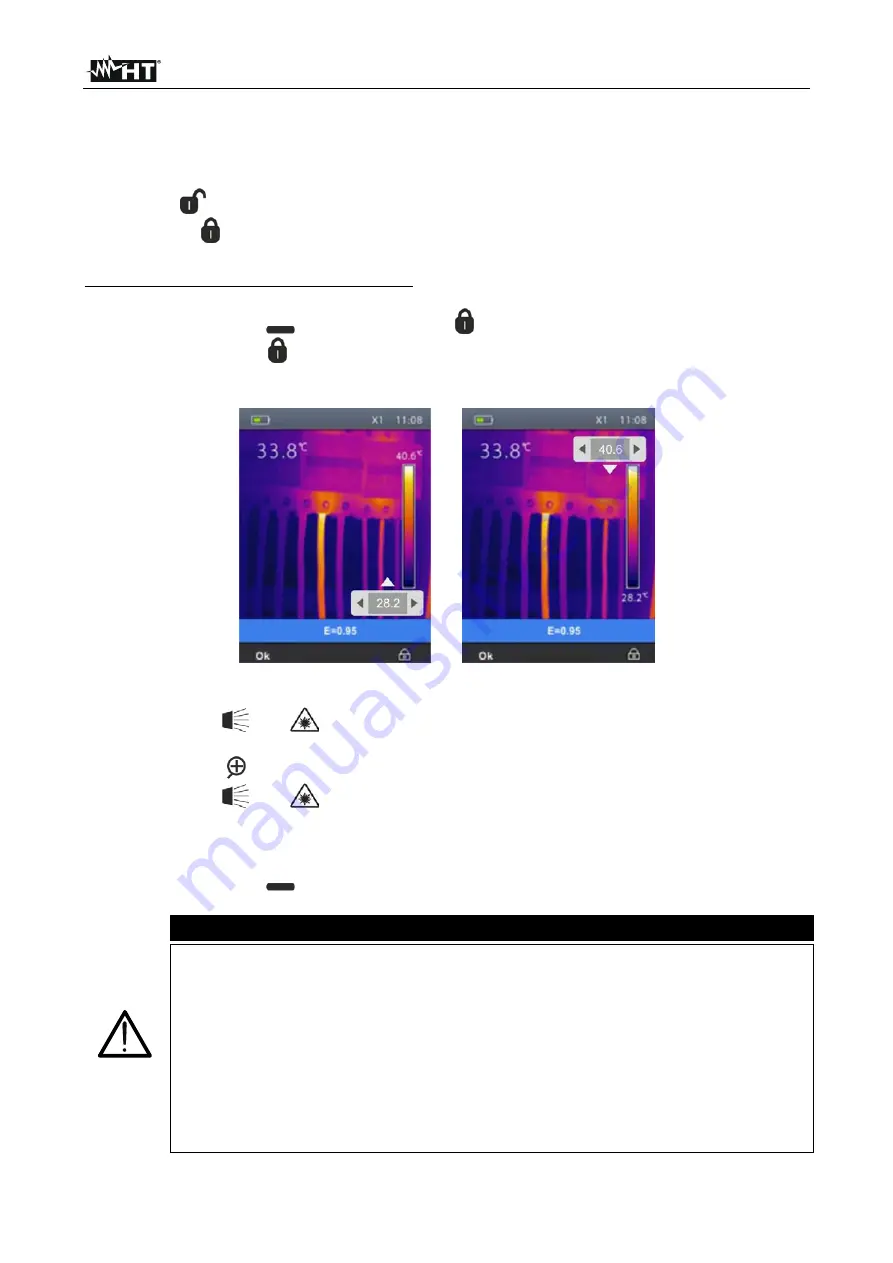
To set Manual mode, proceed as follows:
1. Press the right key
and set the symbol
on the display.
2. Press and hold the
key for 2 seconds. The following screen (see Fig. 26 – Left side)
is shown on the display.
Fig. 26: Setting the adjustment mode of image temperature
2. Use the keys
and
to set the desired value of the temperature associated to the
minimum level. Press and hold the keys for a quick setting of the value.
3. Press the key
to go to the upper level of the color palette (see Fig. 26 – Right side).
4. Use the keys
and
to set the desired value of the temperature associated to the
maximum level. Press and hold the keys for a quick setting of the value.
5. Press the “Ok” key to confirm. The values of the set levels are maintained by the
instrument until a new modification is performed.
6. Press the right key
to go back to Auto mode.
CAUTION
Automatic (Auto)
mode
the minimum and maximum temperature levels
of the framed object on the display and associated with the colour palette
are automatically defined by the instrument and dynamically vary when
moving it. This (default) option, which can be used in most cases, allows for
an optimum display of the IR image in a condition of temperatures equally
distributed within it.
Manual
mode
the minimum and maximum temperature level of the
object framed on the display are manually set by the user. This mode,
particularly useful to clearly identify only some areas of the image, is
recommended in case of advanced thermographic operations.


