2-8
Installation and Reference Guide
Installing and Configuring the Switch
2
c.
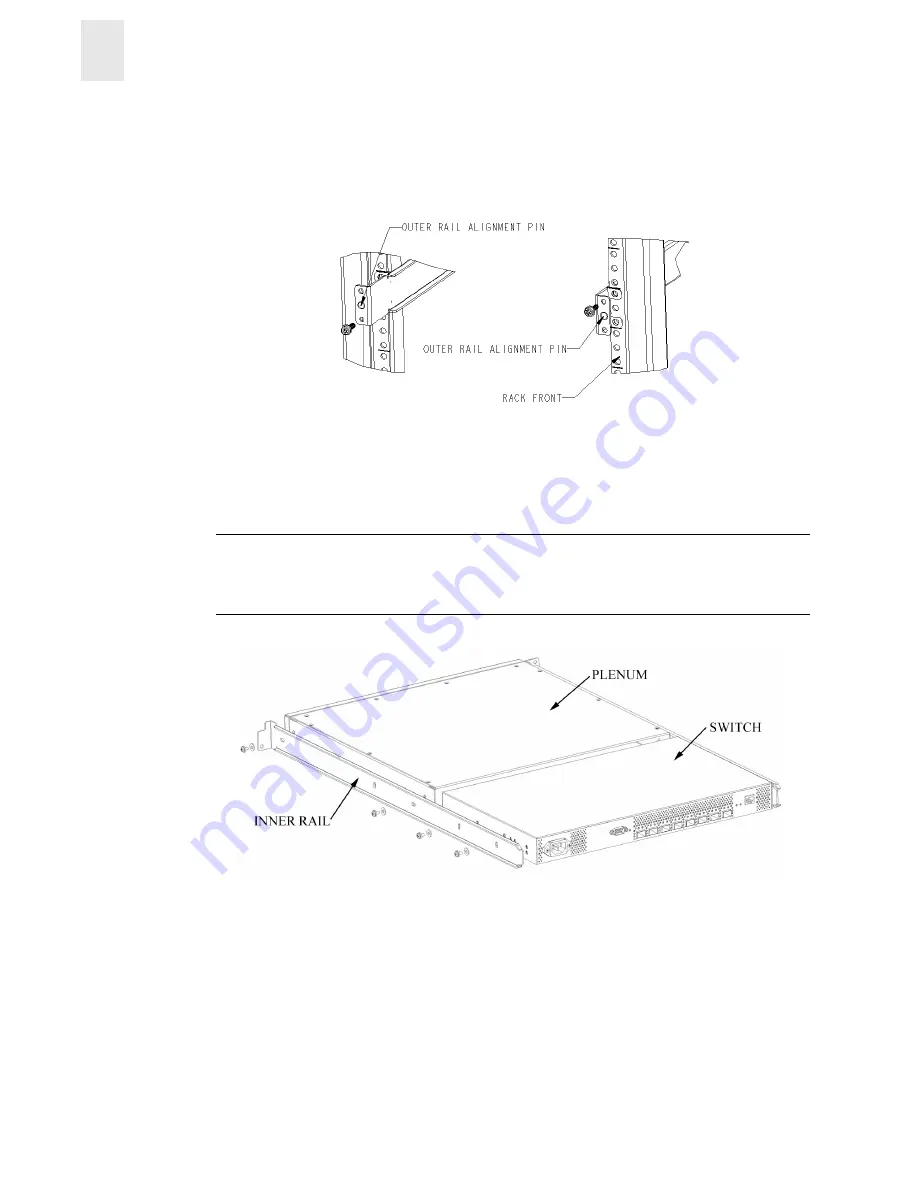
Install one M5 Torx screw in the upper hole location of the right rail. Then, install one M5
Torx screw in the lower location of the left rail. See
Figure 2-5
.
Note:
Do not install the upper left and lower right screws until later.
Figure 2-5
Assembling the Outer Rails
6.
Assemble each of the two inner rails (one on each side of the switch and plenum) using eight
#8-32 x 5/16 Phillips pan-head screws (with attached star lock washers) and eight #8 flat
washers as shown in
Figure 2-6
.
CAUTION
Do not use any other screws other than the eight that are provided. Use of any longer
lengths can cause damage to internal components of the switch. Be sure to install the flat washers
along with the pan-head screws. Before tightening screws, make sure that the rails are centered to
the overall height of the switch.
Figure 2-6
Assembling the Inner Rails


