Installing the NS204i-p Gen10 Plus Boot Device option
Installing the NS204i-p Gen10 Plus Boot Device option
Note the following information about the HPE NS204i-p NVMe OS Boot Device option:
The HPE NS204i-p NVMe OS Boot Device is a PCIe3 x8 add-in card (AIC) that includes two 480 GB M.2 NVMe SSDs.
This boot device enables the deployed OS to be mirrored through a dedicated hardware RAID 1.
This boot device is compatible with the following native operating systems:
Windows
Linux
VMware
This boot device utilizes native inbox OS NVMe drivers.
CAUTION:
CAUTION:
A discharge of static electricity from a finger or other conductor might damage system boards or other static-sensitive
devices. To prevent damage, observe antistatic precautions.
CAUTION:
CAUTION:
To prevent improper cooling and thermal damage, do not operate the server unless all PCIe slots have either an
expansion slot cover or an expansion card installed.
Prerequisites
Prerequisites
Before beginning installation, make sure that the server is updated with the latest operating system firmware and drivers.
Make sure that the PCI fan is installed
Before you perform this procedure, make sure that you have a T-10 Torx screwdriver available.
Procedure
Procedure
Installing drives onto the
Installing drives onto the boot device
boot device
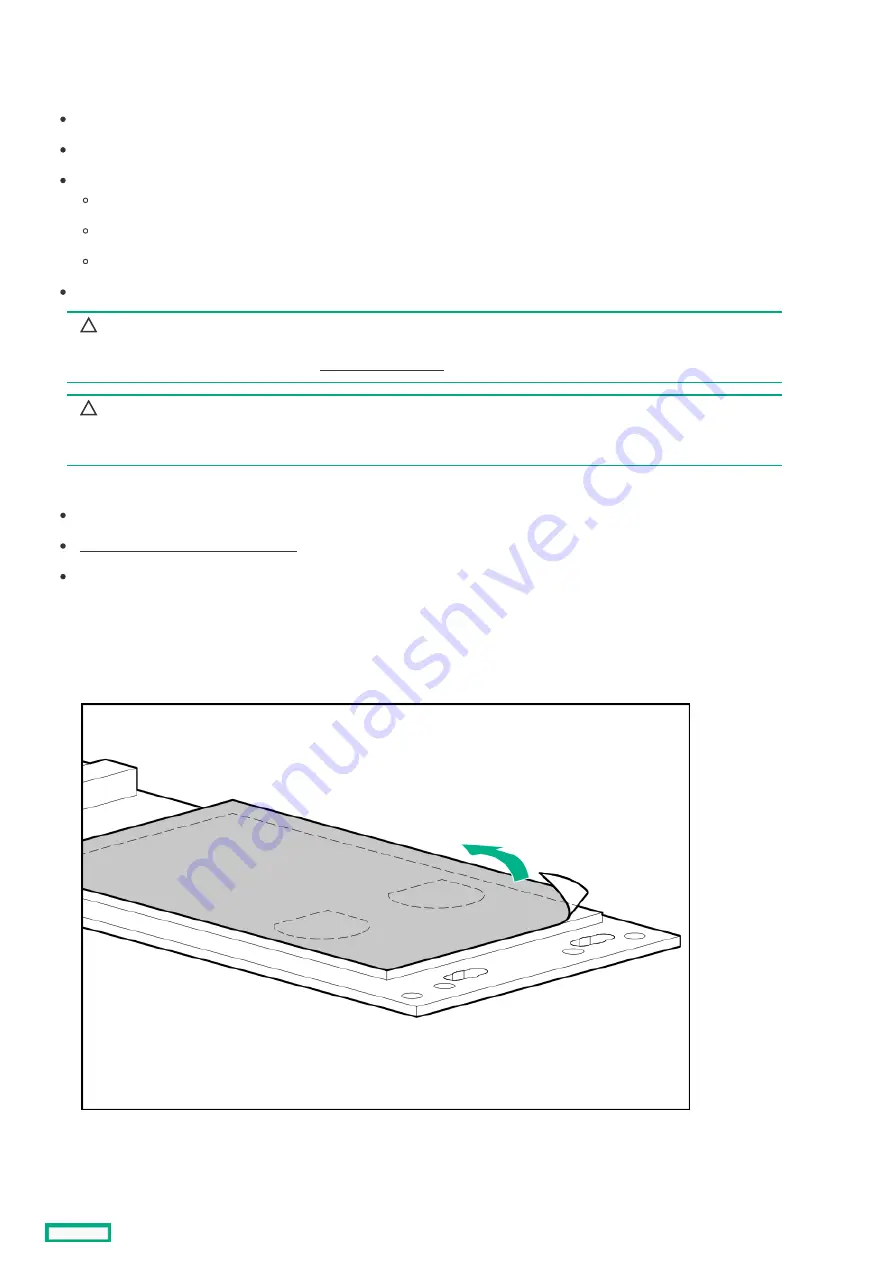
1. Remove the liner from the thermal interface pad.
2. Insert the SSD into the M.2 slot at a 45° angle.
3. Carefully press the SSD down to the horizontal position.
4. Close the retaining latch.
Installing the NS204i-p Gen10 Plus Boot Device option
156
Summary of Contents for ProLiant ML30 Gen10 Plus
Page 17: ...DIMM slot location The arrow points to the front of the server DIMM slot location 17 ...
Page 40: ...Remove the access panel 40 ...
Page 42: ...Remove the air baffle 42 ...
Page 45: ...Remove a media drive 45 ...
Page 53: ...11 Power up the server Install the server into the rack 53 ...
Page 66: ...doors Rack warnings and cautions 66 ...
Page 76: ...6 Install the server into the rack Install the rack rails and server tray 76 ...
Page 140: ...Installing a DIMM 140 ...
Page 163: ...The installation is complete Installing the M 2 SATA SSD enablement option 163 ...
Page 180: ...Energy pack cabling Energy pack cabling 180 ...
Page 186: ...RDX backup system cabling 186 ...
Page 188: ...Gold SATA connector of the SATA power Y cable Color Description Optical drive cabling 188 ...
Page 190: ...Fan cabling PCI fan cabling System fan cabling Heatsink fan cabling Fan cabling 190 ...
Page 191: ...PCI fan cabling PCI fan cabling 191 ...
Page 192: ...System fan cabling System fan cabling 192 ...
Page 193: ...Heatsink fan cabling Heatsink fan cabling 193 ...
Page 204: ...Troubleshooting NMI functionality Troubleshooting resources Troubleshooting 204 ...
Page 216: ...Ukraine RoHS material content declaration Ukraine RoHS material content declaration 216 ...


