EN
Printed Dots 2-3
Printed Dots
The high quality output achieved by HP LaserJet printers is due in
part to the ability to lay down a fine grid of “dots” on the page. The
density of this grid is referred to as the printer’s resolution. From
the first HP LaserJet (the “LaserJet Classic”) until recently, all
HP LaserJet family printers printed at a resolution of 300
dots-per-inch. In a one inch square, the printer could print a dot
anywhere in a grid of up to 300 dots horizontally by 300 dots
vertically, for a total of 90,000 possible dot locations per square inch
(300 × 300 = 90,000).
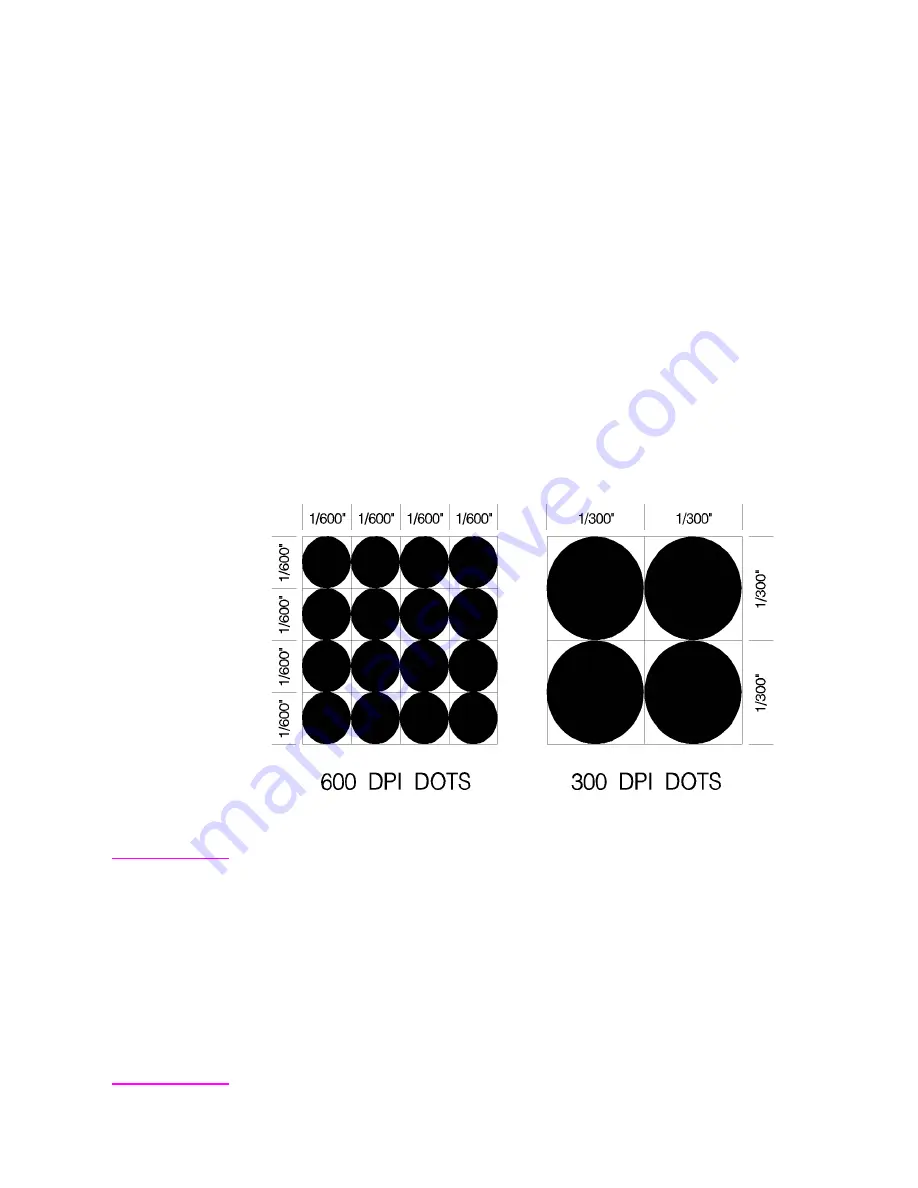
The LaserJet 4 printer is capable of printing at either 300 or 600 dpi
resolution. At 600 dots-per-inch, it becomes possible to print up to
360,000 dots per square inch (600 x 600 = 360,000). Print resolution
of LaserJet 4 is selectable and can be specified either from the
printer’s control panel or programmed through PJL commands.
Figure 2-1 300 vs 600 DPI Dot Sizes
Note
Refer to Appendix E of the PCL 5 Comparison Guide or the printer
User’s Manual
to determine the default print resolution for a specific
HP LaserJet printer.
The printer’s physical dot size has no direct bearing on the size of
“PCL Units” used in cursor movements. PCL Units were previously
referred to as “PCL dots”, but should not be confused with the
printer’s physically printed dots. The size of PCL Units can also
be specified (see the Unit of Measure Command in Chapter 4 for
more information).
Summary of Contents for LaserJet 4100
Page 1: ...Part I Click here to access Part II on hp com ...
Page 2: ......
Page 26: ...Contents 14 EN ...
Page 44: ...2 10 The Page EN ...
Page 54: ...3 10 The Print Environment EN ...
Page 70: ...4 16 PCL Job Control Commands EN ...
Page 80: ...5 10 Page Control Commands EN Figure 5 3 Changing Print Direction on a Page ...
Page 82: ...5 12 Page Control Commands EN Figure 5 4 Text Area Within the Page ...
Page 110: ...6 16 Cursor Positioning EN ...
Page 120: ...7 10 Fonts EN Figure 7 11 Bitmap Character Figure 7 12 Scalable Character ...
Page 122: ...7 12 Fonts EN ...
Page 152: ...8 30 PCL Font Selection EN ...
Page 166: ...9 14 Font Management EN ...
Page 182: ...10 16 User Defined Symbol Sets EN ...
Page 237: ...EN Character Descriptor Formats 11 55 Figure 11 5 Class 2 Character Data ...
Page 240: ...11 58 Soft Font Creation EN Figure 11 6 Portrait Character Example ...
Page 241: ...EN Character Descriptor Formats 11 59 Figure 11 7 Landscape Character Example ...
Page 270: ...13 4 The PCL Print Model EN Figure 13 3 Effect of Transparency Modes on Images ...
Page 276: ...13 10 The PCL Print Model EN Figure 13 4 Shading Patterns ...
Page 277: ...EN Pattern ID Area Fill ID Command 13 11 Figure 13 5 Cross Hatch Patterns ...
Page 290: ...13 24 The PCL Print Model EN ...
Page 297: ...EN Pattern ID Area Fill ID Command 14 7 Figure 14 1 Shading Patterns ...
Page 298: ...14 8 PCL Rectangular Area Fill Graphics EN Figure 14 2 Cross hatch Patterns ...
Page 341: ...EN Raster Graphics Example 15 33 Figure 15 11Example of Raster Graphic Image Data ...
Page 342: ...15 34 Raster Graphics EN ...
Page 370: ...16 28 Status Readback EN ...


