


6.
Disconnect all other attached cables from the back of the HP TouchSmart PC.
7.
Place the computer face down on a soft flat surface. HP recommends that you set down a blanket,
towel, or other soft cloth to protect the touch screen surface from scratches or other damage.
8.
Using the notch on the wireless keyboard and mouse receiver, pull the receiver out of and away
from the back of the computer.
WARNING!
Beware of sharp edges inside the chassis.
To upgrade your hard disk drive, see
Removing the hard drive on page 21
.
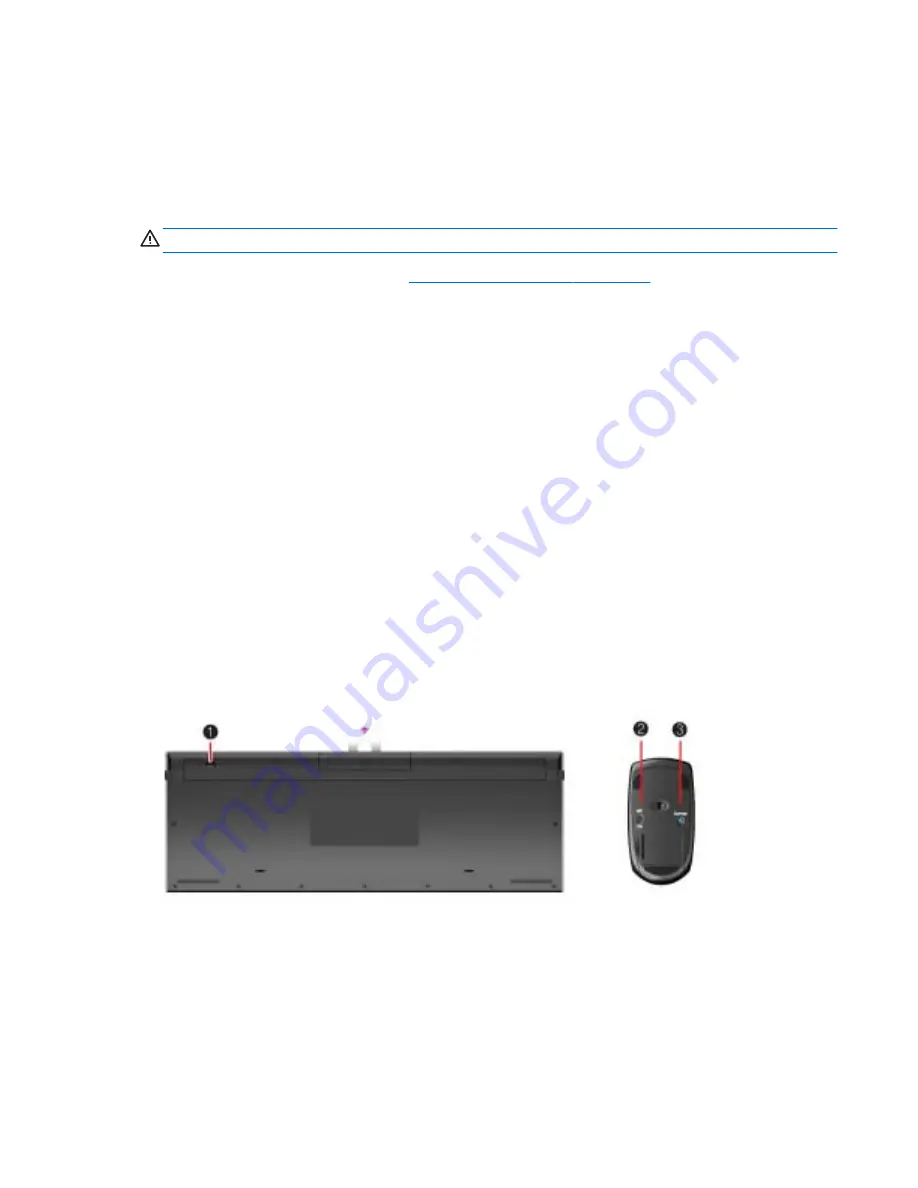
Synchronizing the wireless keyboard or mouse
The wireless keyboard and mouse are pre-synchronized for your convenience, to work with your HP
TouchSmart PC. They should work immediately after pulling the battery tabs, which activate the pre-
installed batteries, and turning the mouse switch on
(2)
.
You may need to manually synchronize the wireless keyboard or mouse if they are not functioning.
To synchronize them:
●
Make sure the keyboard and mouse are next to the HP TouchSmart PC, within 30 cm (1 foot) and
away from interference from other devices.
●
Keyboard
: Press the connect button on the bottom of the keyboard
(1)
for five seconds. The blue
activity LED from the wireless receiver illuminates when the synchronization command has been
received and turns off when synchronization is complete.
●
Mouse
: Press the connect button on the bottom of the mouse
(3)
for five seconds. The blue
activity LED from the wireless receiver illuminates when the synchronization command has been
received and turns off when synchronization is complete.
If this does not work, remove and then reinsert the wireless keyboard and mouse receiver from the back
of the computer and then synchronize the keyboard and mouse again.
Synchronizing the wireless keyboard or mouse
13