background image

6

ASSEMBLY STEP 1

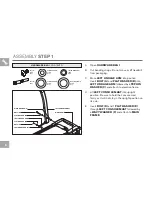
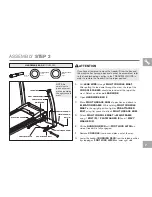
Open HArDWArE bAG 1.

Cut banding straps. Do not move or lift treadmill 
from packaging.

Move LEfT LinKAGE ArM into position. 
Insert boLT (A) and fLAT WASHEr (b) into 
LEfT LinKAGE ArM followed by a TEfLon 
WASHEr (C)
 and attach to elevation frame.

Lift LEfT ConSoLE MAST into upright 
position. Be sure to hold the console mast 
firmly, as it will not stay in the upright position on 
its own.

Insert boLT (D) and 1 fLAT WASHEr (E) 
through LEfT ConSoLE MAST followed by 
WAvy WASHEr (f) and attach to MAin 
frAME
.

FLAT WASHER (B)
20 mm
Qty: 1

WAVY WASHER (F)
29 mm
Qty: 1

BOLT (D)
Qty: 1

BOLT (A)
15 mm
Qty: 1

TEFLON WASHER (C)
18 mm
Qty: 1

FLAT WASHER (E)
27 mm
Qty: 1

HArDWArE bAG 1 CONTENTS :

BOLT (D)

FLAT WASHER (E)

WAVY WASHER (F)

MAIN FRAME

LEFT CONSOLE MAST

BOLT (A)

FLAT WASHER (B)

LEFT LINKAGE ARM

TEFLON WASHER (C)

Summary of Contents for HORIZON GS1050T TREADMILL GS1050T

Page 1: ...GS1050T TREADMILL OWNER S MANUAL Read the treadmill guide before using this owner s manual...

Page 2: ...2...

Page 3: ...and may cause irritating noises To prevent damage to the treadmill the assembly instructions must be reviewed and corrective actions should be taken Before proceeding find your treadmill s serial num...

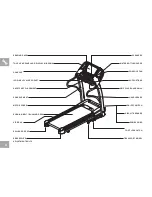
Page 4: ...SWITCH CIRCUIT BREAKER TRANSPORT WHEEL POWER CORD READING RACK CONSOLE IPOD MP3 PLAYER POCKET TOUCH PAD PANEL AND DISPLAY WINDOWS SAFETY KEY PLACEMENT MOTOR COVER RUNNING BELT RUNNING DECK SIDE RAIL R...

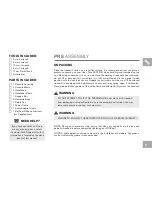
Page 5: ...carton on a level flat surface It is recommended that you place a protective covering on your floor Take CAUTION when handling and transporting this unit Never open box when it is on its side Once th...

Page 6: ...osition Be sure to hold the console mast firmly as it will not stay in the upright position on its own E Insert bolt d and 1 flat washer e through left console mast followed by a wavy washer f and att...

Page 7: ...on side of treadmill is fully engaged F Remove console from box and place out of the way G Lower the treadmill running deck from the folded position by stepping on foot lock latch on lower right side...

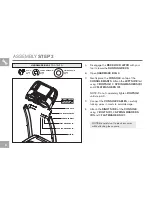
Page 8: ...o lower the running deck B Open hardware bag 3 C Gently place the console on top of the console masts Attach the left side first using 2 bolts G 2 spring washers b and 2 flat washers H Note Do not com...

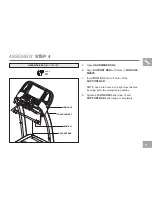
Page 9: ...PORT BAR A Open hardware bag 4 B Align support bar with holes in console masts C Insert bolts i into all 4 holes of the support bar Note Look into holes in the right mast before inserting bolts to avo...

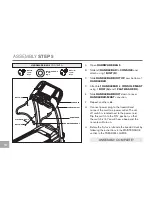
Page 10: ...ndlebar to console mast using 1 bolt g and 1 flat washer j E Slide handlebar boot down to cover handlebar mast conection F Repeat on other side G Connect power plug to the treadmill and connect the co...

Page 11: ...amming The BASIC OPERATION section in the treadmill guide has instructions for the following LOCATION OF THE TREADMILL Using the SAFETY KEY FOLDING the treadmill MOVING the treadmill LEVELING the trea...

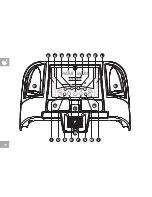
Page 12: ...ETS distance calories manual WORKOUTS intervals hills weight loss activated GOAL CENTER 10 12 11 1 2 9 8 7 6 5 4 3 10MPH 12MPH 11 MPH 1 MPH 2 MPH 9 MPH 8 MPH 7 MPH 6 MPH 5 MPH 4 MPH 3 MPH stop press t...

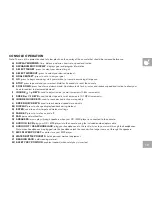
Page 13: ...rements J Speed keys used to adjust speed in small increments 0 1 MPH increments K Incline quick keys used to reach desired incline more quickly L Speed quick keys used to reach desired speed more qui...

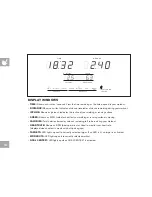
Page 14: ...ALORIES Total calories burned or calories remaining left to burn during your workout HEART RATE Shown as BPM beats per minute Used to monitor your heart rate displayed when contact is made with both p...

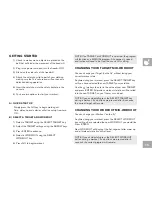
Page 15: ...manual program All changes in speed and incline will need to be from the user in this setting CHANGING YOUR TARGET MID WORKOUT You can change your Target on the fly without losing your current workou...

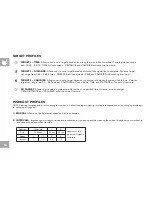
Page 16: ...CALORIES will count down TIME and DISTANCE will count up from zero NO TARGET Allows user to select a workout profile that has no specified time distance or calorie target TIME DISTANCE and CALORIES w...

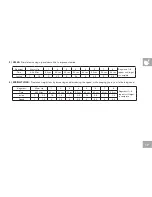
Page 17: ...ec 30 sec 30 sec Incline 1 1 5 2 2 5 3 3 5 4 3 5 3 2 5 4 weight loss Promotes weight loss by increasing and decreasing the speed while keeping you in your fat burning zone Segment Warm Up 1 2 3 4 5 6...

Page 18: ...er 1 or user 2 using the keys and press enter 2 Press and hold goal center for approximately five seconds 3 Press select target key to select time distance or calorie goal 4 Use keys to select goal va...

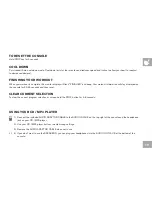
Page 19: ...yed on the console for 30 45 seconds and then reset Clear current selection To clear the current program selection or screen hold the stop button for 3 5 seconds Using your CD MP3 player 1 Connect the...

Page 20: ...20...

Page 21: ...21 LIMITED HOME USE WARRANTY...

Page 22: ...n the possession of the original owner EXCLUSIONS AND LIMITATIONS Who IS covered The original owner and is not transferable What IS covered Repair or replacement of a defective motor electronic compon...

Page 23: ...he person or property arising from such repairs SERVICE RETURNS In home service is available within 150 miles of the nearest authorized repair center Mileage beyond 150 miles from an authorized servic...

Page 24: ...orizon Fitness takes pride in providing you with a high quality product We want to know if you have a problem and we want to have an opportunity to correct it for you Note Please read the troubleshoot...

Reviews: