1
Français p.
Español p.
IMPORTANT INSTRUCTIONS
AND OPERATING MANUAL
LP GAS GRILL
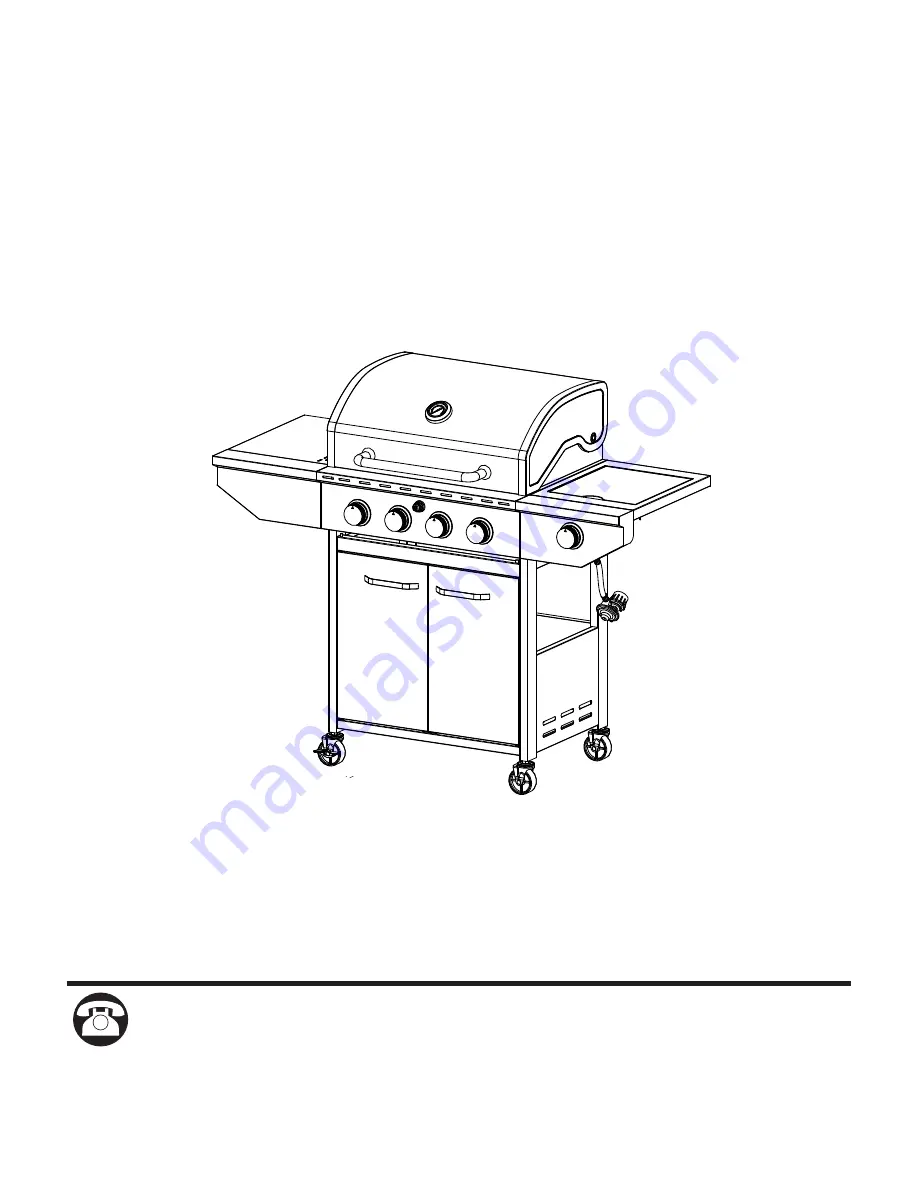
Model: G410
Thank you for choosing our product! If you have any issue about the product, please
contact us via
[email protected]
, our customer service team will
assist you with order, shipping status, assembly and operation.


