The Sampler
User Manual
4
Getting Started
The Sampler monitors and controls airflow continuously. Occasionally the motor speed adjusts
automatically to compensate for changes in environmental and sampling conditions. The
Sampler also automatically enters calibration mode when required.
At any time, you can verify that the Sampler is operating correctly by blocking the flow and
generating a low flow alarm.
What’s in the Box
The list below provides the standard items included with the Sampler. If the Sampler is
damaged or parts are missing, contact
or an authorized
distributor immediately.
• Batteries (2 replaceable AA alkaline cells)
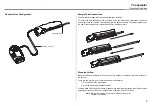
• Short sample tube (4.65 in/11.81 cm)
• Medium sample tube (10.25 in/26.00 cm)
• Sampling hose (10 ft/3 m) with blue stone coarse particulate filter attached
• Attachment hose (3 ft/1 m)
• Particulate filters, Quantity 2
• Quick reference card
• User Manual
To order replacement parts, refer to
Replacement Parts and Accessories
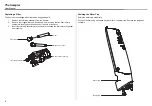
The Sampler is shipped with the short sample tube installed. The Operation section describes
how to replace the sample tube. To install the batteries, refer to
.
Activating the Sampler
1. To activate the Sampler, press
C
.
2. All 3 LEDs flash and the audible alarm beeps 4 times. When the Sampler is activated for
the first time, it enters calibration mode. See
to ensure activation.
Normal Operation
During normal operation, the green
ON
LED is lit and the motor is running.
Operating Guidelines
When operating the Sampler, adhere to the following guidelines:
1. Confirm that all hoses are properly attached to the Sampler
2. Confirm that there are no leaks in the system before obtaining a sample.
Depending upon the length of tubing and the type of gas being sampled, allow at least
3 seconds per foot of hose to ensure the readings stabilize.
Example:
50 feet = 2.5 minutes
Refer to the applicable detector user manual for expected response time(s).


